QGIS Workflow: Converting Drone TIFF to XYZ Tiles (JPG/PNG)
This workflow demonstrates how to convert a drone-acquired TIFF file into XYZ tiles using QGIS.
Steps
1. Open QGIS and Create a New Project
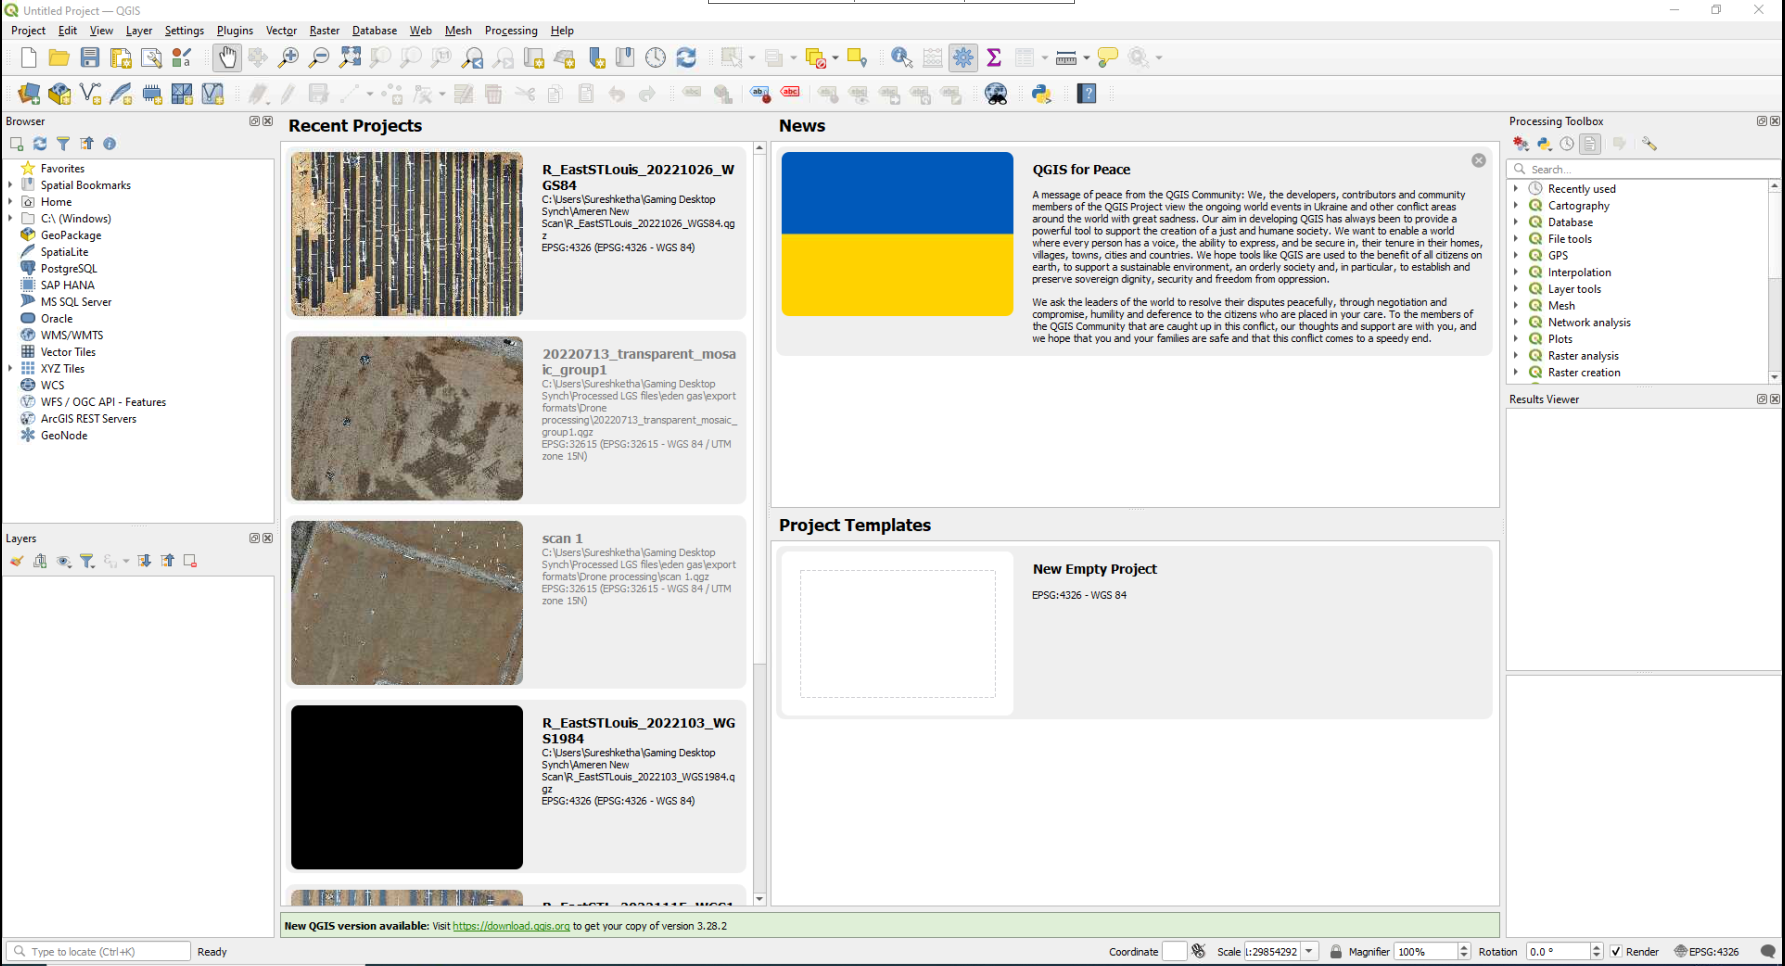
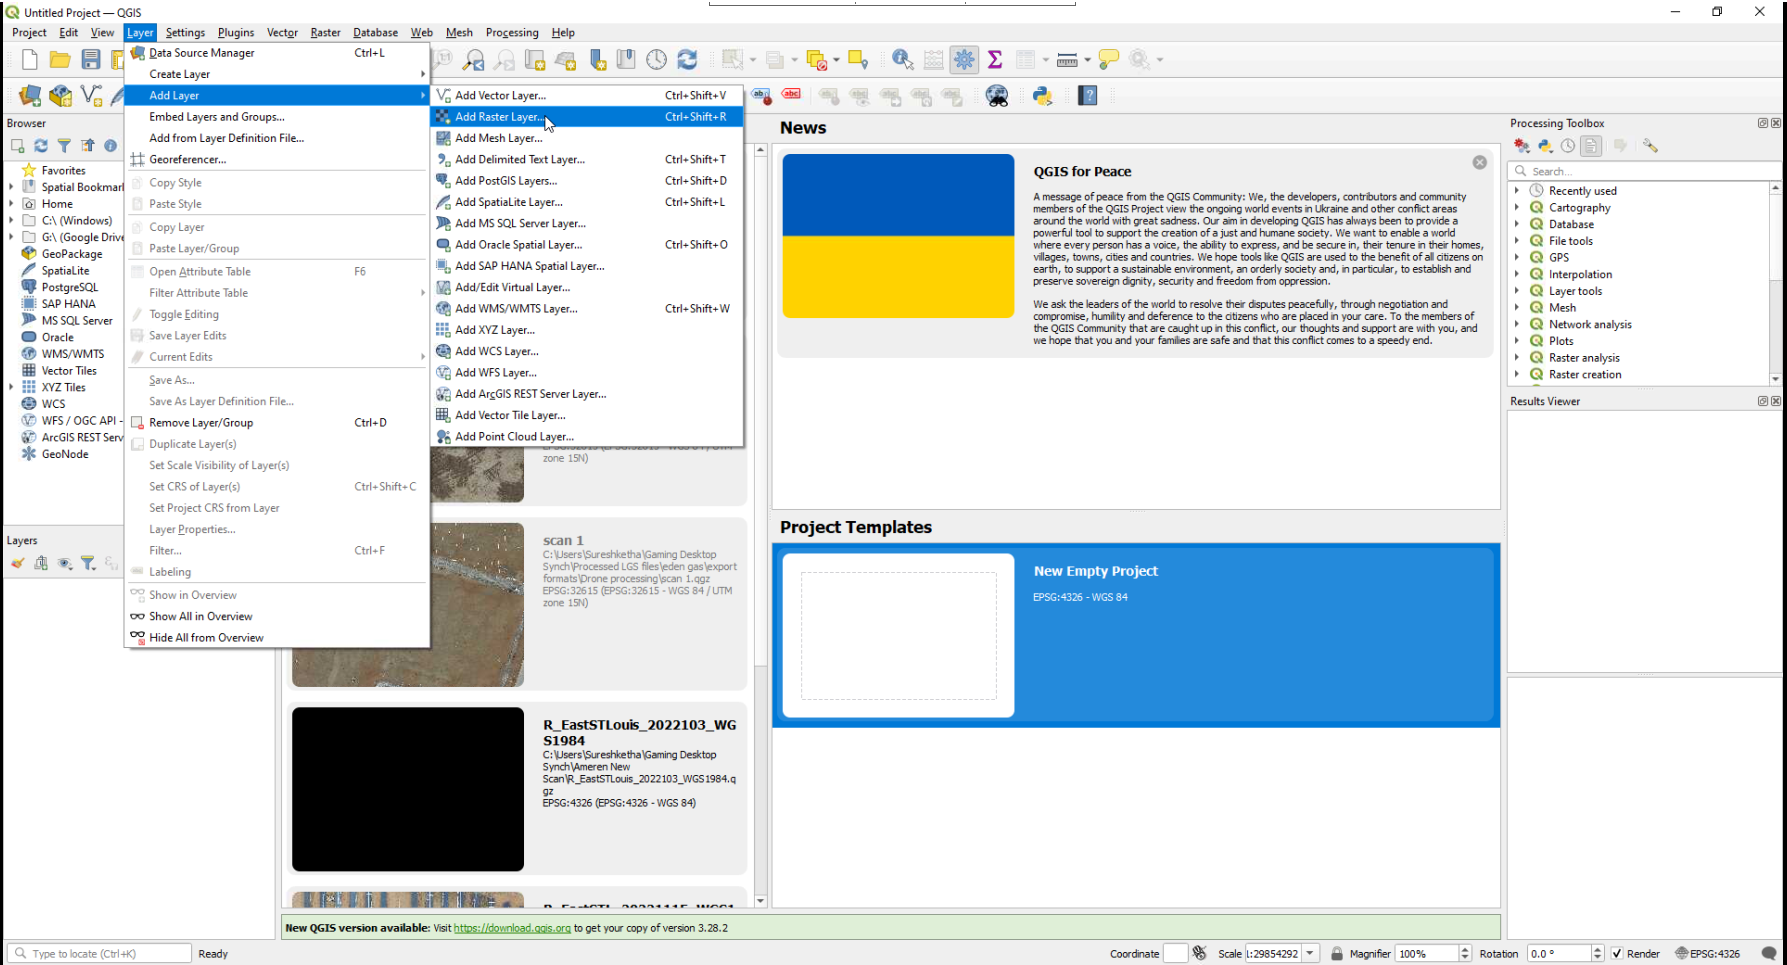
2. Add Raster Layer
- Go to
Layer→Add Layer→Add Raster Layer.
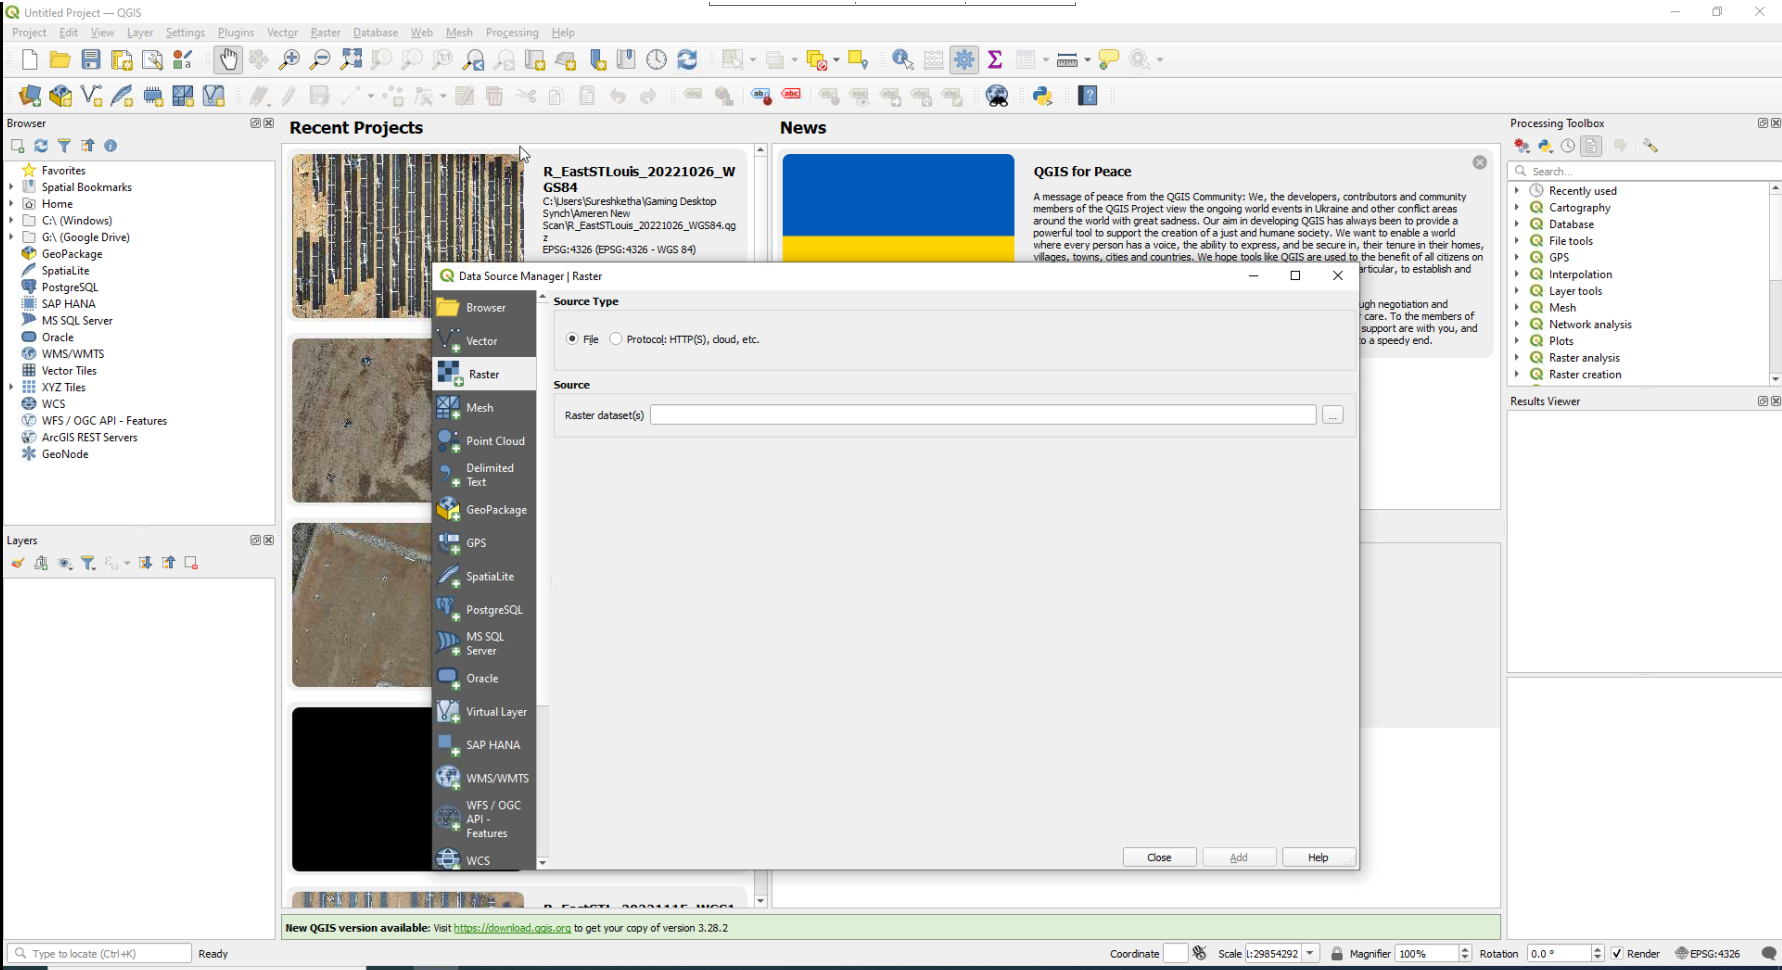
3. Select TIFF File
- In the
Add Raster Layerdialog, browse and select your TIFF file. - Click Add.
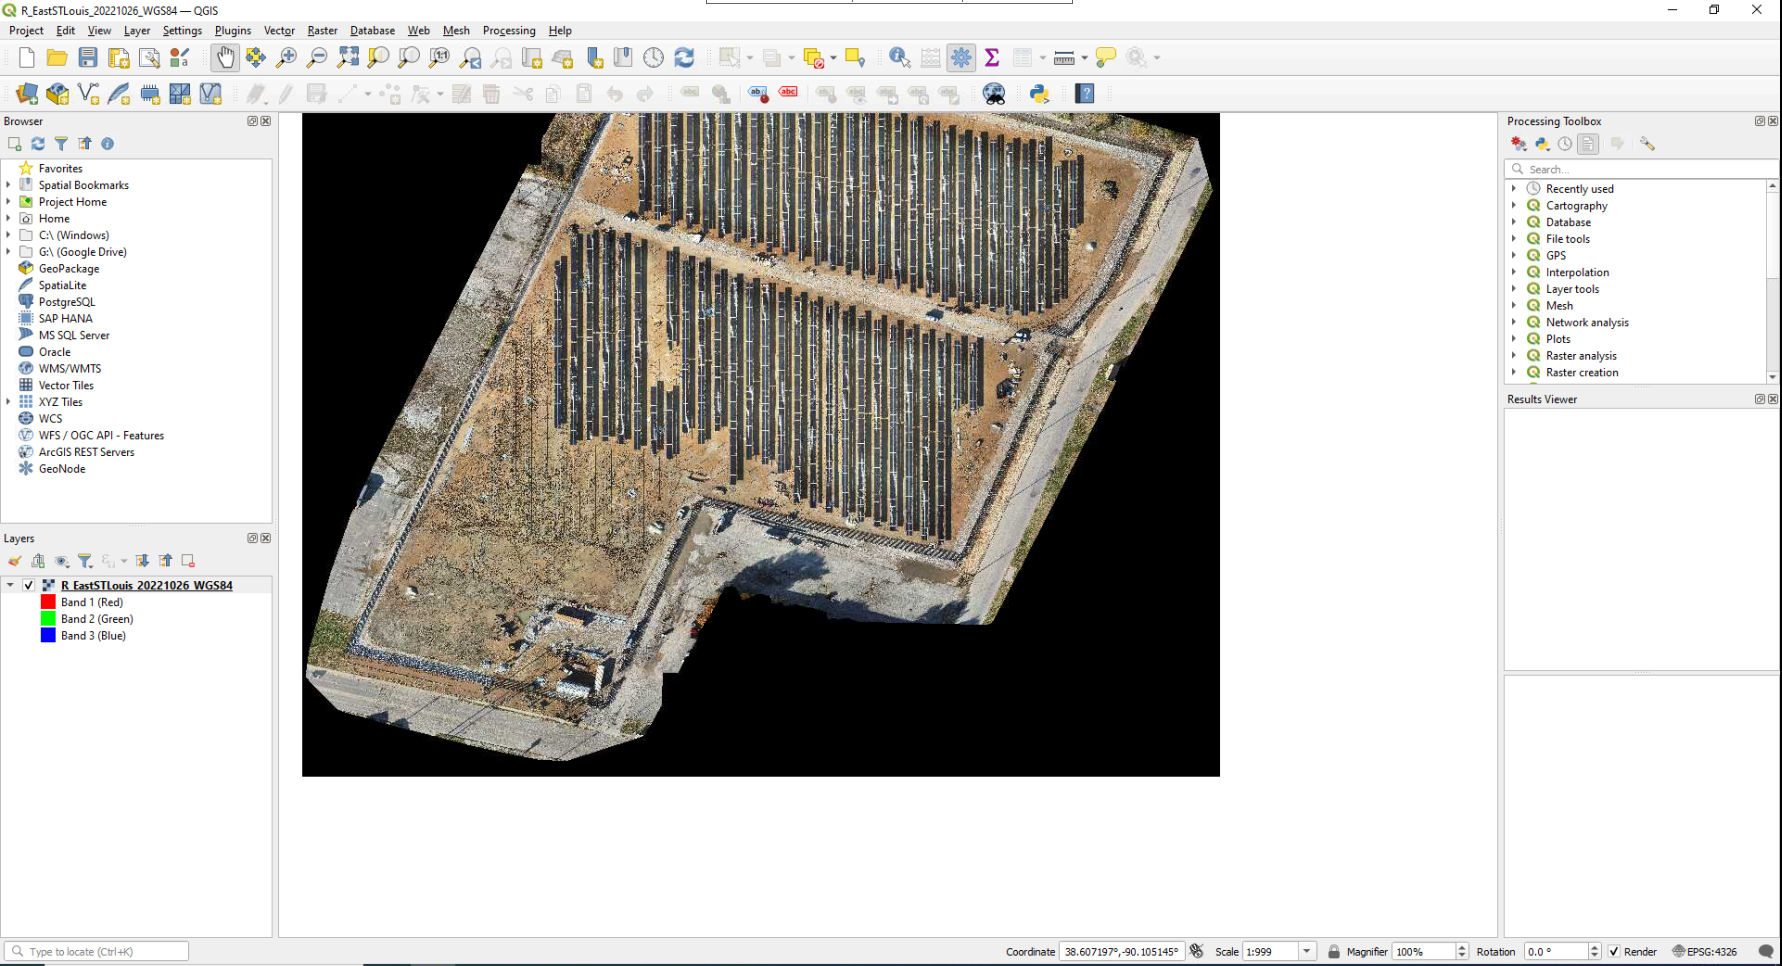
4. View TIFF in Ortho Mosaic
- The TIFF file will load and display as an orthomosaic.
5. Open Processing Toolbox
- Go to
Processing→Toolbox.
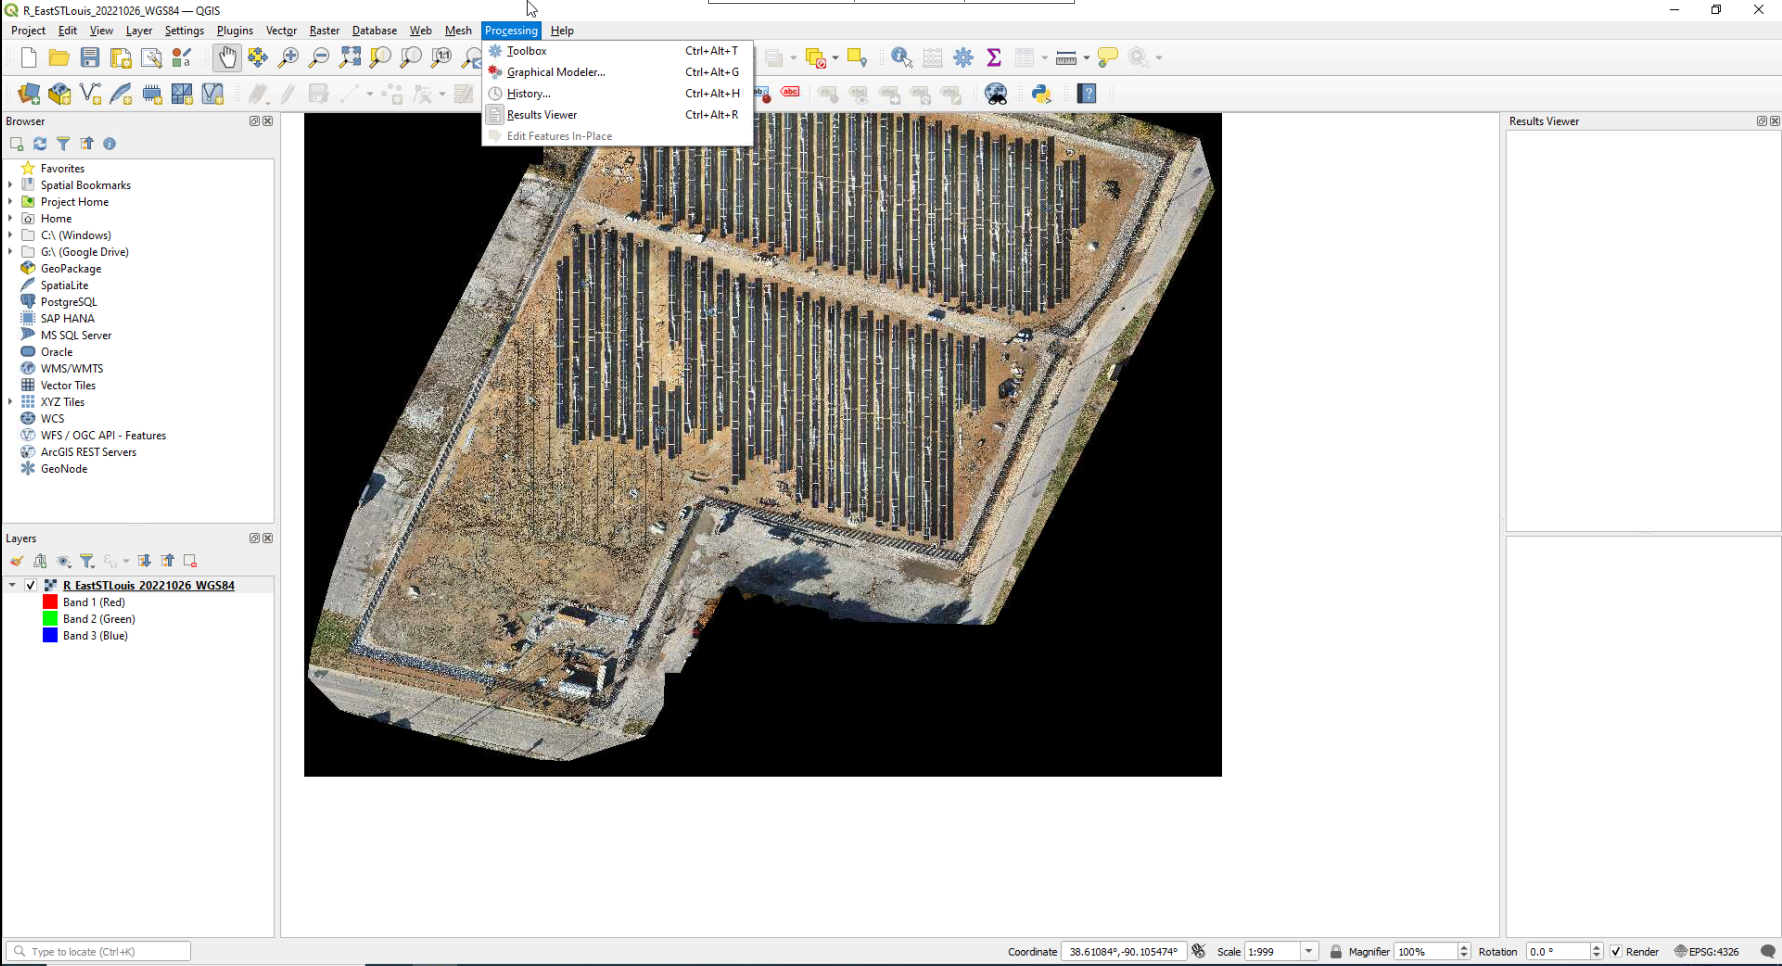
- The Processing Toolbox appears on the right side.
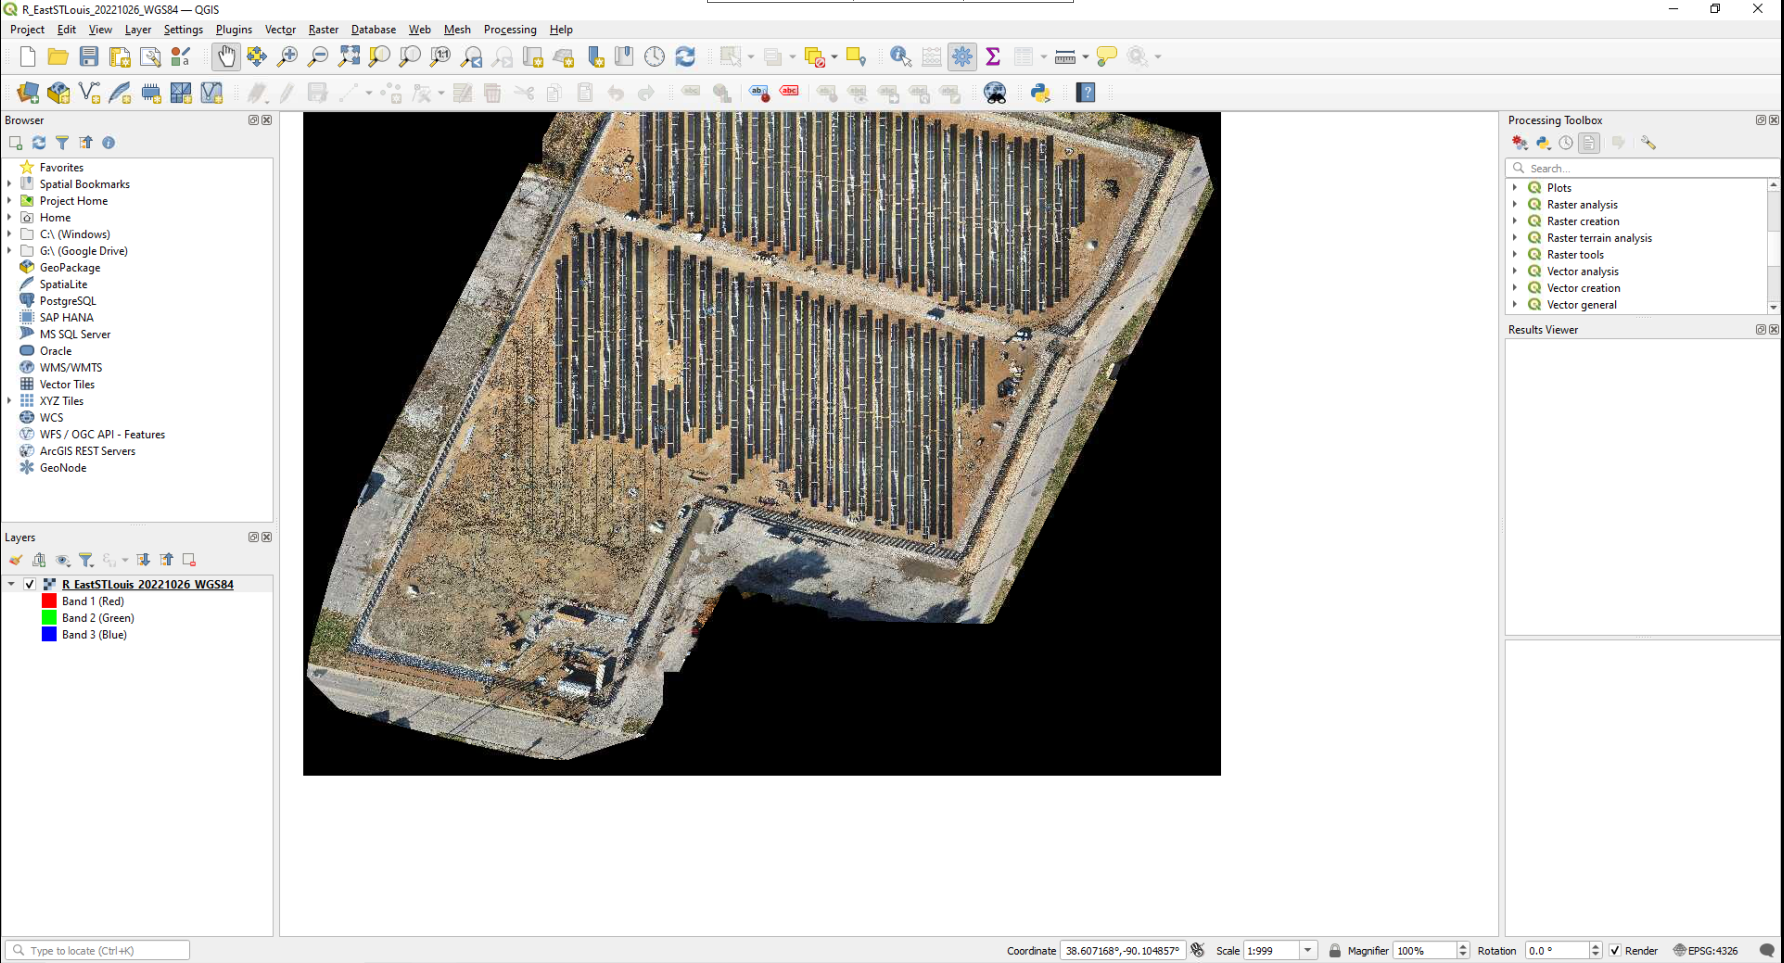
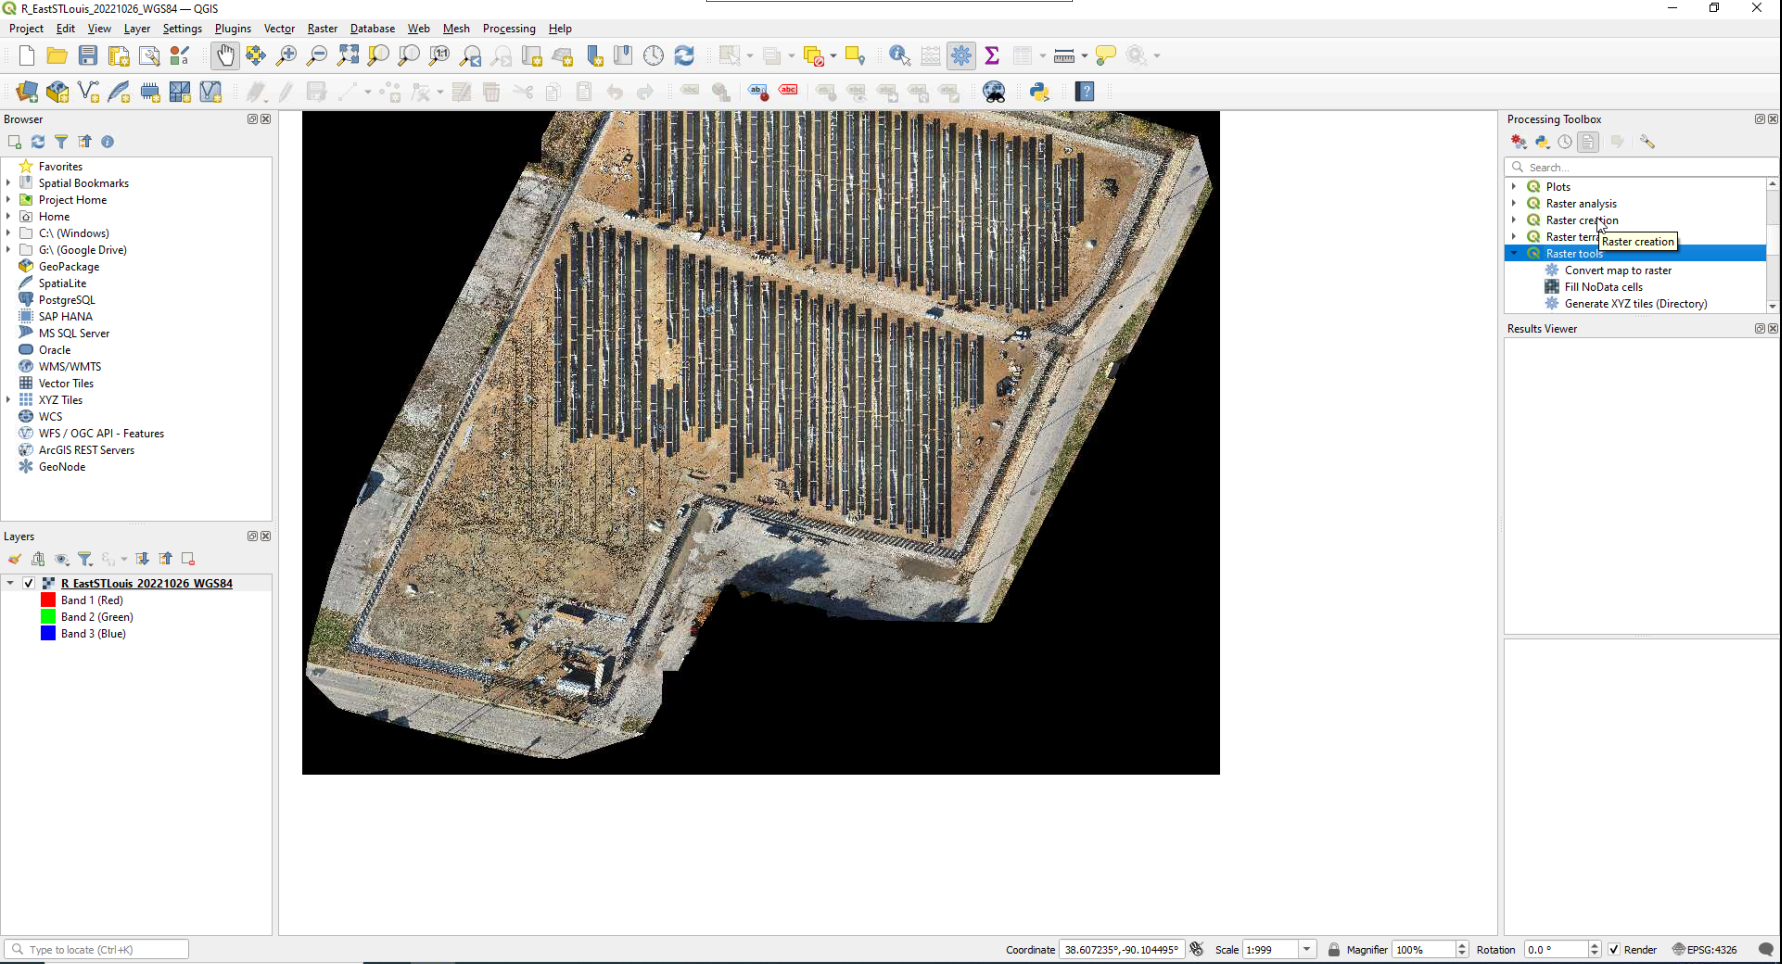
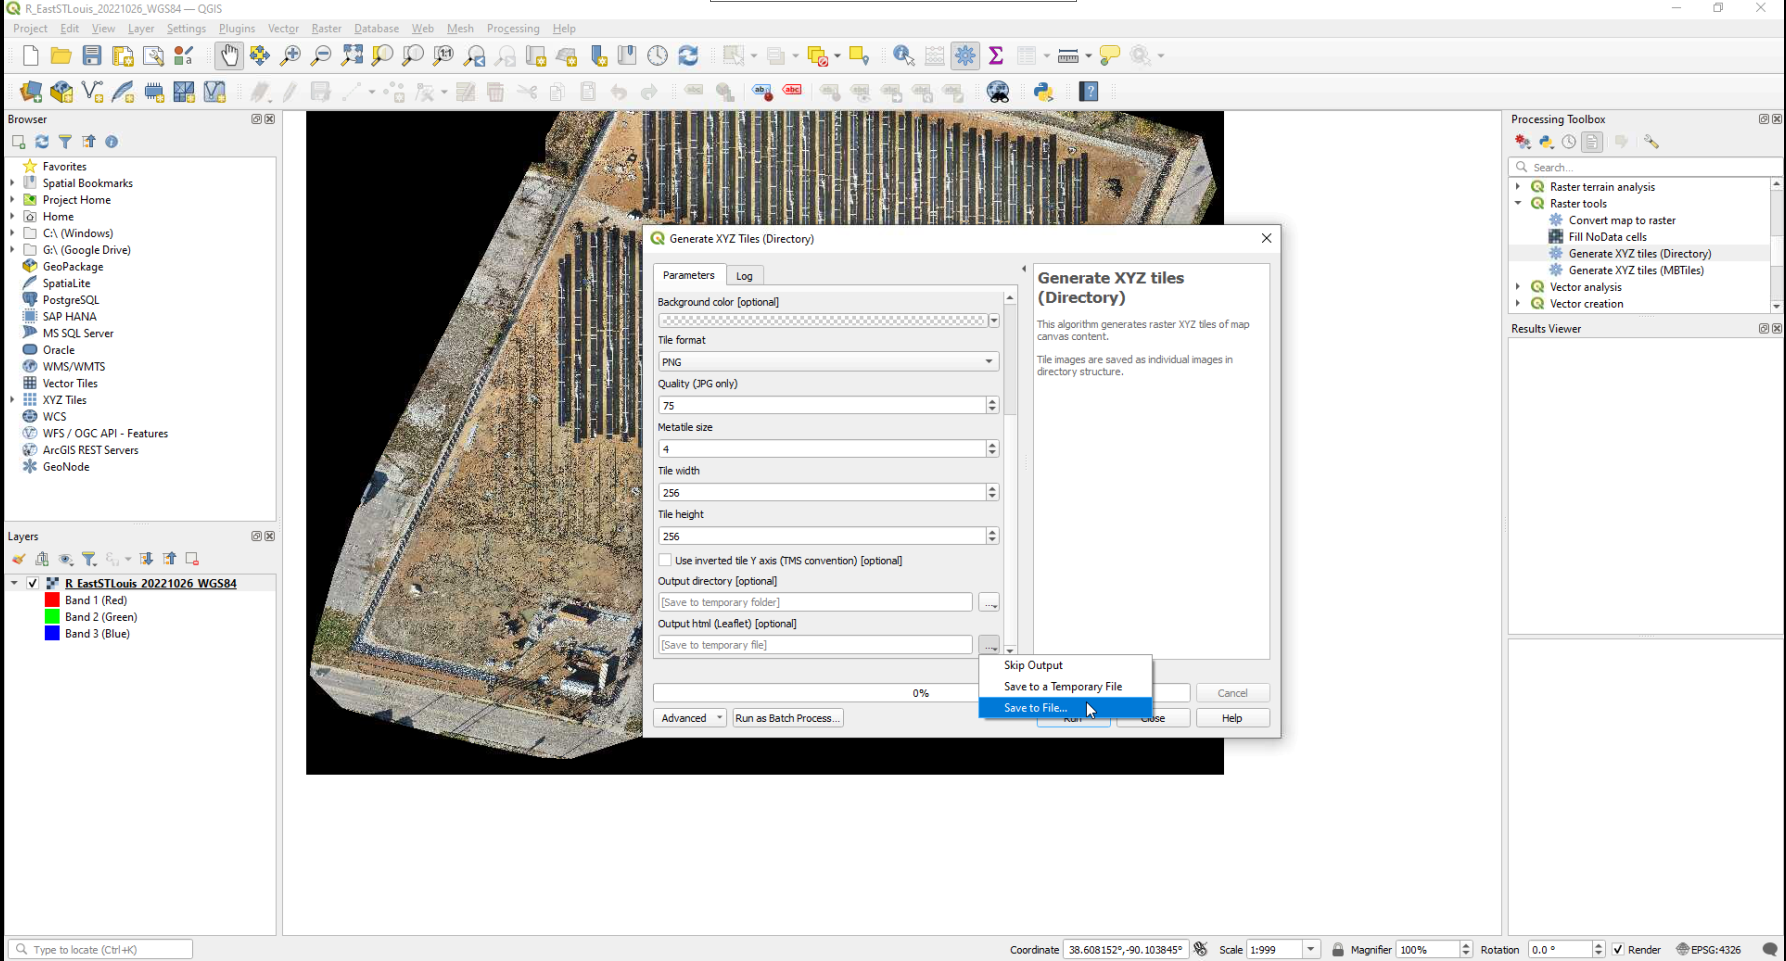
6. Generate XYZ Tiles
- In the Processing Toolbox, go to
Raster Tools→Generate XYZ Tiles.
7. Configure XYZ Parameters
- Set parameters such as output directory, extent, zoom levels, and file format (PNG or JPG).
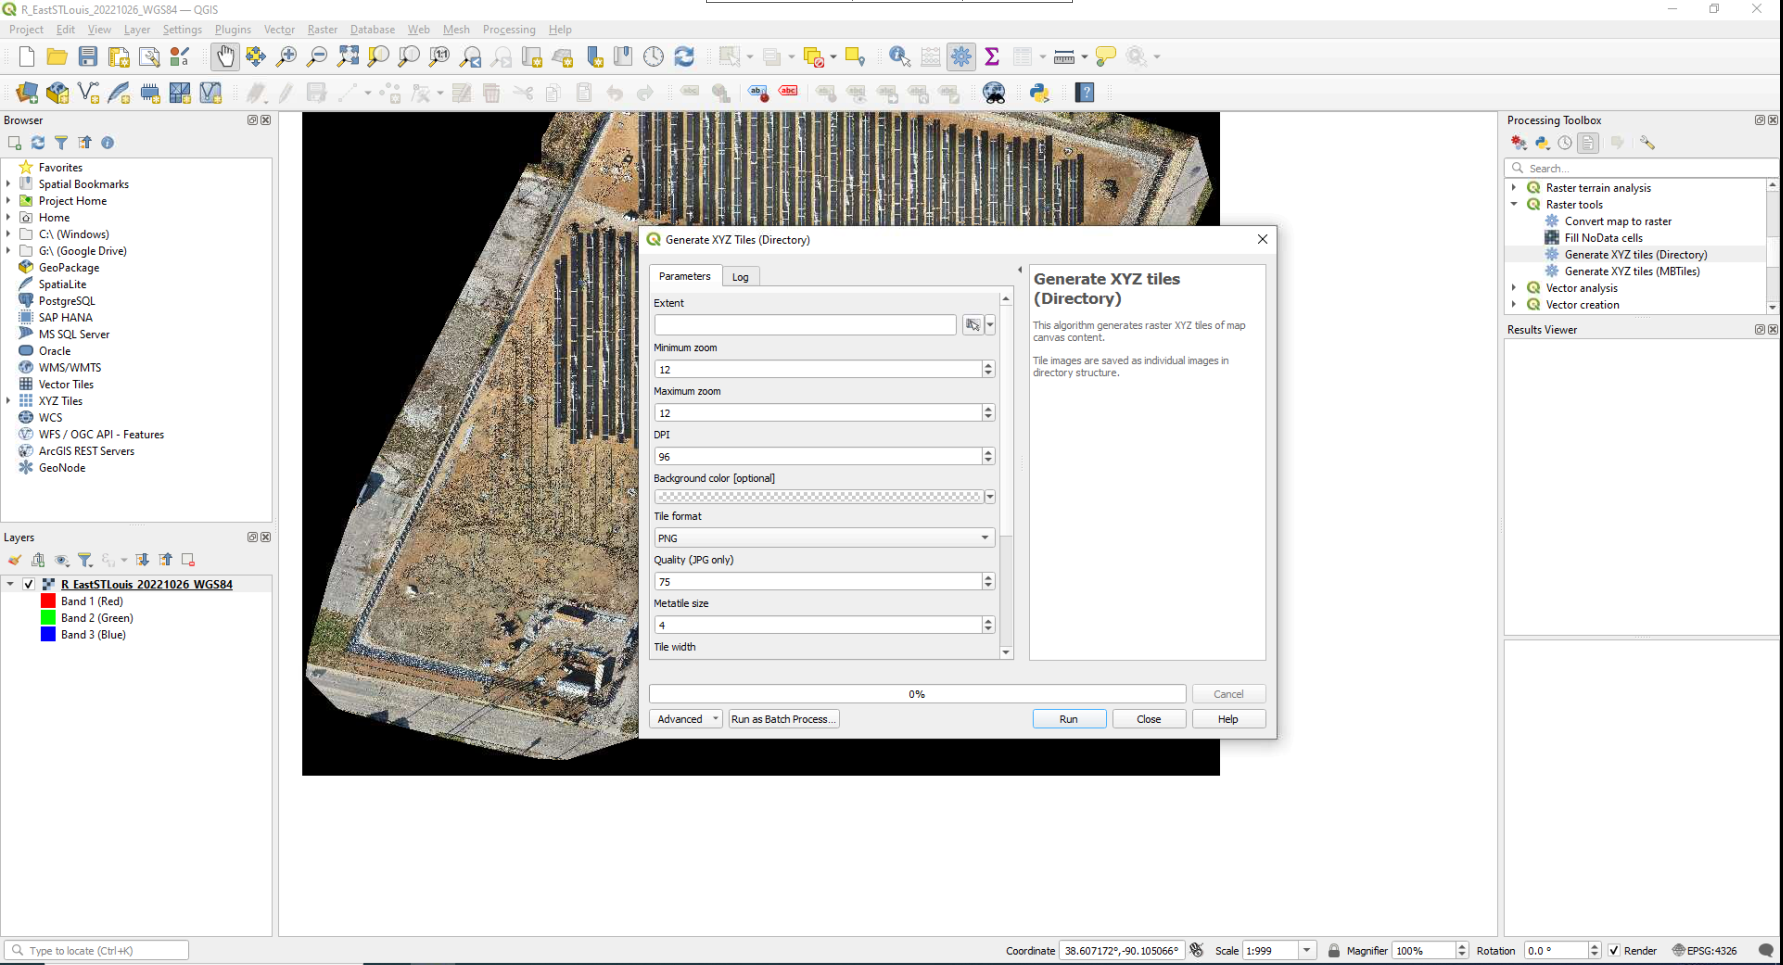
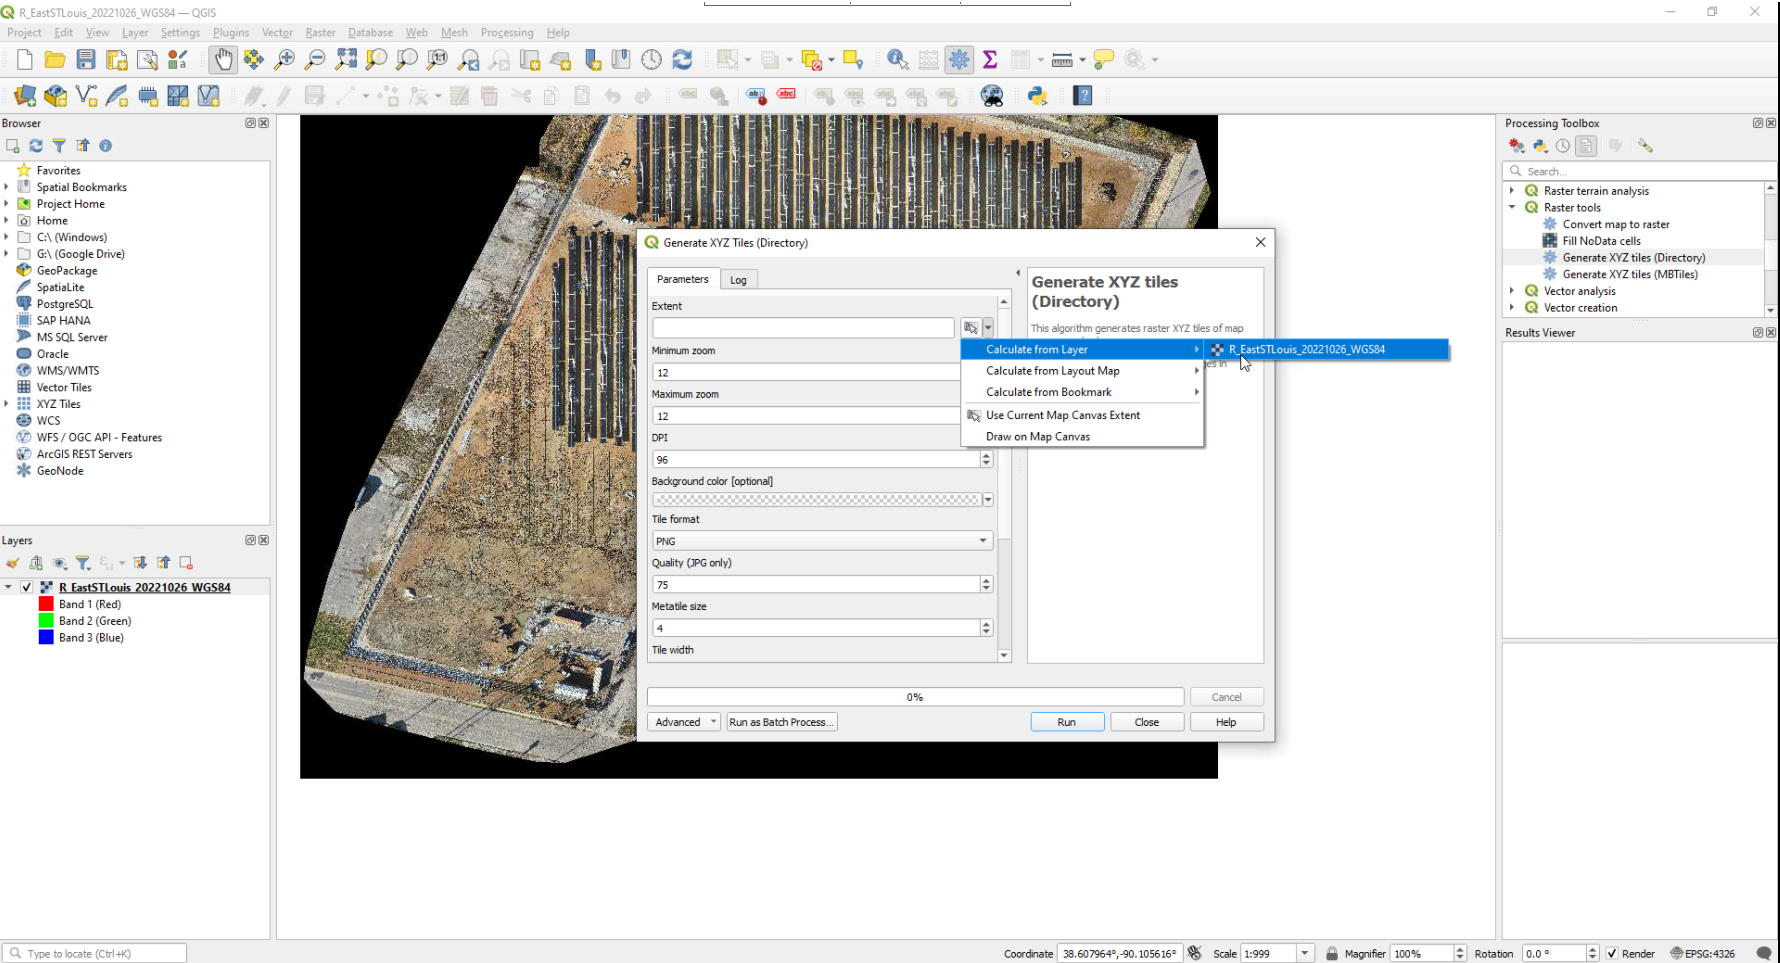
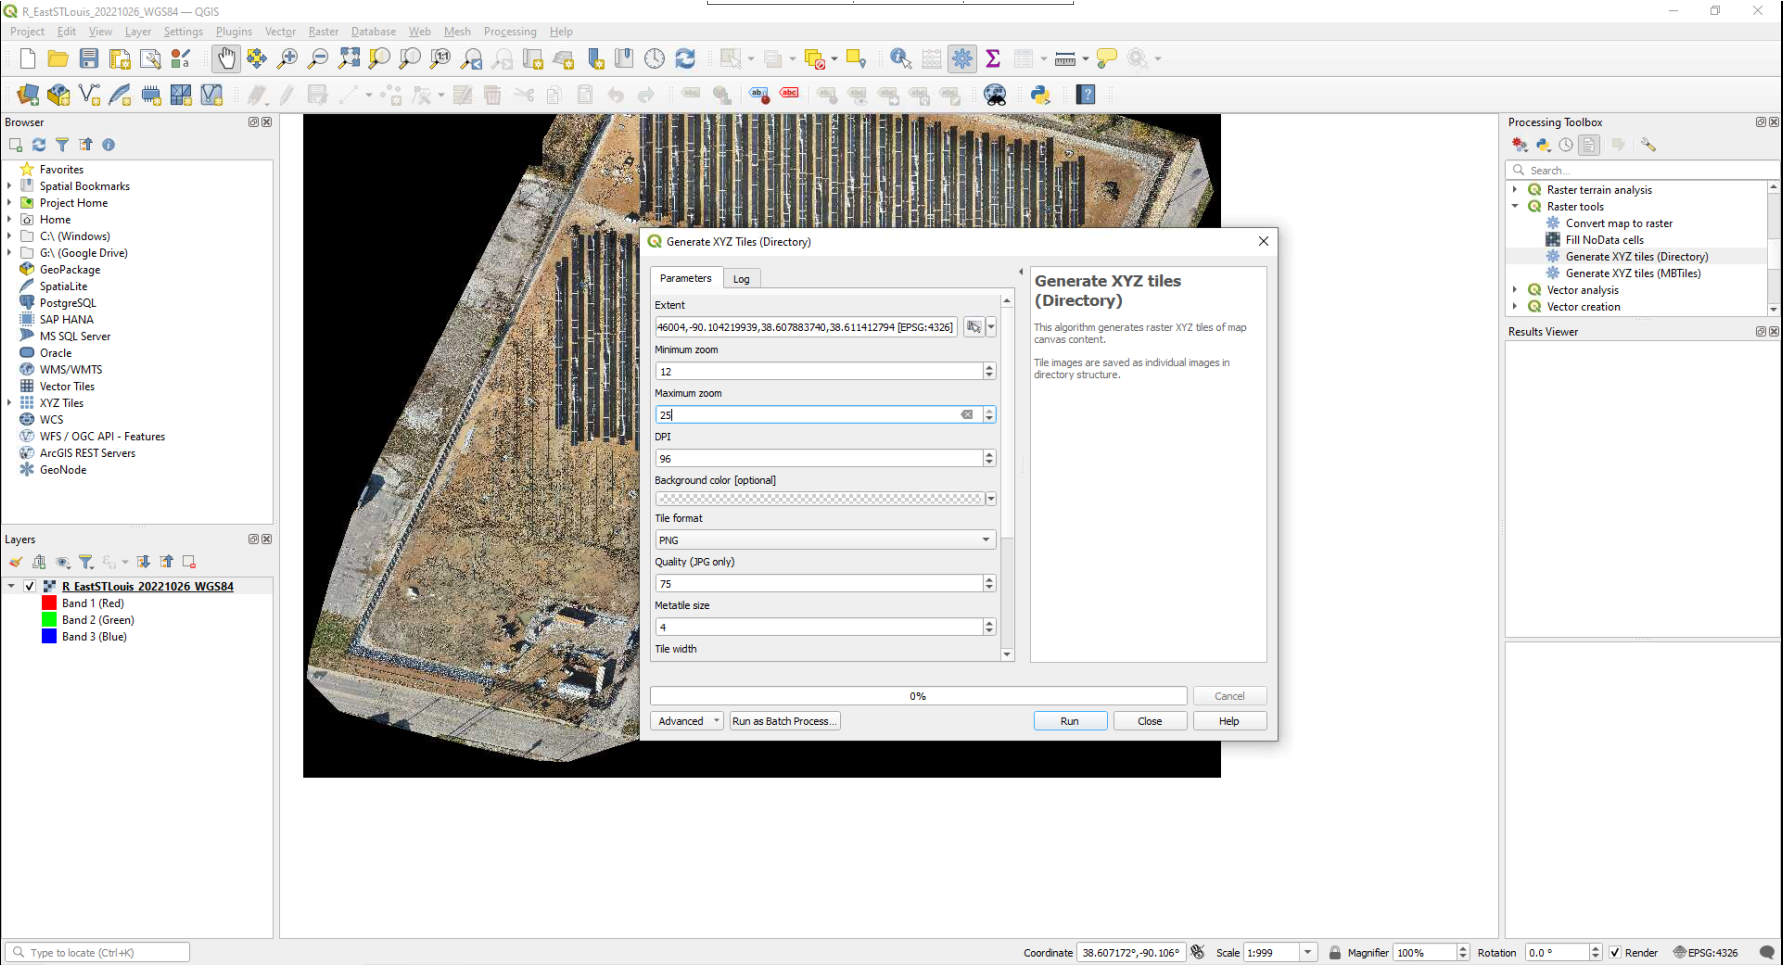
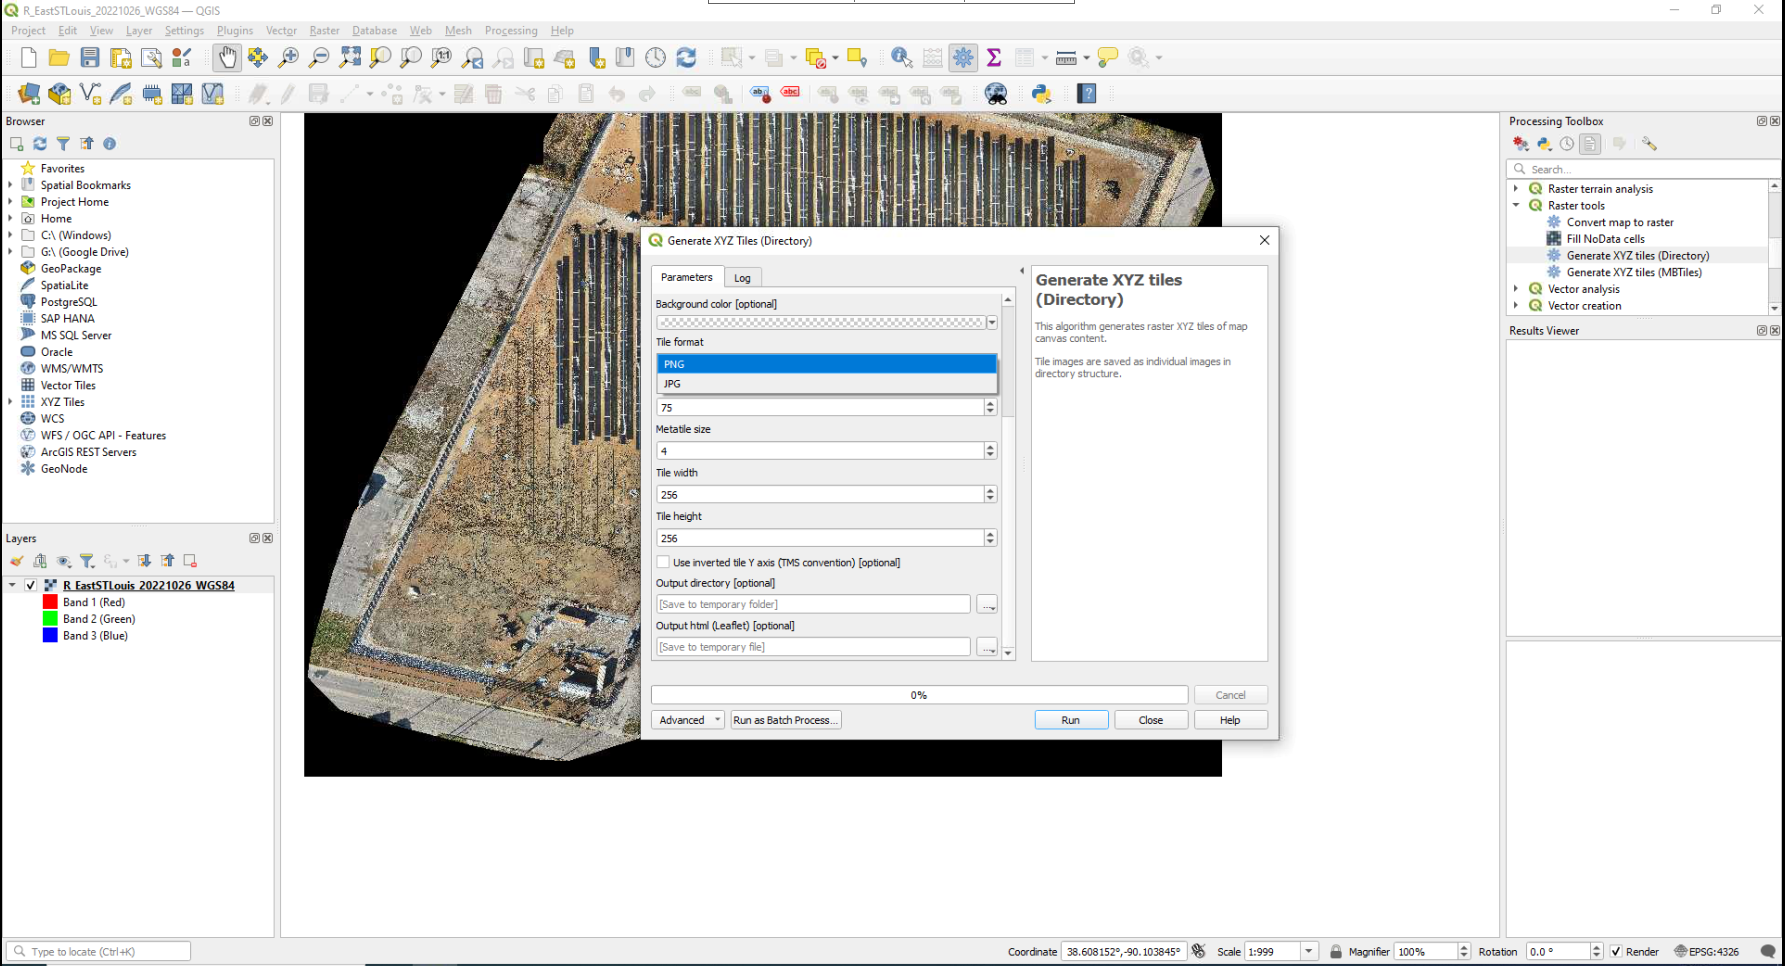
8. Run the Process
- Click Run and select the directory to save the XYZ tiles.
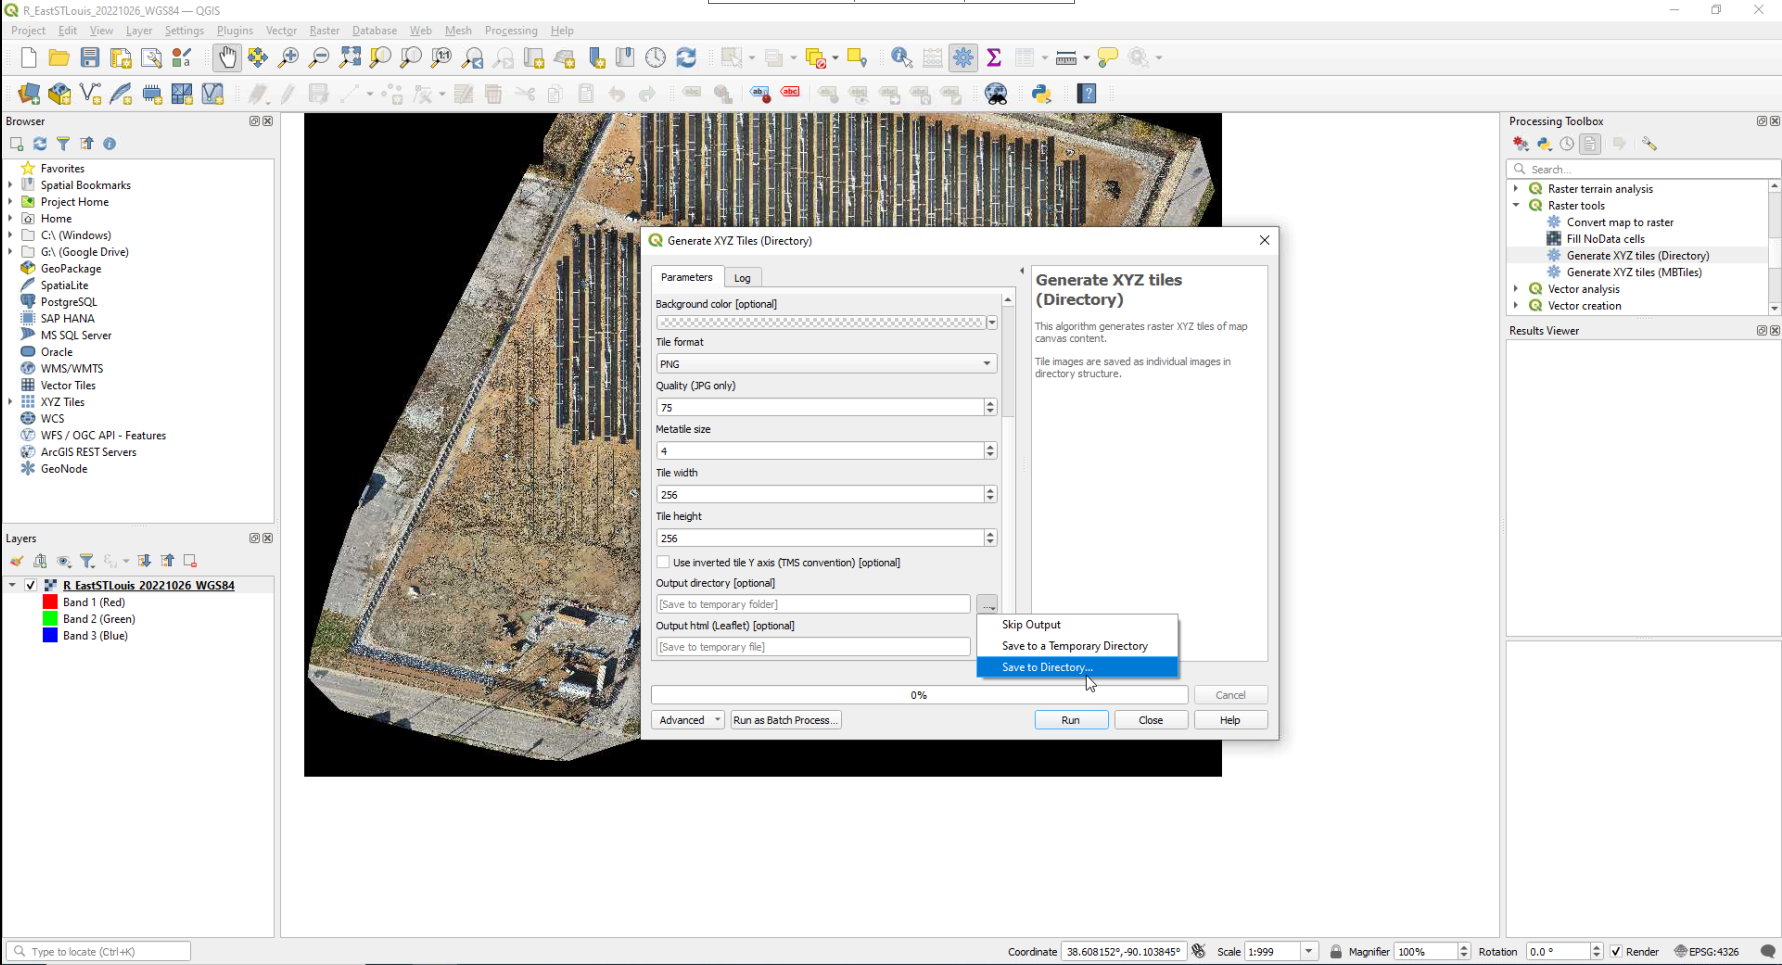
- Click Run again to save the output files.
The process will generate a folder containing XYZ tiles in the chosen format, ready for use in web maps or GIS applications.