Integration
Keycloak Configuration in Standard package
-
Go to Packages and select Authentication Connectors.
-
Choose Keycloak from the list of authentication connectors and click on Edit Line Item.
-
Navigate to the Settings tab.
-
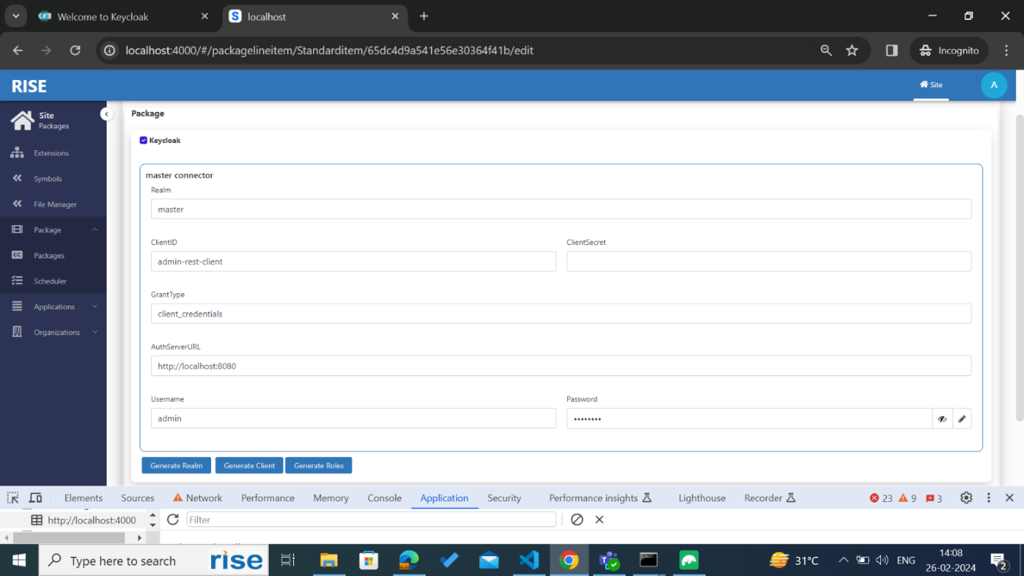
Enter Keycloak master configuration details:
-
Realm : “master”
-
Client ID : “admin-rest-client”
-
Client Secret : Select master realm-> open admin-rest-client->go to credentials tab. You can get client secret from credentials tab
-
Username: master login email/username
-
Password: master login password
-
Grant Type: “client_credentials”
-
Auth server url: “https://keycloak.snapdpl.net”
-
Keycloak master realm login credentials: Email- support@risecorp.com, password: Rise@2023
-
-
-
Submit the package settings. This will update the settings with the provided configuration details.
Keycloak Realm Creation from standard package
-
After successfully updating Keycloak master real configuration details, open keycloak Line Item and go to settings tab
-
Click on Generate Realm button, It Will check Whether the Realm already exist in the keycloak or not. If Realm already exists with the same realm Id then it will throw an error saying Realm already exists. If not, it will create a new Realm in Keycloak against the selected org. Here we are creating a new Realm with our organizationId and storing the autogenerated Keycloak’s RealmId in our org model with a property called ‘externalOrgId’.
-
After successfully creating the realm from our node-site go to keycloak server and configure the Realm settings.
Configure Keycloak Realm Settings
-
Select the desired realm, and under Realm Settings, go to the Login tab.
-
Enable the following options under the Login tab:
-
Email as username
-
Login with email
-
-
Go to the Email tab and configure SMTP server details for sending verification and password update emails to users.
{

    "type": "SMTP",

    "host": "smtp.gmail.com",

    "port": 465,

    "secure": true,

    "auth": {

        "user": "snapdlplatform@gmail.com",

        "pass": "wumpyheoqhahjkyr"

    }

}
-
Go to the Tokens tab -> Access Token -> change Access Token Lifespan to 30mins
-
Configure required IdentityProviders with redirectUrls
Client creation in keycloak through standardpackage
-
Click on Generate Client to create a new client in Keycloak within the selected realm.
-
Click on Generate Realm button, It Will check Whether the client already exist in that Realm or not. If Client already exists with the same client Id in that realm then it will throw an error saying Client already exists. If not, it will create a new client in Keycloak within the selected realm. Here we are creating a new client with our applicationId and storing the autogenerated Realm’s clientId in our application model with a property called ‘externalApplicationId’.
-
After successfully creating the client from our node-site go to keycloak server and configure the client settings.
Configure Keycloak Client Settings
-
Select Clients menu from sidebar under the selected realm
-
Update Valid redirectUrI with
-
${keycloak-server-url}/keycloak/keycloaklogin.html(for login/registration redirection) -
${keycloak-server-url}/keycloak/settings.html(For authentication connector redirection) -
Update web-origin url with client-server-url
-
Generating default realm roles in keycloak through standardpackage
-
Click on Generate Roles to generate realm roles for the selected organization.
-
It will create all the roles available in that organization in the realm roles
Org Settings Keycloak Configuration
-
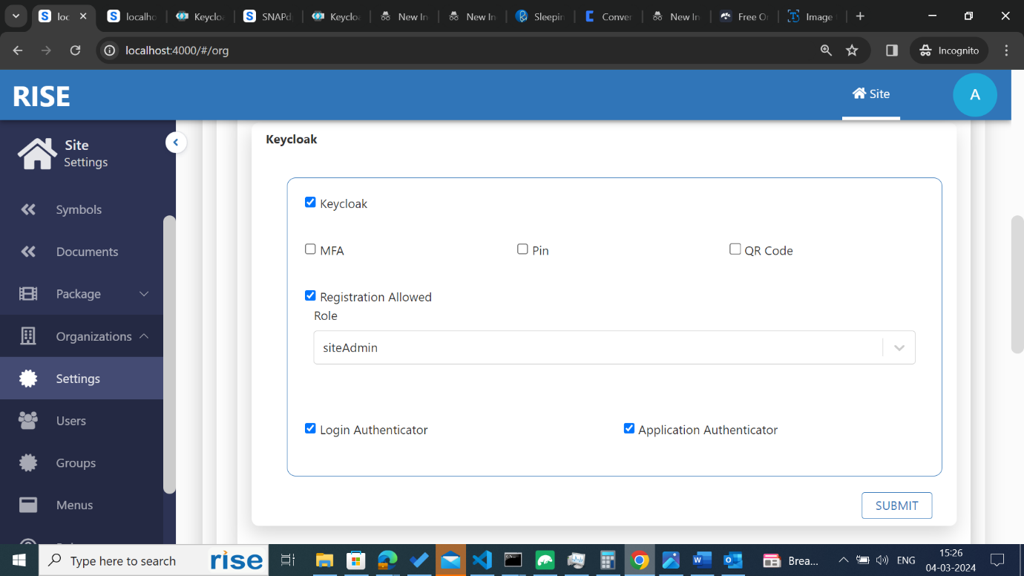
In the organization settings, set keycloak and registrationAllowed to true to enable the registration for user to register to keycloak and node-site through node-site. If the registrationAllowed is set to false or checked for keycloak in org-settings that means that we are not allowing user to register in this organisation
-
In Keycloak a user can be registered using any of the enabled identity provider or keycloak local
-
A user can login to node-site using keycloak only when the Login Authenticator is enabled in the org-settings. If it is disable or not checked and the user is trying to login using his keycloak credentials or any keycloak identity provider then it will throw an error saying “Keycloak is not enabed at the org-level, please contact orgAdmin”
-
An user can access keycloak’s enabled or configured identity providers as application authentitcators only if the applicationAuthenticator checkbox is enabled in the organization settings
User Registration
-
When a new user is registered using any of the identity provider, they will receive an email for email verification and the user should their password to set keycloak local password for that user.
-
Users can log in using their email and the updated password.
-
User registration follows the same process, ensuring a seamless flow with Keycloak integration.
User Creation
-
A new user can be created from user’s screen. Click on create button in the users list. Provide the user email address. If the user does not exist with keycloak in that application of the loggedin organization, available authentication providers will be displayed. Select keycloak from the the list. It will show up a form fill the user details and select the user role and submit the form. Then the user will e created with the temporarily provided password in keycloak.
-
When a user is created, the user will receive an email to update his password. The user needs to click on the link from the email and update his password in keycloak.
User Login
-
If a user created/registered using keycloakLocal/ identity provider or imported using keycloak federation in that application, the user needs to select keycloak from the authentication types.
-
If a user created/registered using keycloakLocal/ identity provider he can login either using keycloakLocal password or by selecting any of the available identity provider he will redirects to the identity provider’s login page. User needs to enter his credentials . After successful login user will redirects to the dashboard page
-
If a user is imported using keylcloak federation then the user needs to enter his federation password to login to node-site. He’s not allowed to login using Keycloak local or Identityprovider.
Node.js Integration
javascript
const session = require('express-session');
const Keycloak = require('keycloak-connect');
const memoryStore = new session.MemoryStore();
const keycloak = new Keycloak({ store: memoryStore });
app.use(session({
    secret: 'secret',
    resave: false,
    saveUninitialized: true,
    store: memoryStore
}));
app.use(keycloak.middleware());
API Gateway Integration
yaml
# Kong Gateway
plugins:
- name: oidc
  config:
    client_id: your-client-id
    client_secret: your-client-secret
    discovery: http://localhost:8080/realms/your-realm/.well-known/openid_configuration
Token Validation
bash
# Validate JWT token
curl -X POST \
  http://localhost:8080/realms/your-realm/protocol/openid-connect/token/introspect \
  -H 'Content-Type: application/x-www-form-urlencoded' \
  -d 'token=your-jwt-token&client_id=your-client-id&client_secret=your-client-secret'