AWS
AWS EC2 Site Deployment
To Install Site in AWS follow the steps to provision the necessary services in AWS.
EC2 Procurement: -
-
Login to the AWS Dashboard and navigate to EC2 console and Click on "Launch Instances".
-
Enter the name of your choice and Select the Linux of choice between CentOS, Ubuntu or RHEL 8 with AMD backed instance(64-bit x86).
-
Select the instance size (Type) depending on the utilization. Preferably atleast 4vCPU and 8 GB RAM.
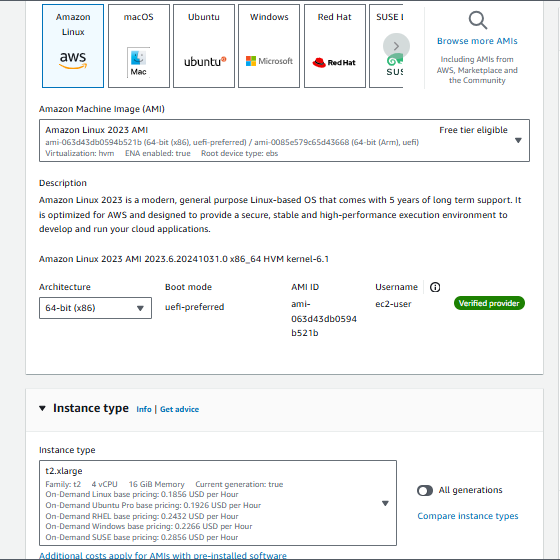
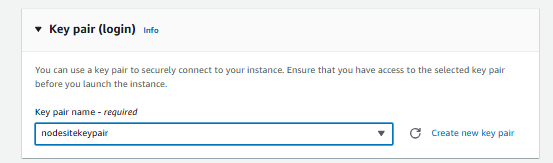
- Create a key pair or select the existing keypair if you have the keypair in hand as it will be used to connect to the instance.
-
In the Network tab, select the VPC in which you want to install the Site Application and select the subnet.
-
Create a new Security Group before launching instances
-
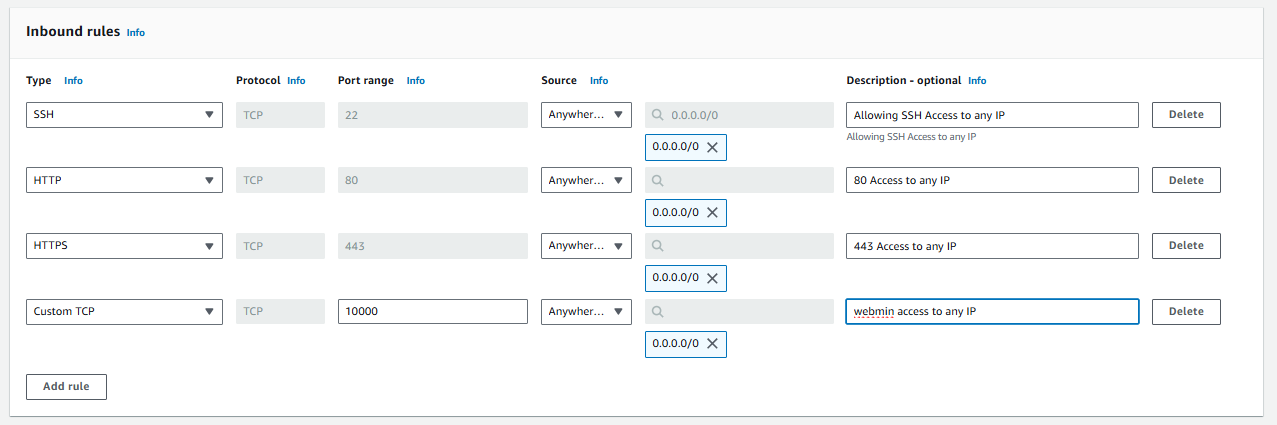
Enter your Security Group name ,Description and select VPC And the allow INBOUND rules as below
-
In the Firewall (Security groups ) Please choose the traffic flow. If you want to access the Server connection and Site Application only to specific Ips in the below image change the IP address section from 0.0.0.0/0 to ip addresses of your choice.
In the above image we are allowing In Bound rules - 22 (SSH), 80 (HTTP), 443 (HTTPS), 10000 (WEBMIN) to any where 0.0.0.0/0 if you have any specific IP or IPs change to your desired ip/32.
-
In the storage section if you want to proceed with EBS storage we recommend to provision atleast 50 GB.
-
Click on Launch Instance this will take a while to start the server.
-
Once the Instance is running, grab the IP address of the server and use the downloaded keypair to access the server. You can use the following command to connect to the server.
> ssh -i keypair.pem username@ipaddress
- With the above configuration you can launch an EC2 instance in AWS to run Site Application.
The Below is for additional support if you want to use AWS managed storages and AWS managed databases.
AWS RDS: -
AWS RDS is a managed service AWS for Databases. You can use this database to use as the backend database for the Site Application. The following Configuration guides you to procure and connect to the EC2.
-
Navigate to RDS dashboard and click on "Create Database".
-
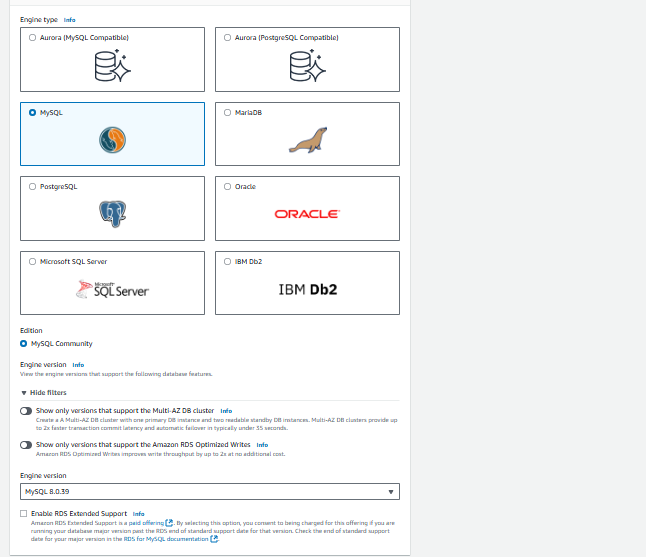
We support MySQL, PostgreSQL and Microsoft SQL server. Based on your choice make the selection under "Engine Options".
-
Select the Engine version of the Specific Database. Under the template select the Production template.
-
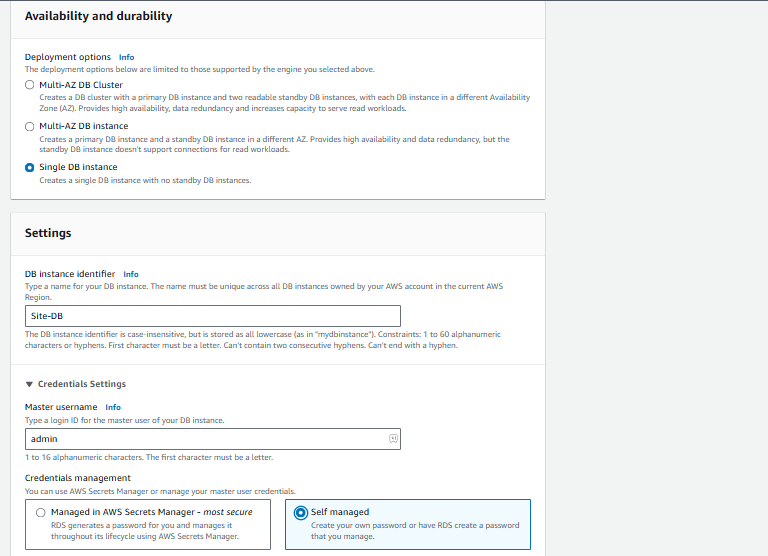
Under "Availability and durability" section make selection of your choice for now Single DB instance is good enough.
-
In the "Settings" tab under DB Instance identifier enter the name of your choice for recognition.
-
Under the master username you can add any username but save the username which will be used for connectivity to the cluster.
-
Select Self managed option for Credentials management as we can manage the password on our own instead using another service of AWS to store passwords.
-
Enter the password twice and move forward. Please save the password as it is the database's main password.
-
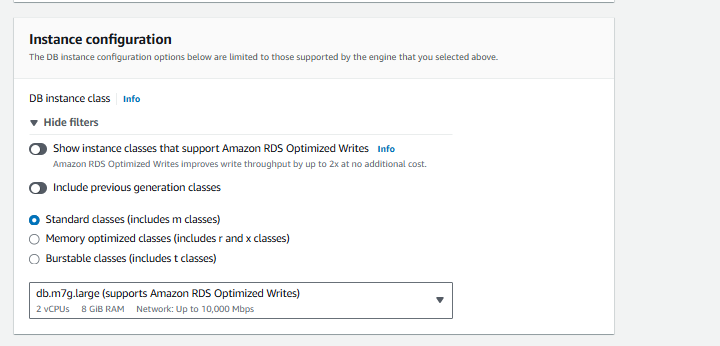
Under the Instance Configuration Select "Standard classes" and select the DB instance size of you choice we recommend a 2vCPUs and 8 GB RAM.
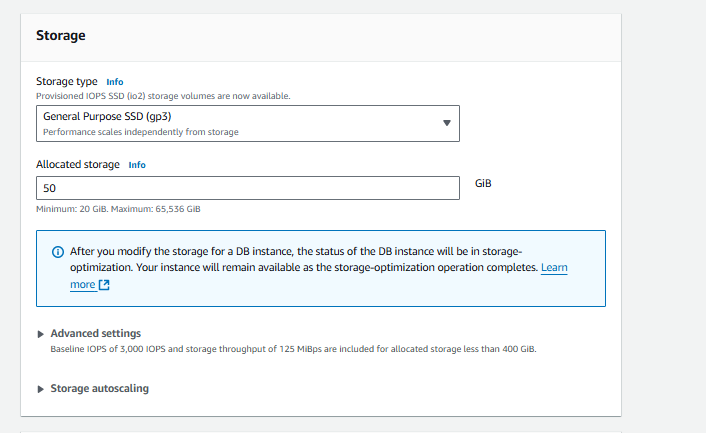
Under storage option under Allowed storage enter 50 GB which would be sufficient for now.
-
Under the "Connectivity" tab select "Connect to an EC2 compute resource" and select our Site Server.
-
Disable public access as we connect our server to the EC2 instance directly. If you want to access RDS outside AWS select public access to yes and manage under security groups from where to connect the database like we did in the server management.
-
Leave the rest as defaults and click on "create database". After a while your database will be ready.
-
You can copy the connection string from the "Connectivity & Security" tab under "Endpoint & port".

AWS EFS: -
AWS EFS is a AWS managed network file system to use it as backend storage to avoid data loss independent of the server's state. So we can make use of this storage to prepare for disaster recovery. Follow the below steps to procure EFS and attach that to EC2.
-
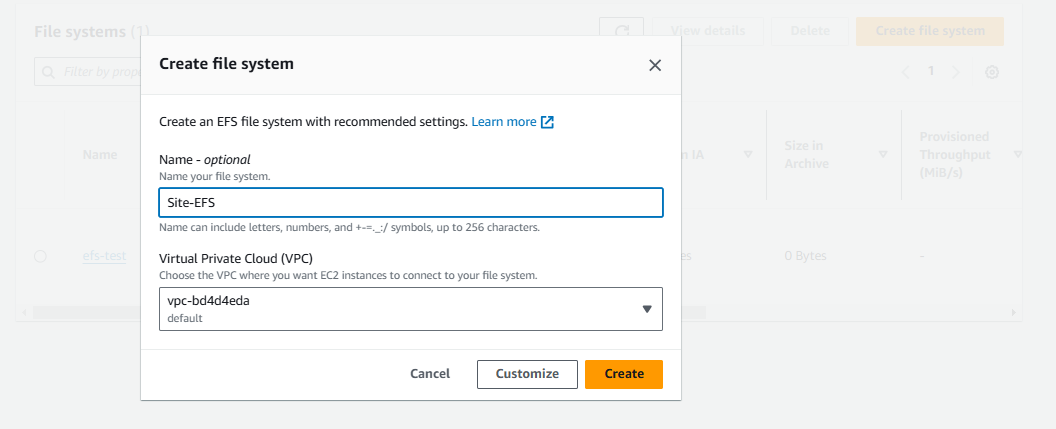
Open AWS Console and navigate to EFS and click on "Create Filesystem".
-
Name the file system and select the VPC in which the EC2 was deployed and click on create.
-
Once the file system was created, click on the created file system and copy the DNS name from the General tab.
-
Now that we created the file system we need to mount the file system in the server.
-
Login to the EC2 instance and run the following commands to attach the file system.
sudo apt update

sudo apt-get install -y nfs-common

sudo mkdir /mnt/efs

> **Add the following in /etc/fstab file**

copied-dns-name:/ /mnt/efs nfs4 defaults,\_netdev 0 0
From the above command replace the "copied-dns-name" with the your DNS name copied from the EFS details.
AWS S3: -
AWS S3 is an object store that can also be used as alternative storage for the server to store and host application and its data. Follow the below steps to create S3 storage and connect that to the AWS EC2.
-
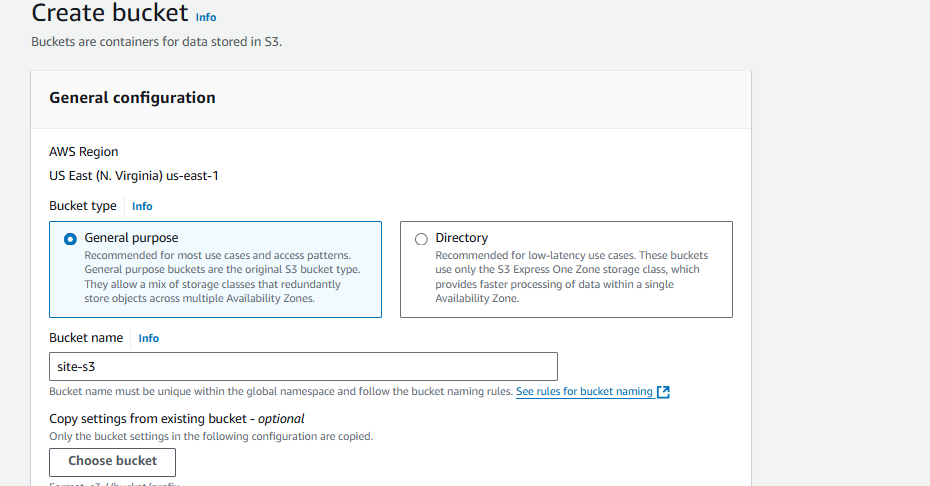
Login to AWS console, navigate to S3 dashboard and click on "Create bucket".
-
Select the General purpose as bucket type and Enter the name for the bucket which should be unique across AWS S3 names or ese it will prompted to change the name of the bucket.
-
Leave the rest as default as we will not allow the bucket to public which will create vulnerabilities and maintain all the objects in the bucket with standard so there will be minimum latency to access the storage types and click on create bucket.
-
Now we need to create an IAM role so that we can access S3 storage directly from our server using AWS private network to achieve low latency.
-
Navigate to IAM dashboard and click on Roles from the side menu.
-
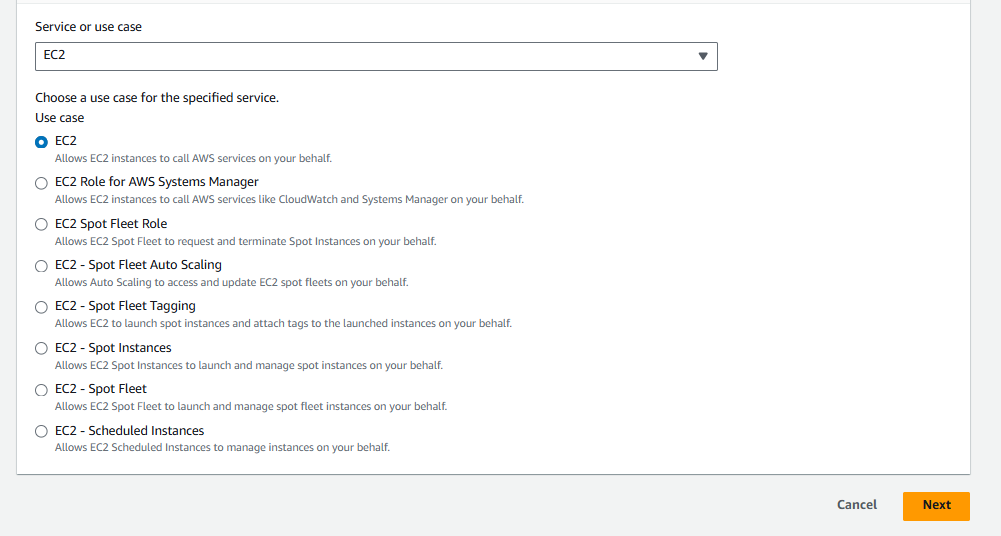
Click on "create role" and select "AWS service" as trusted entity type.
-
Under use case select EC2 and click on Next.
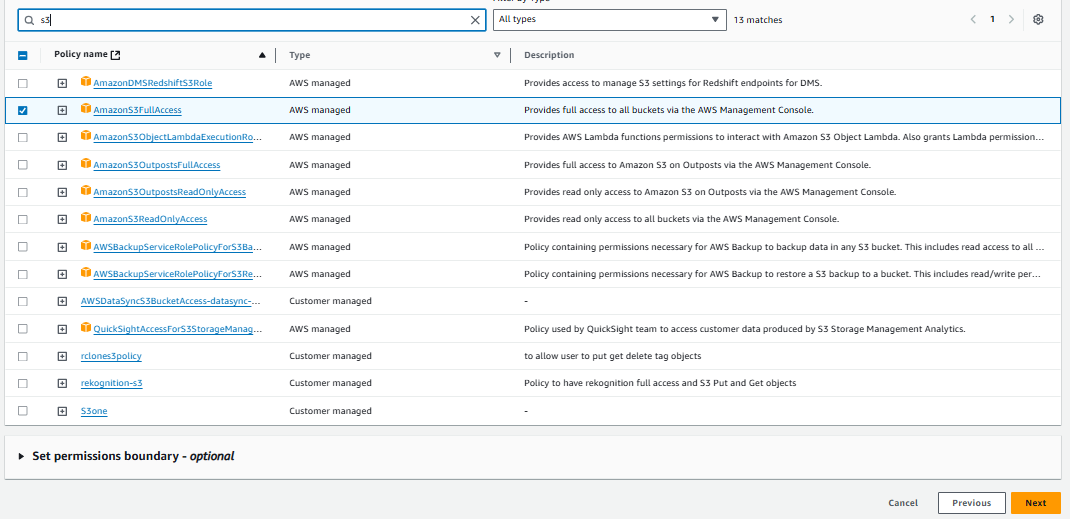
In the Next tab select S3 full access or Select predefined policy that allows s3 readwrites and click on Next.
-
Enter the Role name of your choice and click on Create Role.
-
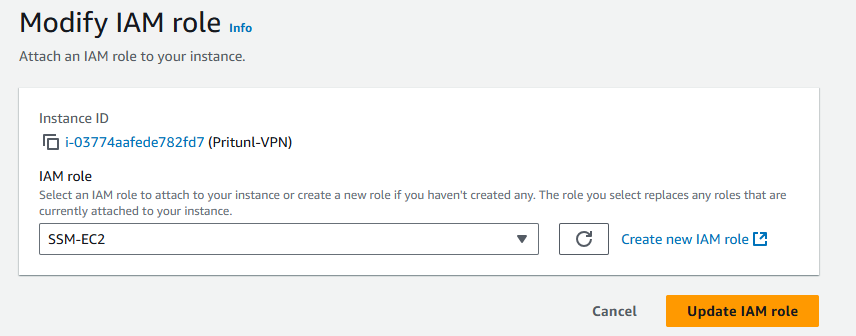
Now Navigate to EC2 dashboard, select the Site server and click on Actions tab select security and click on "Modify IAM Role".
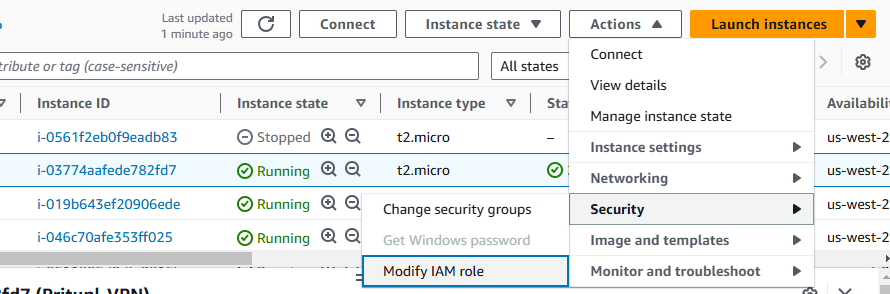 Choose the created IAM role and click on "Update IAM role".
Now Login to the server and run the following commands
- Install "s3fs" utility in the server
apt install s3fs
- create a directory to mount the storage
mkdir -p /mnt/mountpath
- Enter the below command in /etc/fstab
s3fs#my-bucket /mnt/my-s3-bucket fuse
\_netdev,iam_role=\<your-iam-role-name\>,allow_other 0 0
- To test use the below command and ls the mountpath
sudo mount -a
Using the above configuration we can create S3 bucket and attach that bucket to the server using IAM role and mount it as file system using s3fs utility.