AZURE
Azure
AZURE Site Deployment
- To instal Site Application in Azure the following services should be procured.
Resource Group: -
-
Sign in to Azure cloud console and navigate to Resource Groups and click on Create.
-
Select your Subscription in which you want to create and manage the Site Application.
-
Enter a name of your choice for the resource group and select the region.
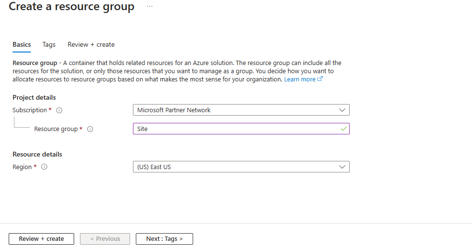
We have now created a resource group we will add all the services in the following resource group.
Virtual Machine: -
-
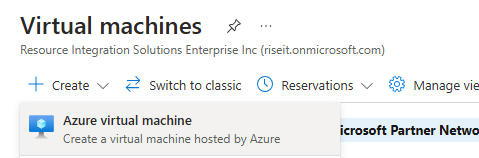
Search for Virtual Machine in search tab and select to open the Virtual Machine dashboard.
-
Click on Create and select Azure virtual machine option.
-
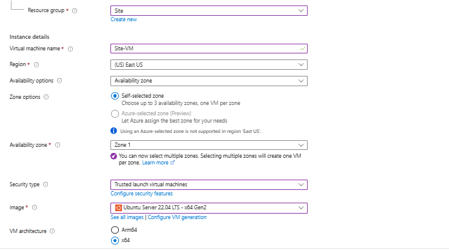
Select the Subscription and Resource group which we have created in previous step.
-
Enter name for your VM, Select the region and Zone in which you want to deploy the VM.
-
Under the image Select CentOS, Ubuntu 22.04 or Ubuntu 24.04 or RHEL 8 and Select x64 under VM architecture.
-
Select the Size of the VM depending on the Utilization. Recommended at least 4vCPUs and 8 GB RAM.
-
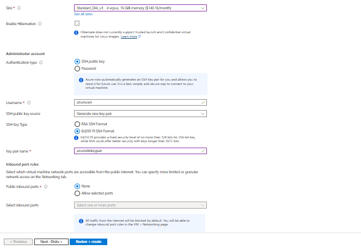
Select the Authentication type of your choice
-
If you are selecting SSH Pubic key then enter username and name of the keypair.
-
If you are selecting Password option then enter username and password.
-
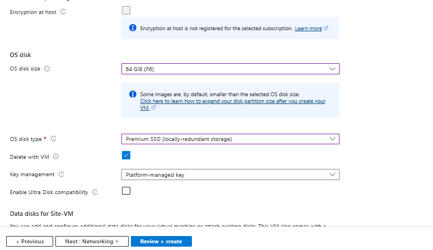
Click on Next where we will be moved to disks, We recommend of having atleast 50 GB disk space to run Site Application based on the utility configure disk spaces. Here we will proceed with 64 GiB and click on Next.
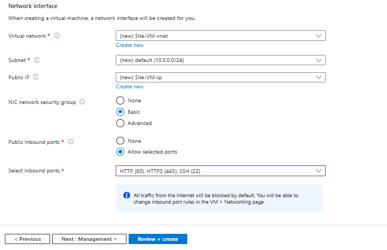
In the networking tab use the following values as we will overwrite the rules post creating the VM.
-
In the Management tab, Monitoring tab, Advanced tab leave the defaults and configure if you require custom settings and click on Next.
-
Review all the configurations and click on Create. This will take a while to create the VM.
-
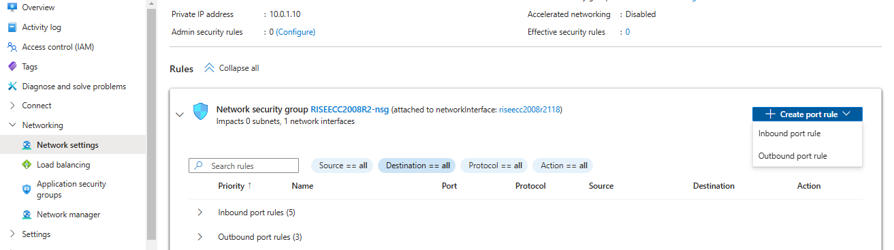
Once the VM is created, Click on Networking from side menu and select Network Settings, click on Create Port Rule and Add the incoming traffic for 22, 80, 443, 10000 depending whether you want to allow them publicly or specific to particular IP ranges. So that you have a control over access to the server and Site Application.
Now you can connect to the server using either SSH key or username + password and continue to deploy the Application.
Azure Databases: -
-
Azure Databases supports multiple engines in which we support MySQL, PostgreSQL, Microsoft SQL server and Mongodb.
-
Accordingly select the engine you want to use for the Application and search in the Azure Cloud console and click on Create.
-
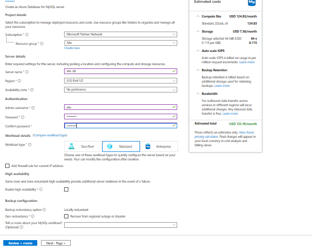
Select the Subscription and Resource group that we have created. Enter the name of the database server name.
-
Select the region and Availability zone.
-
For the Authentication enter the Admin username and password. Make sure to save them as they are the main credentials to access the database.
-
In the workload type we recommend to select standard or Enterprise. Click on Next add tags if required and click on Review and Create.
-
Review the configuration and click on Create.
Now we have created the database we can connect to the database using the Server name value from the overview of the database using the username and password we used.