Application Details

Navigating to the Application Screen
To access the application screen, follow these steps:
-
Go to the Extension Screen.
-
Click on the Action Button to navigate to the application details screen.

Overview of the Application Screen
The application screen consists of five sub-screens:
-
Settings
-
Logs
-
Comments
-
Notes
-
Documents
-
Activity
1. Settings Screen
The Settings Screen allows users to configure application details. Options available are
-
Name: Displays the name of the application.
-
Version: Displays the current version of the application.
-
Features: Displays whether it is preconfigured bundle site or Template site.
-
Bundle ID: Displays the bundle identifier.
Additional Settings
-
Organization: Select the organization from the dropdown menu.
-
Devices: Choose the required devices from the selection menu.
-
Default Toggle: Toggle the default setting.
-
XR Studio Build Type: The build type can either be Product Line or Site Application. Select the appropriate option based on your needs."
Storage Locations
- Storage Location: Specify the path for archived storage, log Storage location.
- Logs Screen
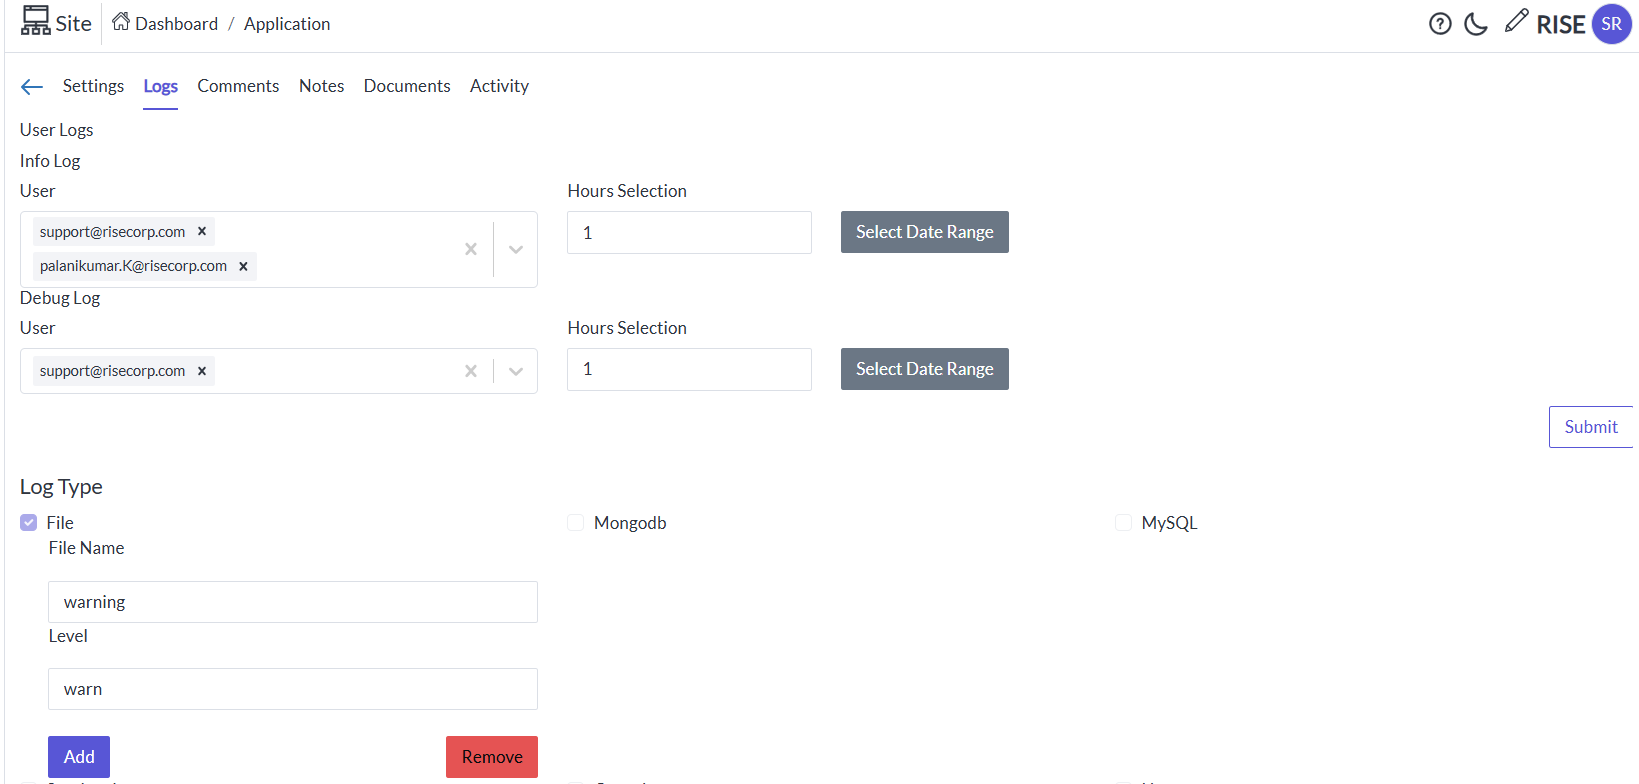
The User Logs Screen provides the following options:
-
User Info: Display user-specific information.
-
User: Select the specific user to track their logs.
-
Hour Selection: Choose the desired hours to track the user log
-
Date Range: Select a date range to track the user log
Debug log:
-
Debug User: Specify user details for debugging.
-
Hour Selection: Choose the desired hours to track the user debugging log
-
Date Range: Select a date range to track the user debugging log
Log Type
The Log type enables users to manage log files, based on the hours/date range the data will be stored. Available options include:
-
Log type: e.g. File
-
File Name: Display the name of the log file.
-
Level: Set or view the logging level.
-
Add Button: Add a new log file.
-
Remove Button: Remove an existing log file.
-
-
Note: The log file will be stored in the respective storage.
3. Comments Screen
The Comments Screen allows users to:
-
Search Comments: Use the search bar to find specific comments.
-
Add Comments: Add new comments to the application.
-
Attach Files: Attach relevant files to comments.
-
Speech to text: voice recognition to add the comment
4. Notes Screen
The Notes Screen provides tools for creating and managing notes:
-
Create Note Button: Create a new note.
-
Search Bar: Use the search bar to find specific notes.
-
Select Notes: Lists the existing notes.
Note Management Workflow
-
Create a Note: Use the create button to start a new note.
-
Create Sections: After creating a note, organize content into sections.
-
Create Pages: Within each section, create pages where notes can be added.
6. Documents Screen
The Documents Screen allows users to manage and view documents. Features include:
-
Upload Button: Upload new document by the representative file name.
-
Create Button: Create a new document.
-
Search Bar: Search for specific document.
-
List View and Grid View: Toggle between list and grid views to display documents.
7. Activity Screen
The Activity Screen displays detailed activity logs. Features include:
-
Search Bar: Search for specific activities.
-
List View and Grid View: View activities in either list or grid format.
Activity Details
The activity screen displays the following details:
-
Actions: Description of actions performed e.g. details.
-
ID: Unique identifier for the activity.
-
Build Type: Type of build associated with the activity.
-
Interaction Type: Type of interaction logged.
-
User ID: Identifier of the user.
-
Created Date: Date the activity was created.
-
Data Type: Type of data involved.
-
Org Name: Organization name.
-
Application Name: Name of the application.
-
API URL: API endpoint used.
-
Device Info: Information about the device used.
-
Browser: Browser used for the activity.
-
OS: Operating system of the device.