Site Details

General Information:
Sections
-
Details
-
Databases
-
Comments
-
Notes
-
Documents
-
Activity
User can be able to view the below details in the screen.
-
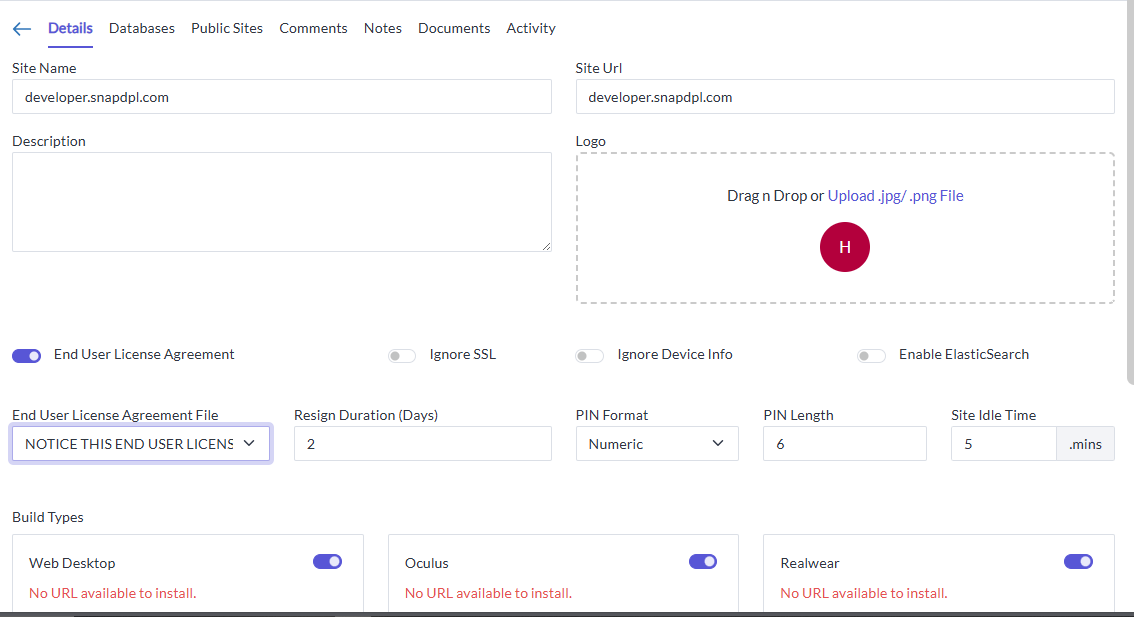
Site Name: Respective Site Name
-
Site URL: Respective Site URL
-
Description: Respective Description of the site
-
Logo: user can logo of the site or can upload the new file or drag and drop the logo.
Toggles
-
Ignore SSL: We can enable this toggle for SSL types.
Ignoring SSL (Secure Sockets Layer) is typically used in scenarios where we need to bypass SSL certificate validation. This can be useful in development or testing environments where we might encounter self-signed or expired certificates that can cause errors -
Ignore Device Info: By Enabling this Toggle we can ignore device information.
-
Enable Elastic Search: If we enable this Elastic Search Component, it allows you to store, search, and analyse big volumes of data quickly and in near real-time.
-
End User License Agreement:
By enabling this toggle, we acknowledge that we have read, understood, and agree to be bound by the terms of the End User License Agreement (EULA). If we do not agree to these terms.
End User License Agreement File

-
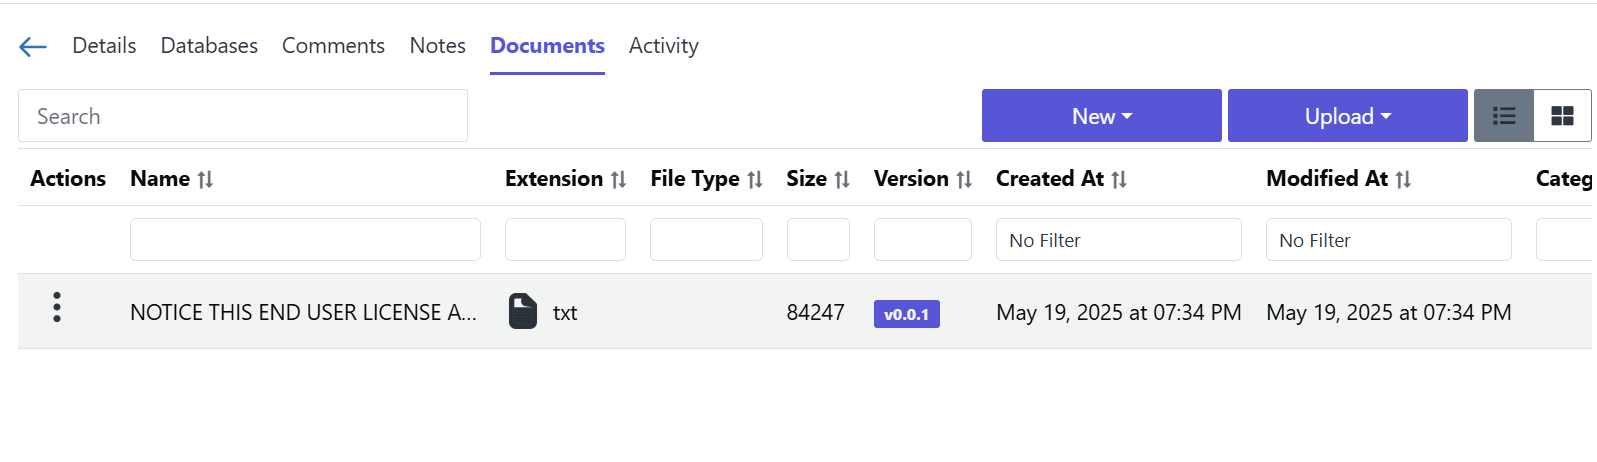
To proceed, please select the License Agreement file from the dropdown menu provided. This file can be added in the documents sub screen; the file format should be .txt file
-
By enabling this toggle and selecting the appropriate License Agreement file, we acknowledge that we have read, understood, and agree to be bound by the terms of the End User License Agreement (EULA). If we do not agree to these terms, please do not enable this toggle.
-
Resign Duration (Days): Here, the Admin can specify the number of days a user has to resign the agreement, based on the date the user needs to accept the agreement
PIN Configuration
-
PIN Format (Dropdown: Numeric, Alphabetic)
-
PIN Length: user can set the Pin Length "e.g. 6"
Site Settings
- Site Idle Time: e.g. 5 mins
Idle session timeout is a security feature that automatically signs out users after a period of inactivity. We can set for session timeout.
Build Types & URLs
Marketplace URL: This refers to the web address of an online marketplace platform where software products or services are listed and can be purchased or accessed. Examples include the URLs for platforms like the Apple App Store, Google Play Store, or Microsoft Store, where users can browse and download various software applications.
Product Line URL: This refers to the web address associated with a
specific product line within a company's software offerings. A product
line in software is a collection of related software products that share
common features and are developed from a common set of core assets.
For the Below Build type we can enable based on the availability of the
devices: Web Desktop, Oculus, Realwear, Hololens, iOS, Magic Leap,
Windows, Android
To proceed, please enable the toggle based on the availability of the following devices in the marketplace or product line URL: Realwear, Hololens, SmartPhone, Tablet, Magic Leap, Windows Machine, Surface Tablet, iPhone, iPad, and Mac.
Database
-
The site provides various database types user can choose their respective DB for an example: MySQL /Mongo
-
Create a New Database
-
Yes: Select this option if we want to create a new database.
- Provide the required details like Admin user, password etc.,
-
No: Select this option if we want to use an existing database.
-
-
Database Connection Details
-
Host: The server address where the database is hosted. Default: 127.0.0.1
-
Port: The port number for database communication. Default: 3306
-
Database: The name of the database. Example: emp
-
Username: The username required for database authentication.
-
Password: The password required for database authentication (hidden for security).
-
Notes Screen
Purpose to Create and manage notes.
Creating a Note
-
Click on the Create button.
-
From the available options, select Notes.
-
Enter the necessary details:
a. Notes Name: Provide a meaningful name for the note.
b. Description: Add relevant details or context for the note.
-
Click on the Create button to save the note.
Adding Sections to a Note
-
Once the note is created, click on the Create button again.
-
Select the Section option from the menu.
-
Add relevant details to the section as needed.
-
Save the section to include it in the note.
Managing Notes
-
You can edit an existing note to modify its name or description.
-
Sections can be added, edited, or removed as needed.
-
Deleting a note will remove all associated sections.
Documents Screen
Search Bar
- Use the search bar to quickly find specific documents.
New Button
-
Clicking the New button provides an option to create new documents of various file types.
-
Supported file types:
Example:-
TXT (Text files)
-
MP4 (Video Files)
-
JS (JavaScript Object Notation)
-
CSV (Comma-Separated Values)
-
JAVA (Java Source Code)
-
JSON (Duplicate for structured data files)
-
Upload Button
-
The Upload button allows users to upload files or folders.
-
Two upload options:
-
File Upload -- Select individual files to upload.
-
Folder Upload -- Upload an entire folder with multiple files.
-
How to Use
-
Creating a New Document:
a. Click the New button.
b. Select the desired file type.
c. Provide the necessary details and save the document.
-
Uploading a Document:
a. Click the Upload button.
b. Choose between File Upload or Folder Upload.
c. Select the files or folders from your device.
d. Confirm the upload.
-
Searching for Documents:
a. Enter keywords in the search bar to find specific files.
Comments Screen
-
Purpose: Add comments and enhance collaboration.
-
Features:
-
Add Comments: Input comments to provide feedback.
-
Emojis: Include emojis for expressive feedback.
-
Attach Files: Upload relevant attachments.
-
-
Usage:
-
Use the comment box to add your input.
-
Attach files and select emojis as needed.
-
Activity Screen
-
Purpose: View the activity log for a user.
-
Features:
-
Display a list of recent activities.
-
Track user interactions and actions.
-
-
Usage:
- Navigate to the Activity screen to view logs.