Drone Data Flow
Image Capture
Conversion Tools
- ARCGIS
- PIX4D
- DJI Terrain (only for DJI drone data)
Processing Tools
- QGIS
Supported File Formats
- JPG
- TIFF
- GPX
- MP4
Conversion Workflows
TIFF to XYZ Tiles
Convert georeferenced TIFF files into XYZ tile format for web mapping.
JPG to TIFF Conversion
Batch convert JPG images to GeoTIFF format with embedded geolocation data.
Upload to Server
Final step to deploy processed assets to production server.
SNAPDPL Platform
XYZ tile to Visualize
Drone capture involves acquiring aerial imagery using DJI and other drone cameras. The exported file format is typically JPG.
To convert this data in single raster image by using Arcgis or QGIS. If your data in JPG or pdf data. We need to convert tiff file by using Arcgis.
To explain the process using example: Download the master plan data for Achuthapuram from this link. This data is freely available for anyone to view or download. data
Georeferencing a JPG, PNG and PDF File in ArcGIS Pro.
-
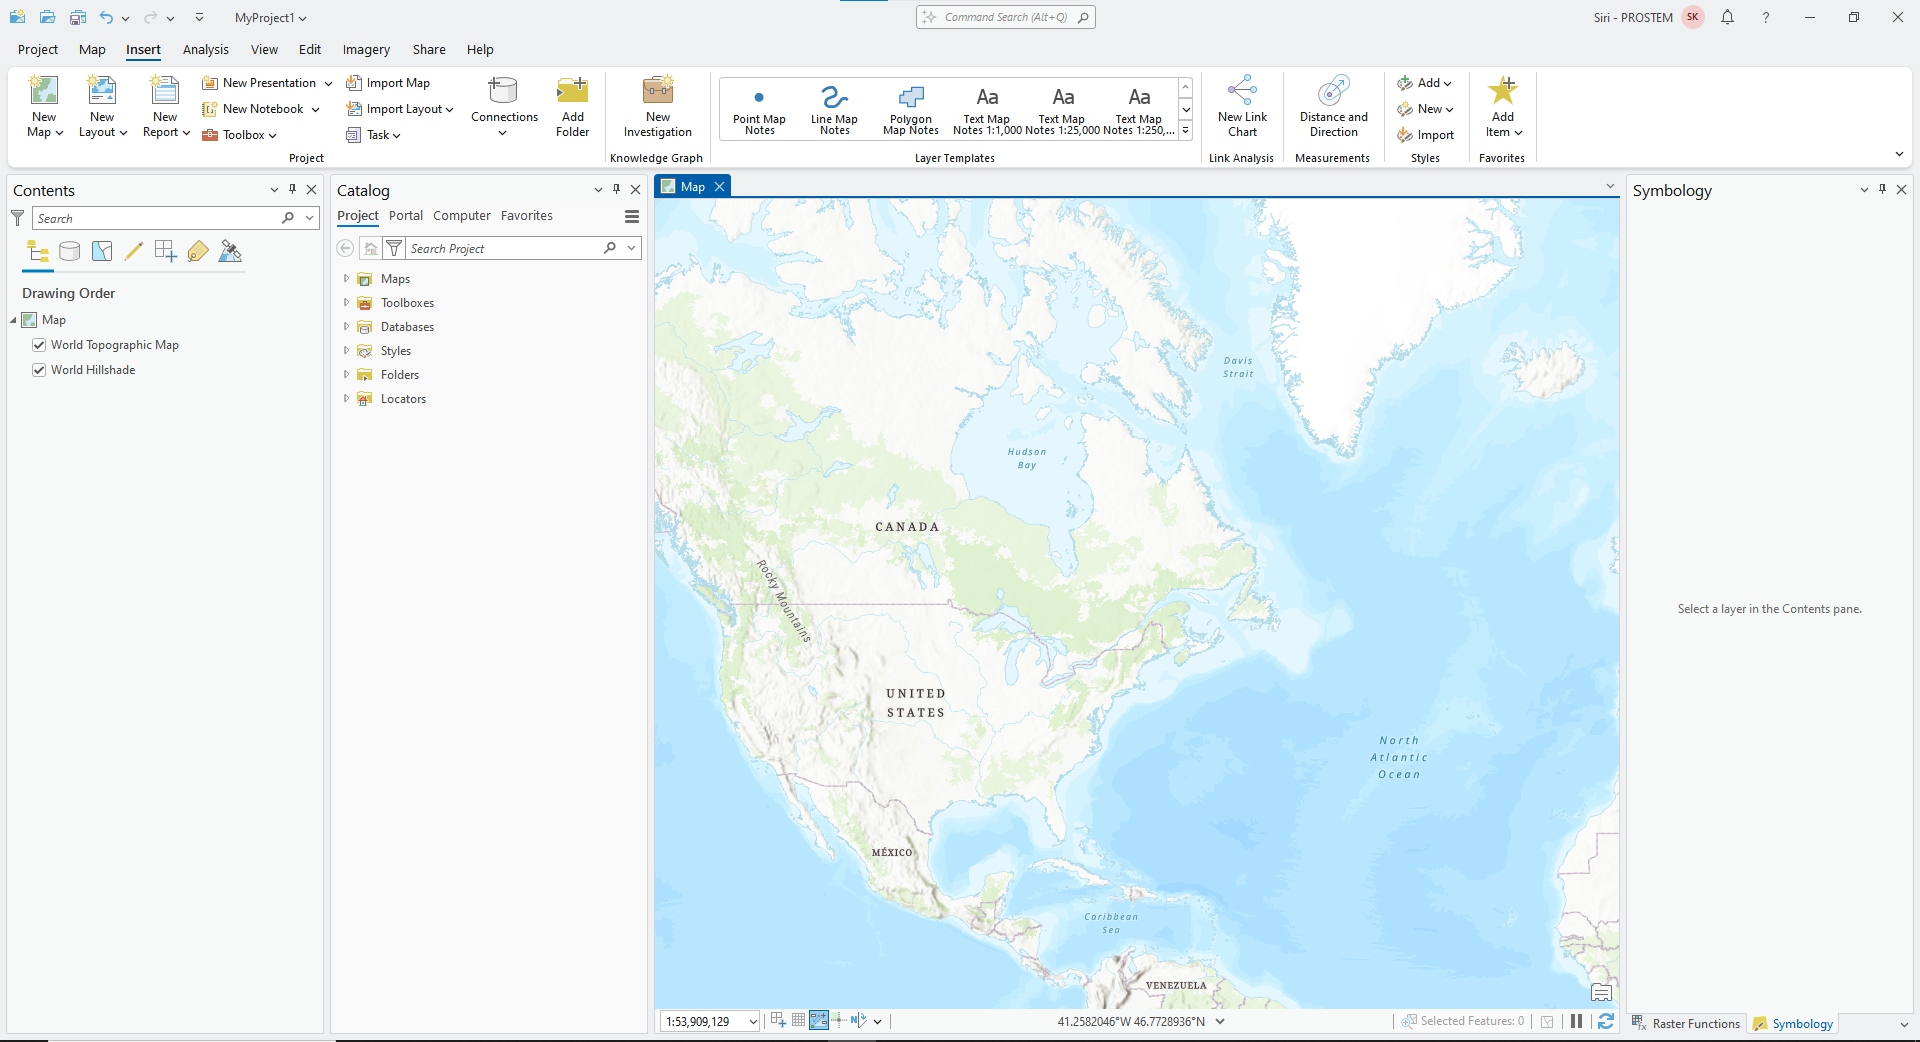
Load the Image (JPG, PNG and PDF)
-
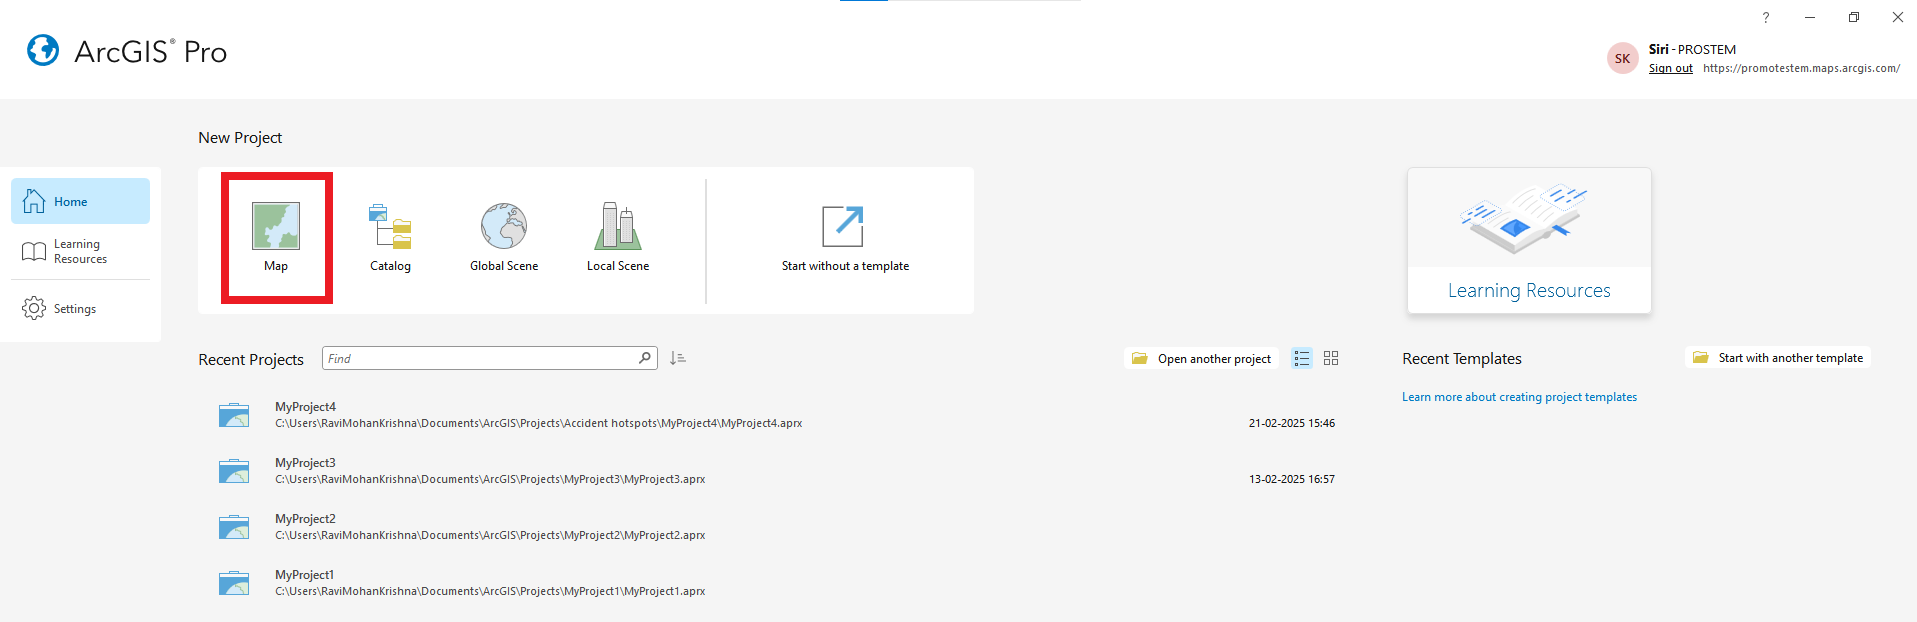
Open ArcGIS Pro and create a new project.
-
Go to Catalog Pane → Folder Connections → Add Folder Connection.
-
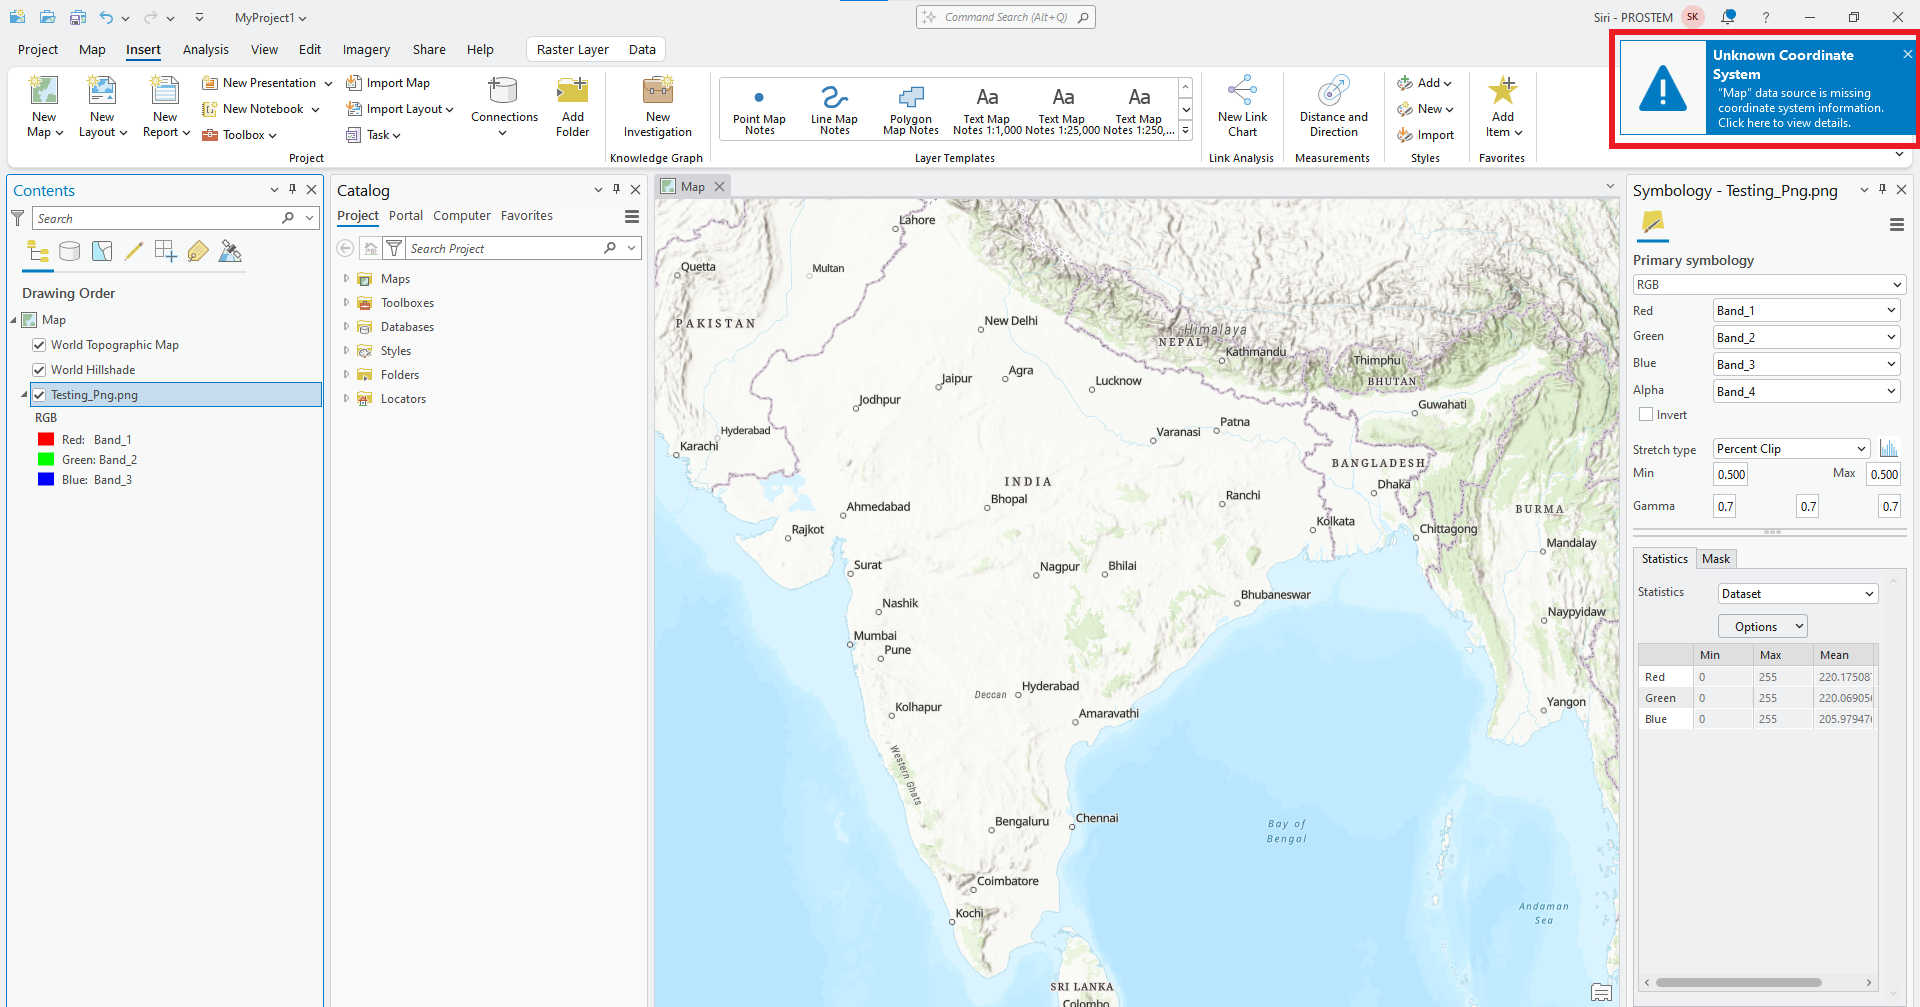
Drag the file into the Map View (it will not have spatial reference yet).
-
-
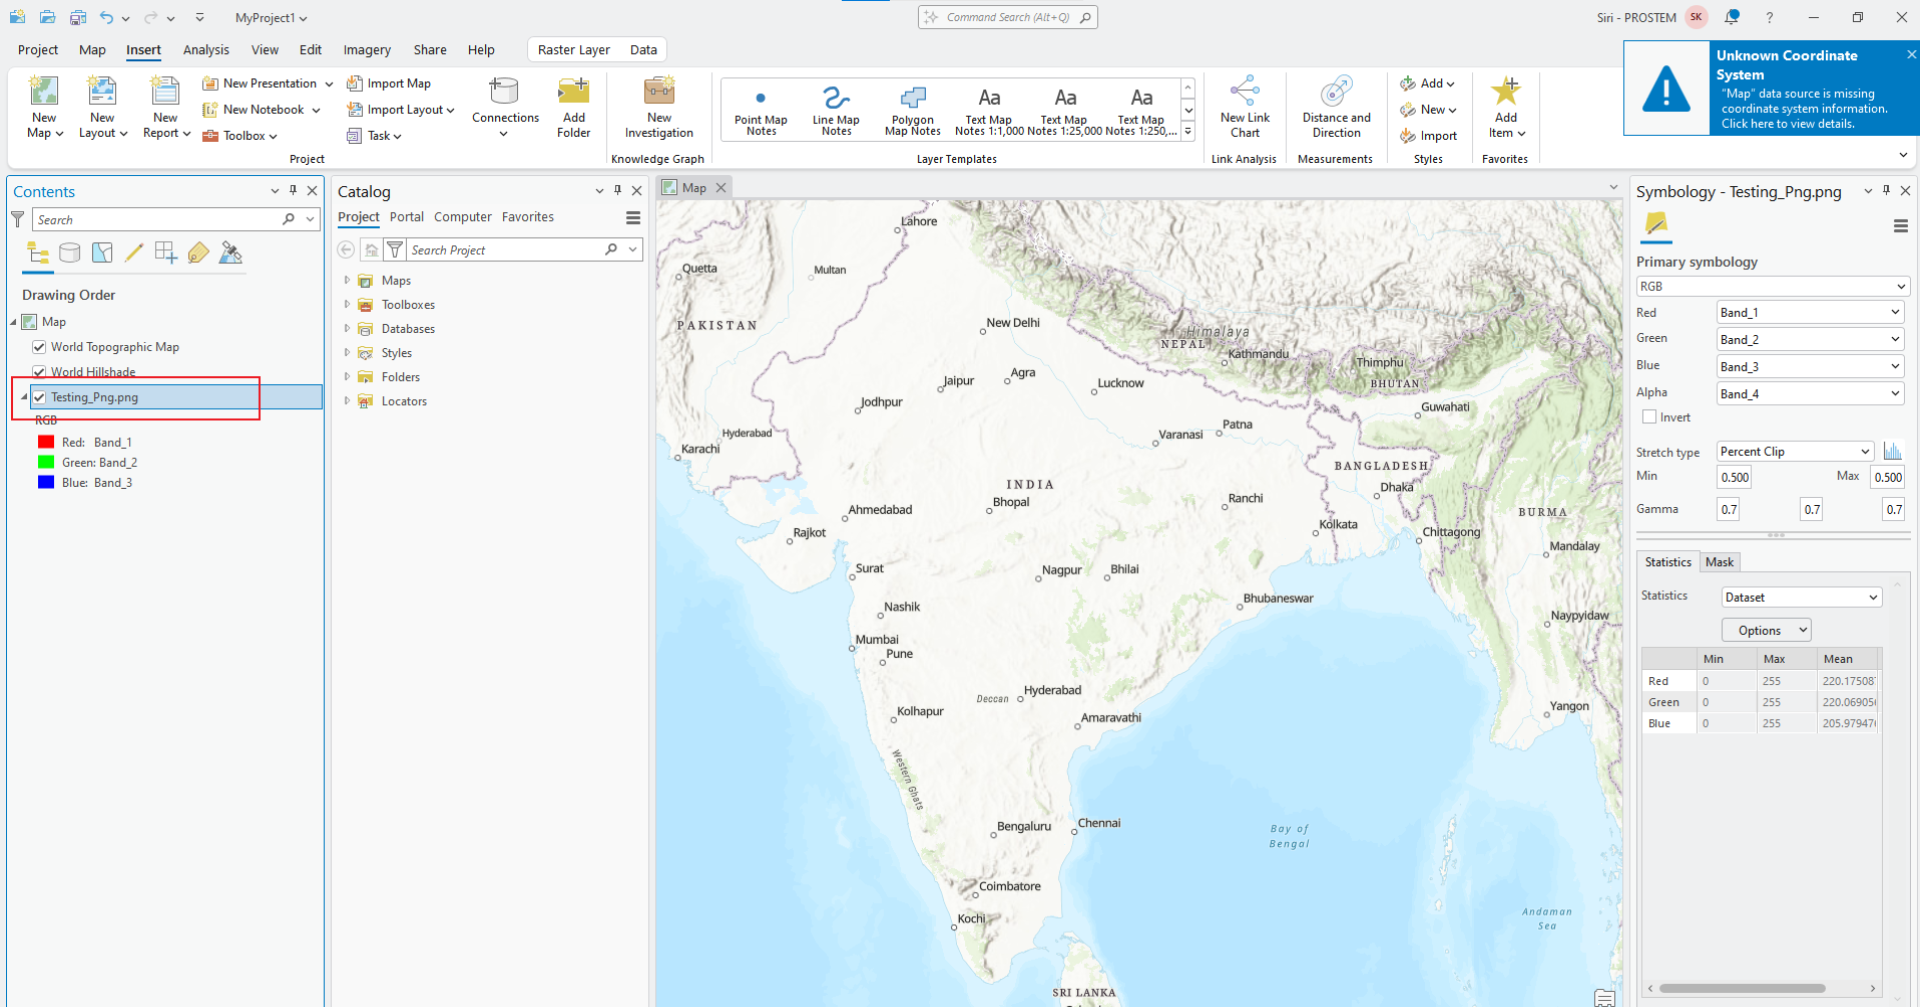
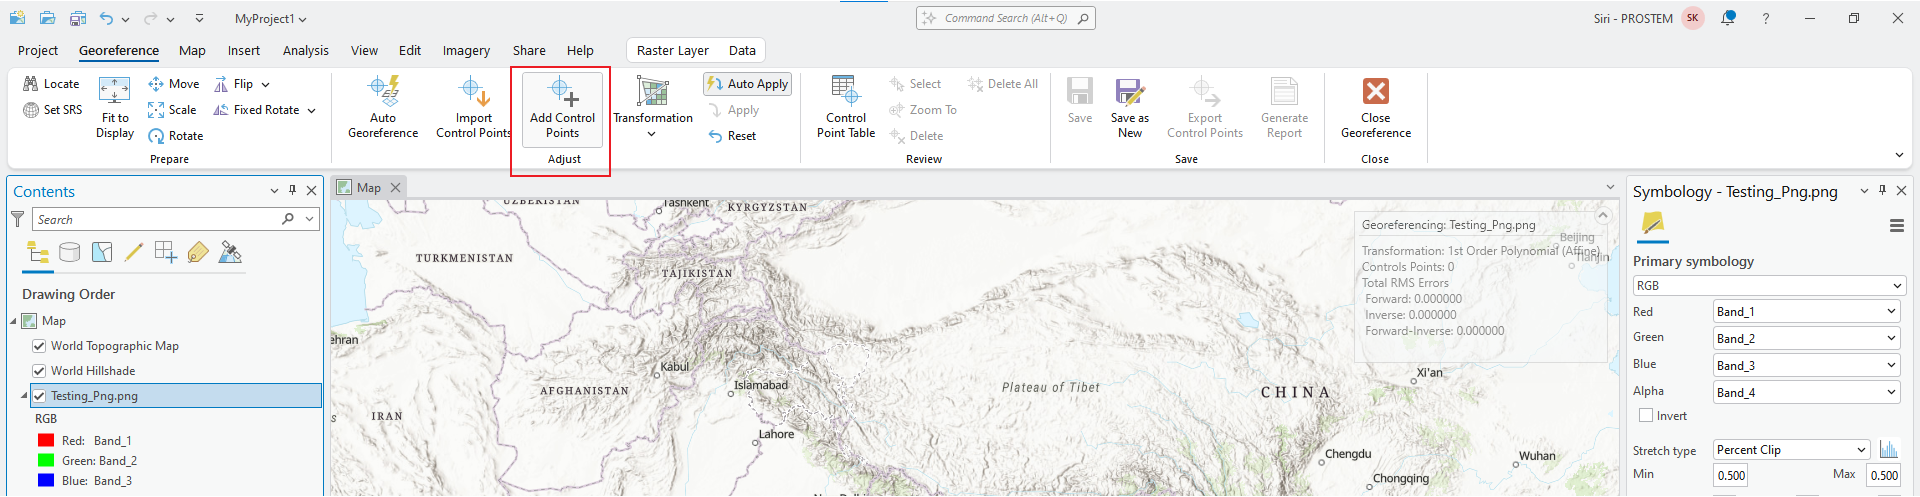
Enable the Georeferencing Tool
-
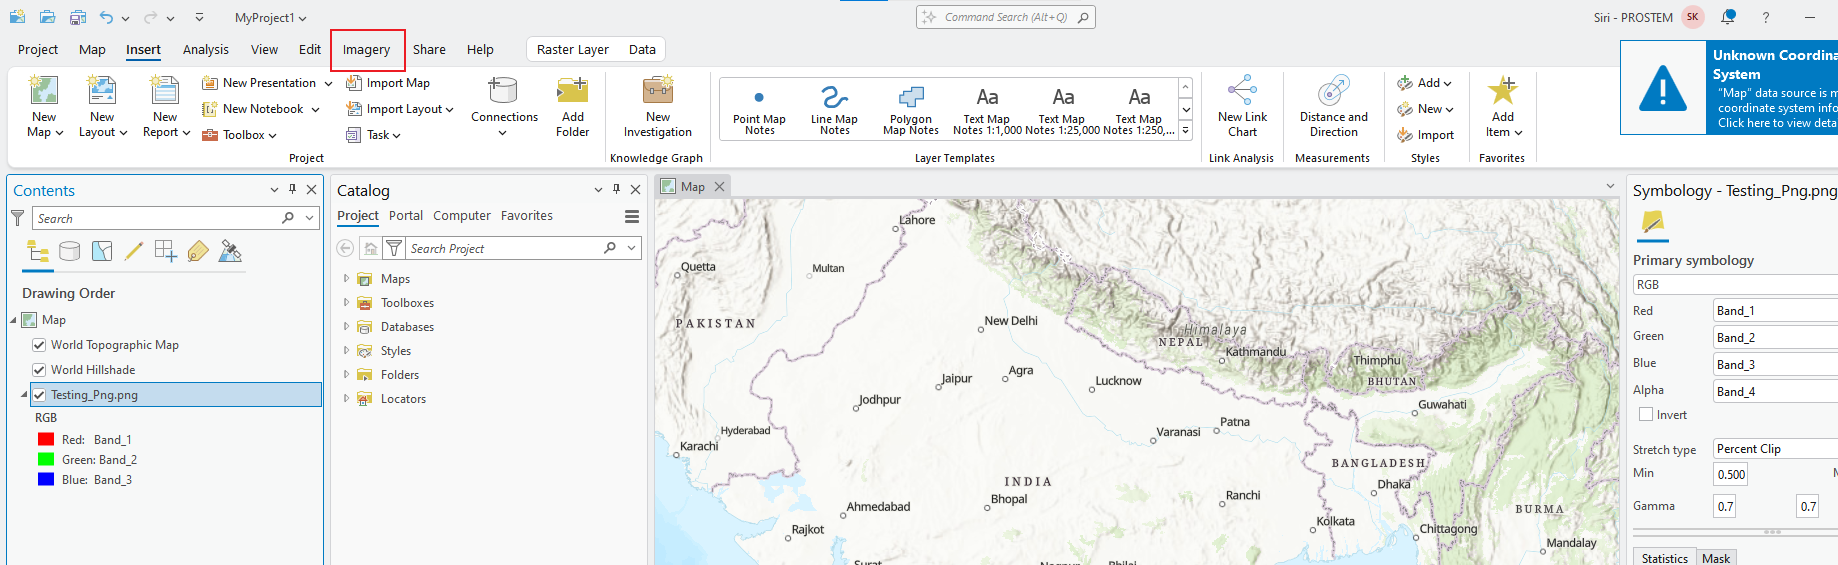
Select the JPG or PDF layer in the Contents Pane.
-
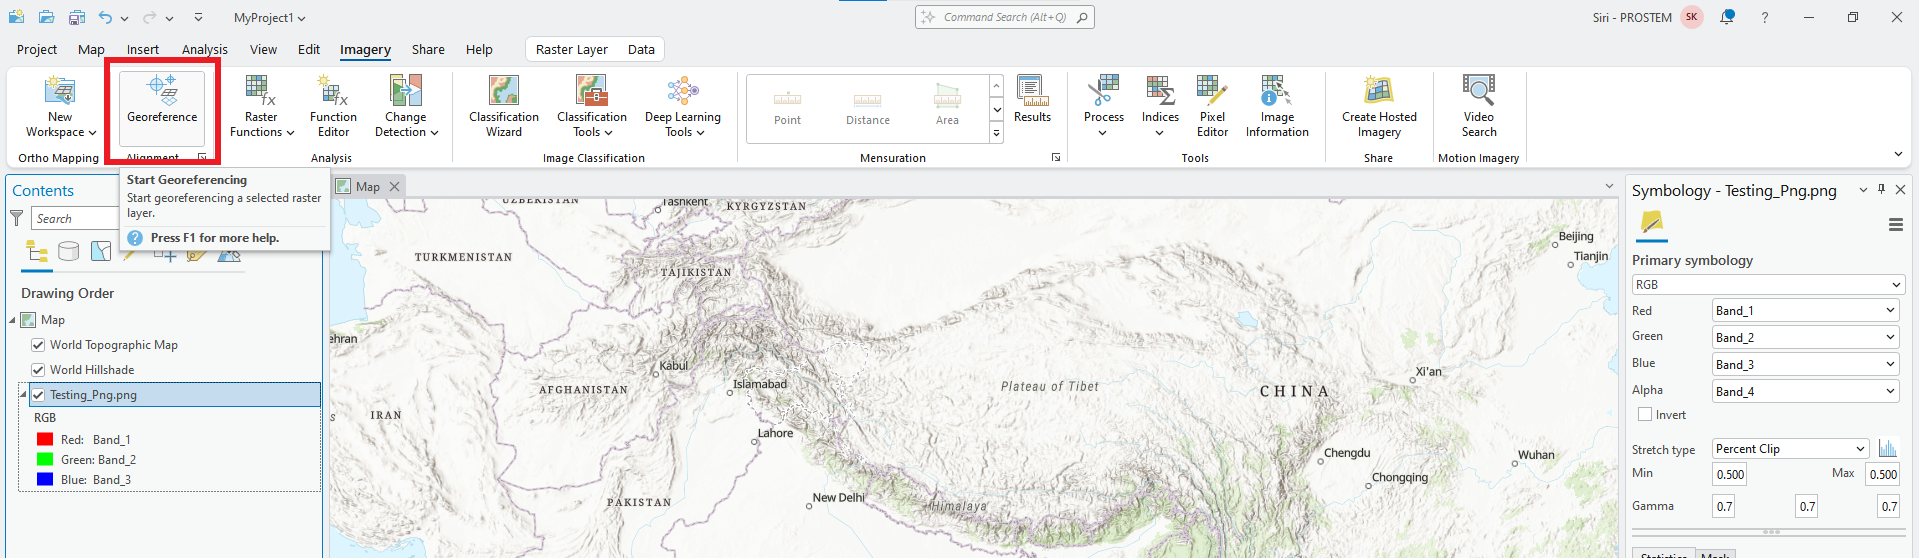
Go to the Imagery tab in the top menu.
-
Click on Georeference to open the Georeferencing Toolbar.
-
-
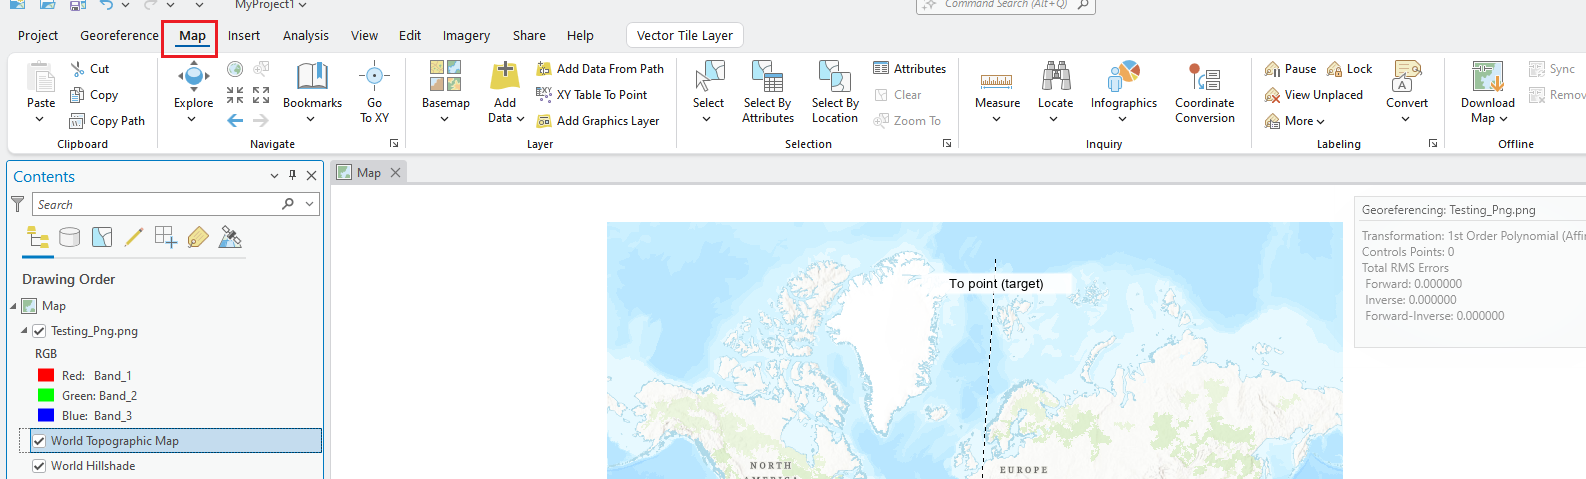
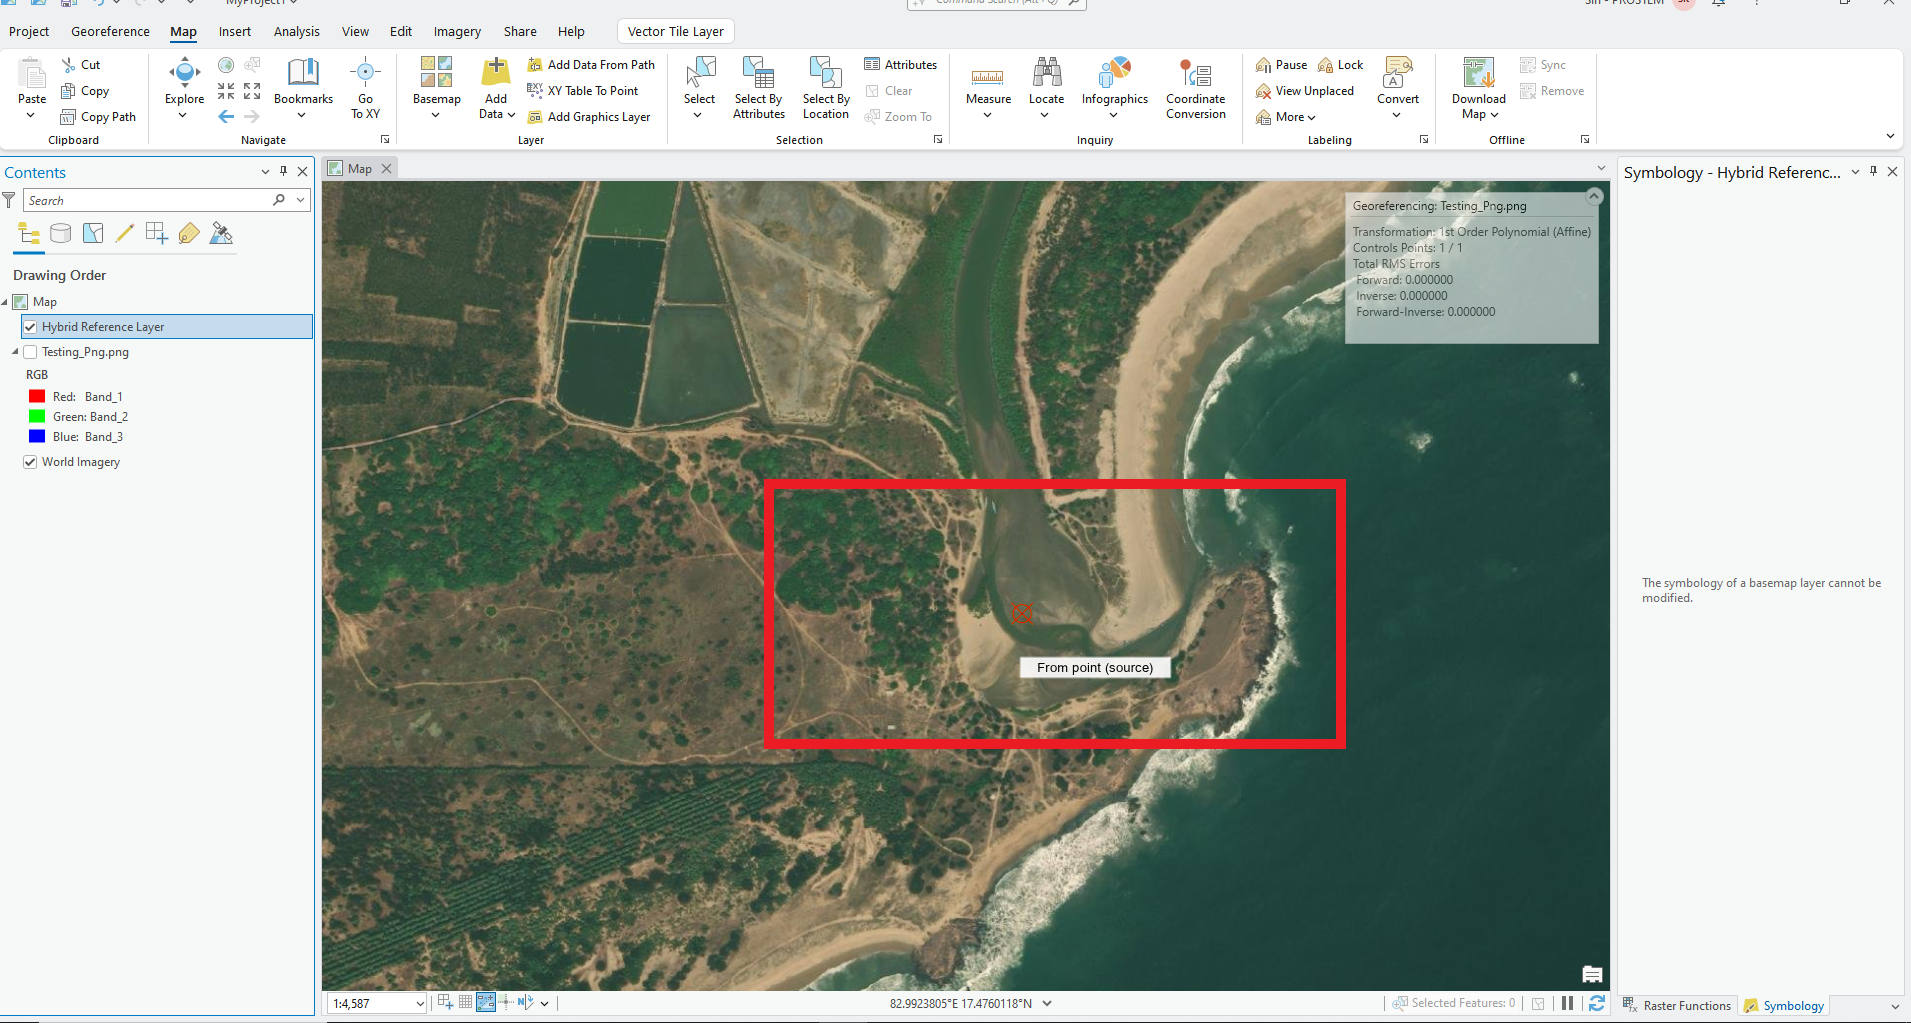
Define Control Points
-
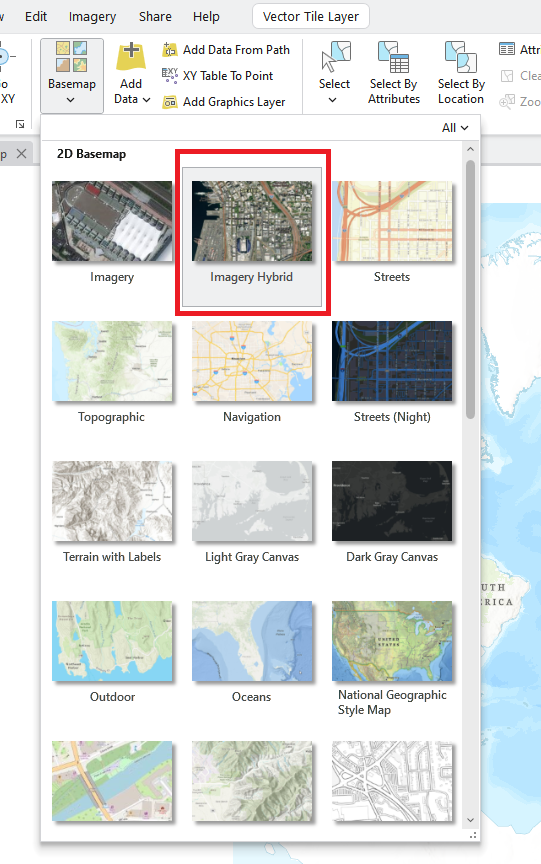
To define point change base map. Click on Map.
-
Click on Base map option.

-
Choose Imagery Hybrid option.
-
Click Add Control Points from the toolbar.
-
Select a known location on the JPG/PDF (e.g., road intersection, building corner).

-
Click the corresponding real-world location on the reference layer (such as a basemap or an existing georeferenced raster).
-
Repeat this process for at least 4 well-distributed points for accuracy.
-
-
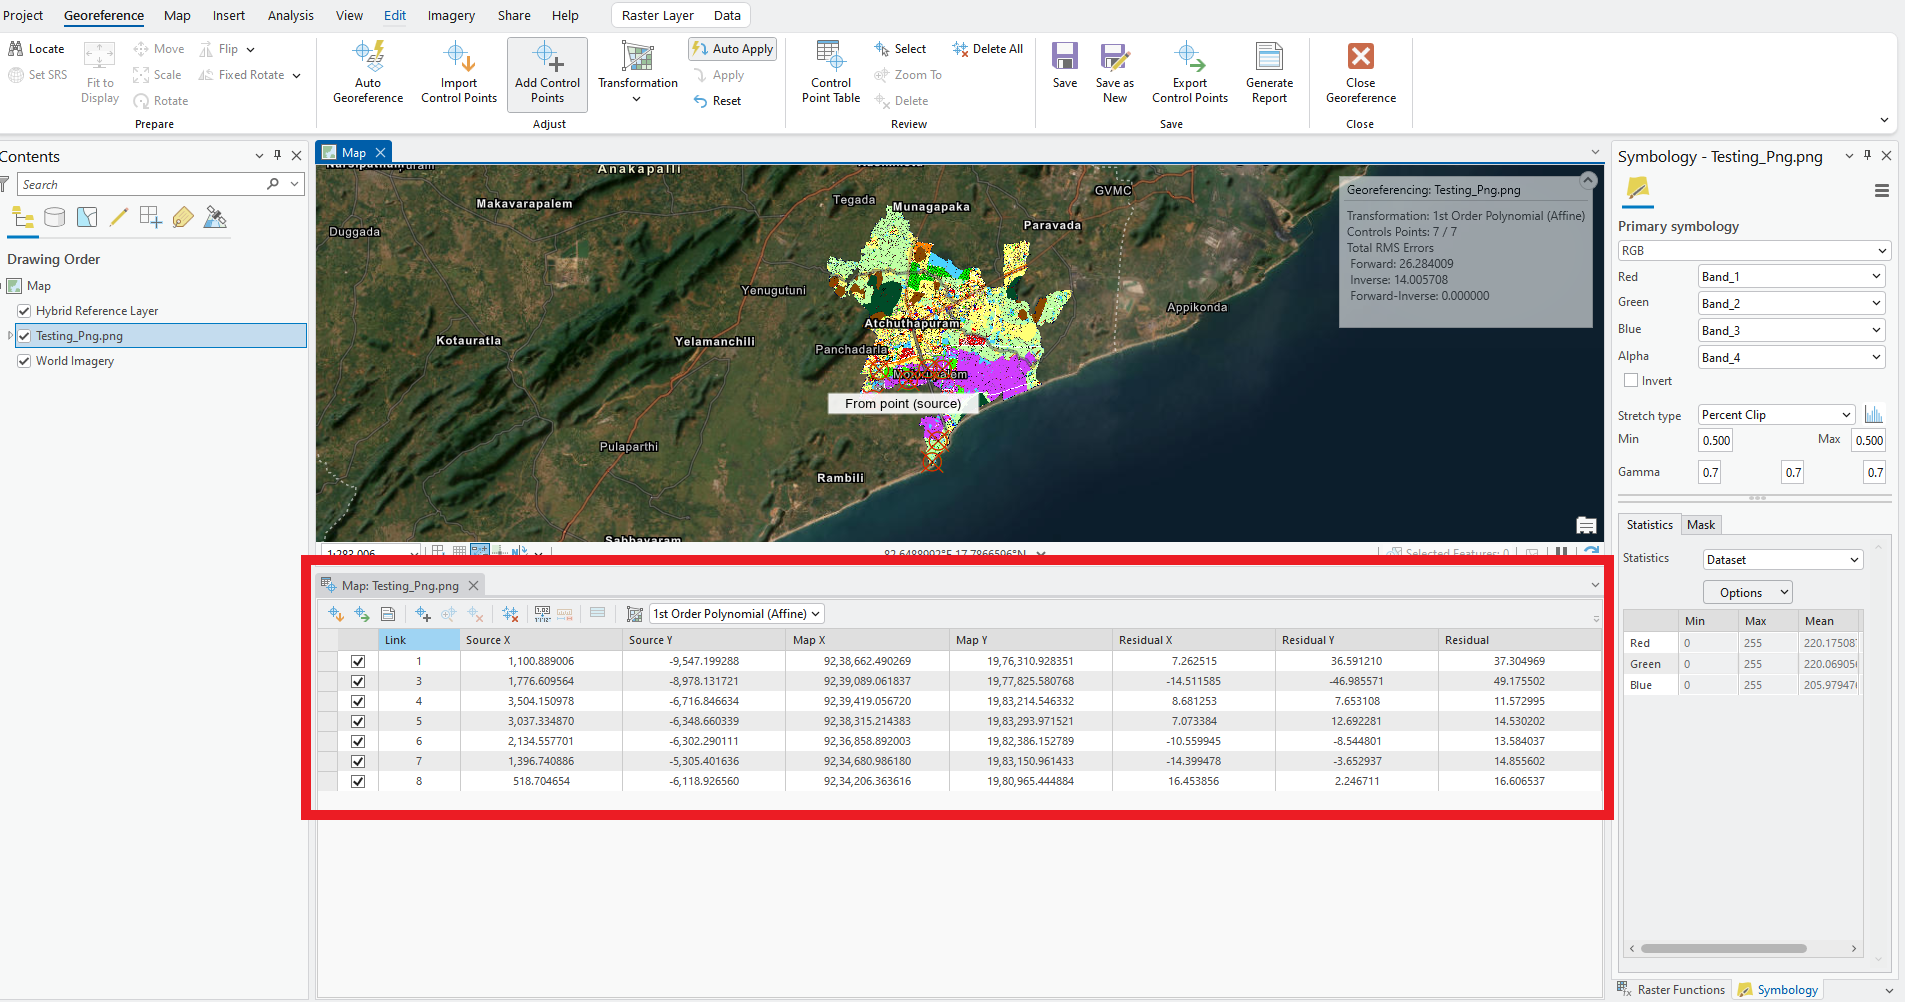
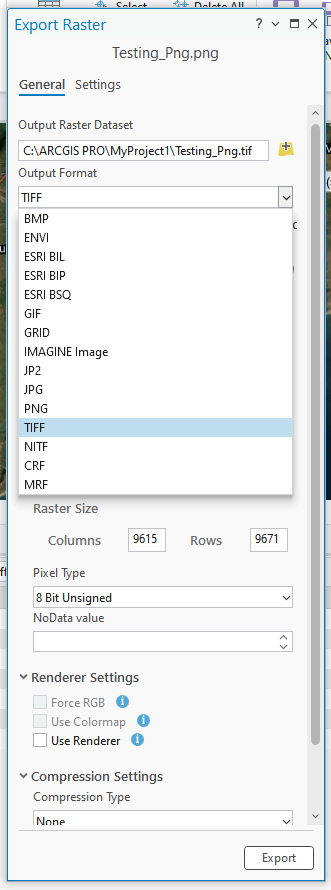
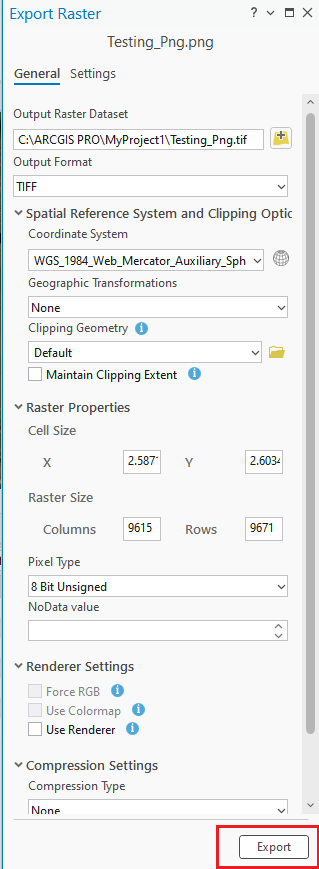
Save and Export the Georeferenced Image
-
After aligning the image correctly , Click Save to store the control points.

-
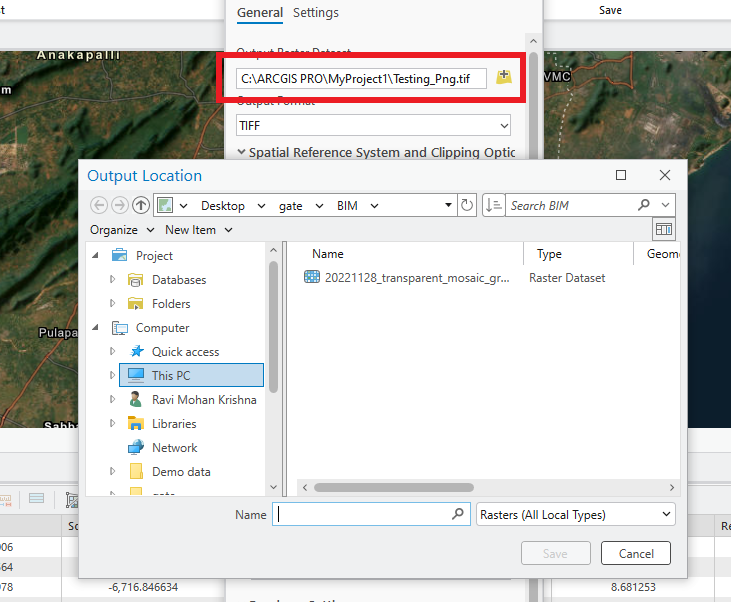
Click Export → Choose TIFF (.tif) as the format.

-
Set a suitable coordinate system and location.
-
Click OK to export.
-
Verify Georeferencing
-
Add the exported TIFF back into ArcGIS Pro.
-
Check if it aligns correctly with other geospatial layers.
-
If needed, refine control points and re-export.
-
-
-
-
Sometimes export as a tiff will not work. Using QGIS we can convert JPG or PDF to into tiff.
Importing a Georeferenced JPG or PDF into QGIS and Exporting as Geo TIFF
-
Load the Georeferenced JPG or PDF into QGIS
-
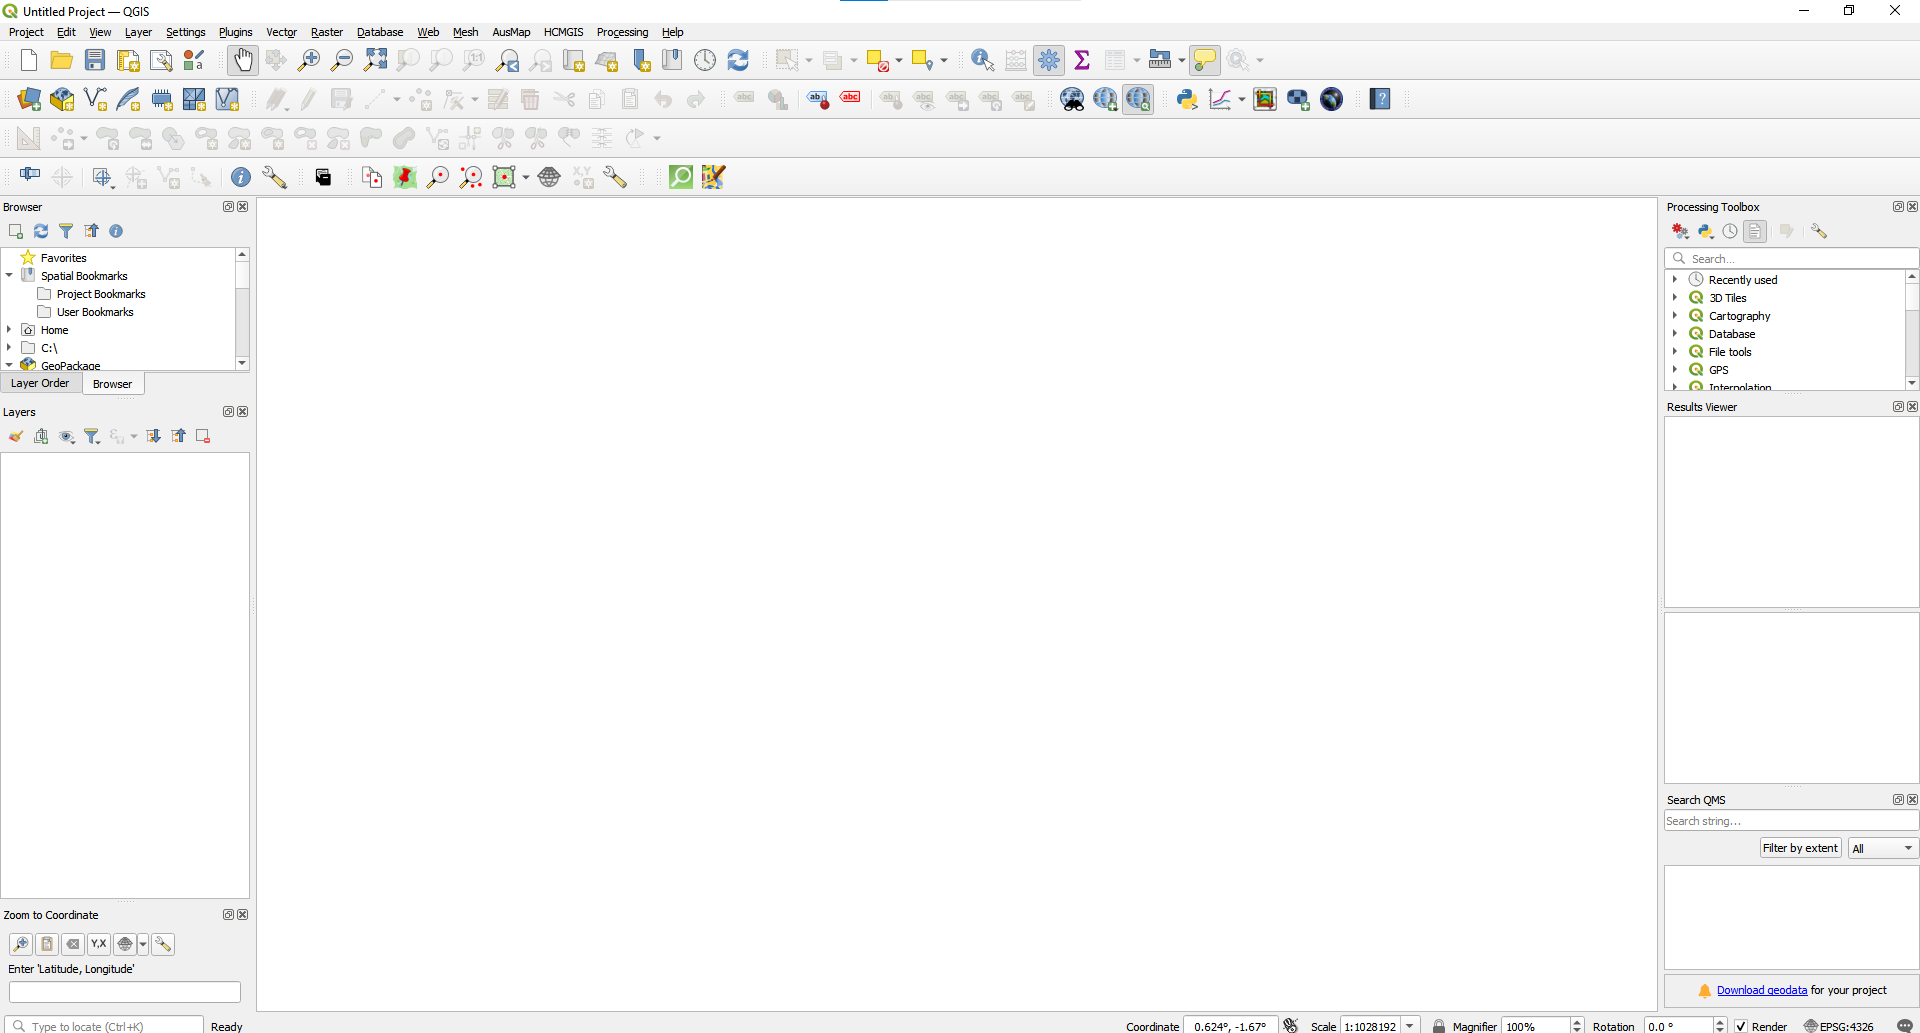
Open QGIS and create a new project.
-
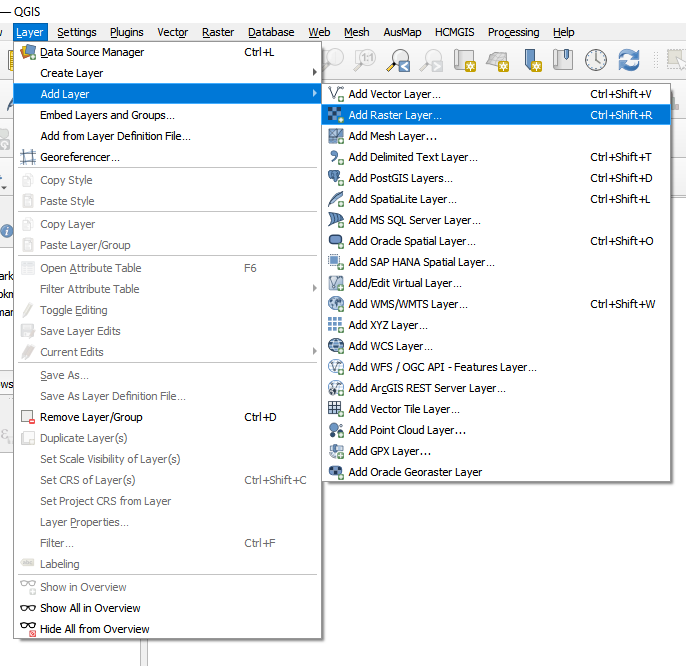
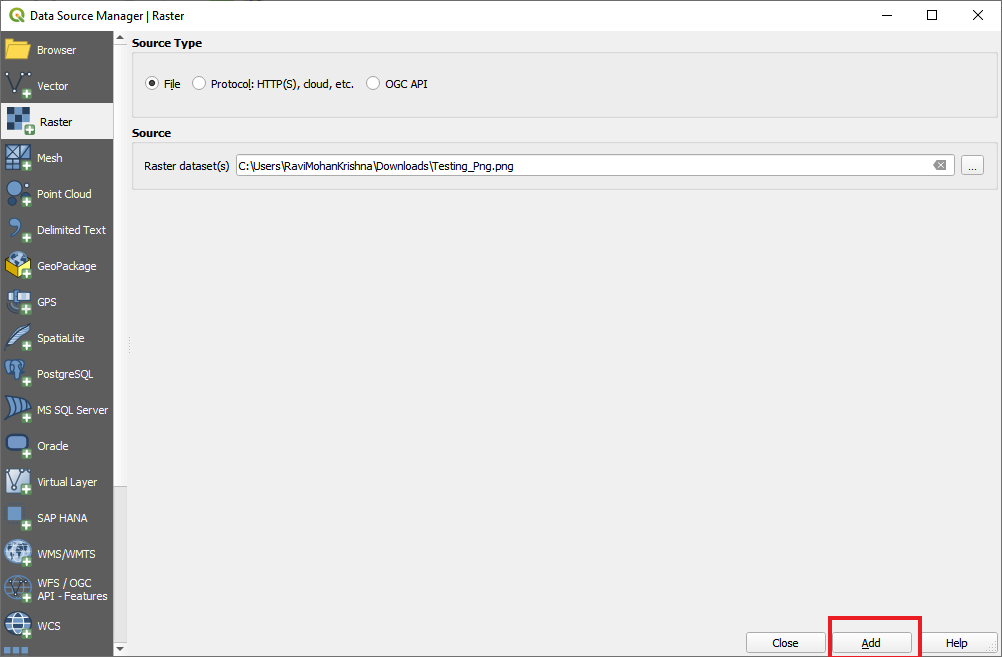
Go to Layer → Add Raster Layer.
-
Select the georeferenced JPG or PDF or PNG file and click Open.
-
If using a PDF, QGIS will prompt you to select a page (if it has multiple pages).

-
Export as GeoTIFF
-
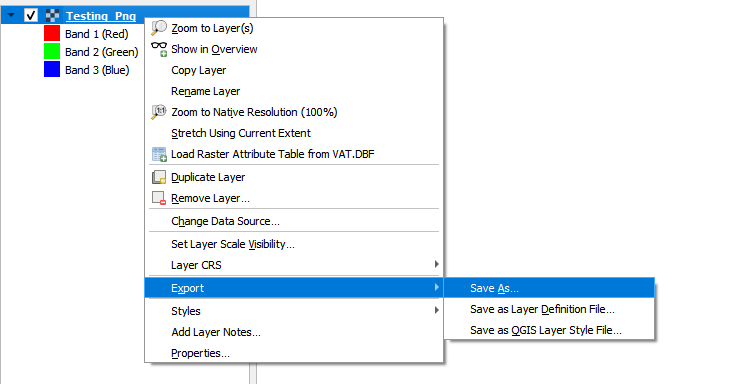
Right-click on the imported JPG or PDF layer in the Layers panel.
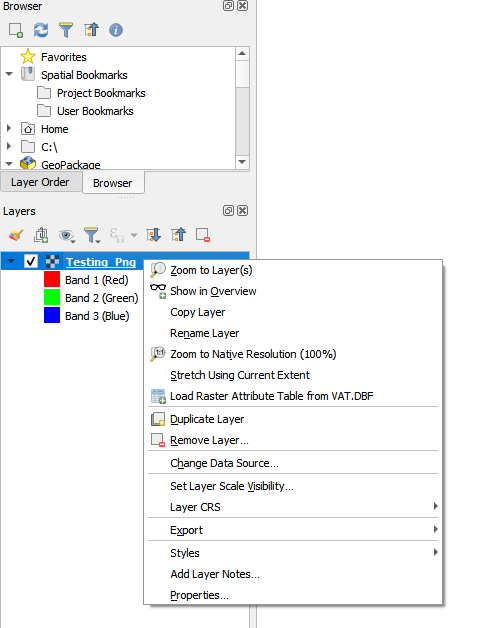
-
Click Export → Save As.
-
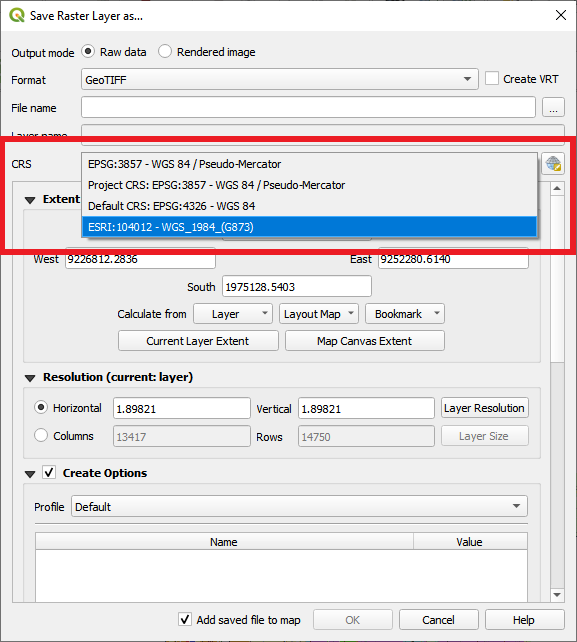
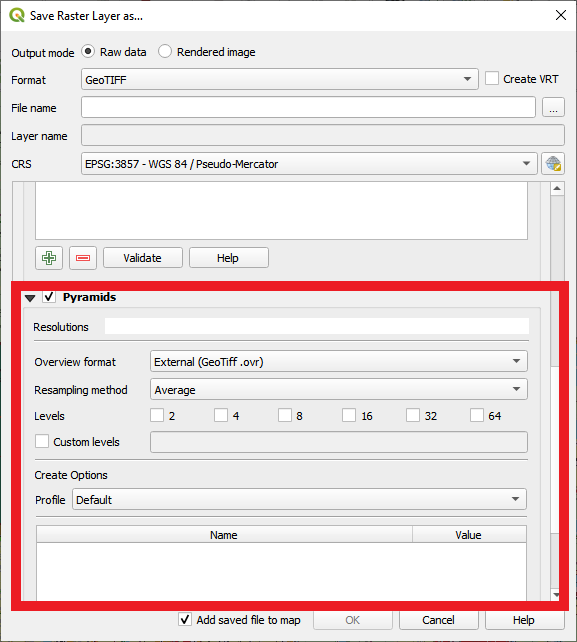
In the Save Raster Layer as window
-
Format: GeoTIFF (.tif)
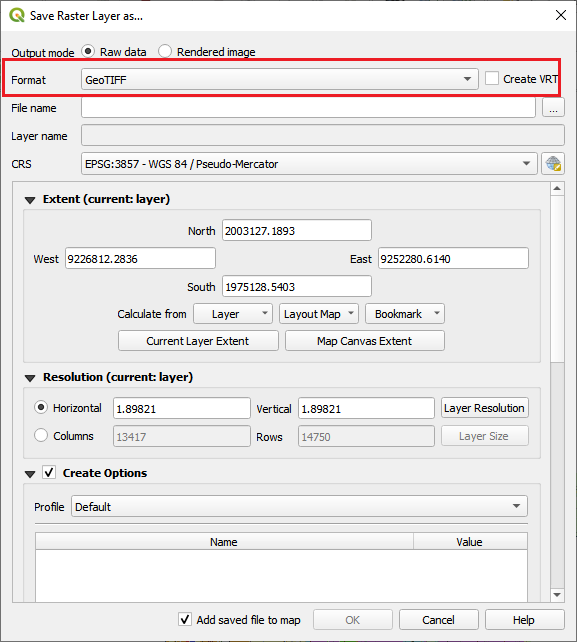
-
CRS: Choose the correct Coordinate Reference System (CRS)
-
Resolution: Set the appropriate pixel size (same as the original image)
-
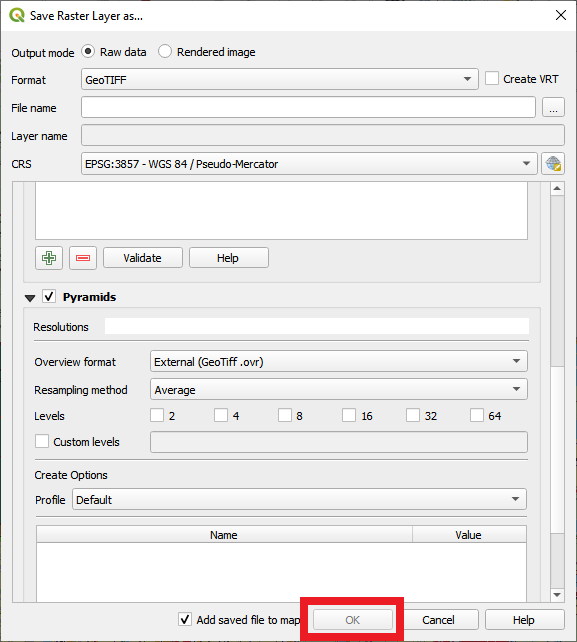
Click OK to export.
-
-
-
To view the tiff file SNAPDPL Geospatial spaces we need to convert the file to XYZ tile.
-
Using QGIS we can process this file into XYZ tiles
Processing GeoTIFF to XYZ Tiles and Exporting as PNG in QGIS
-
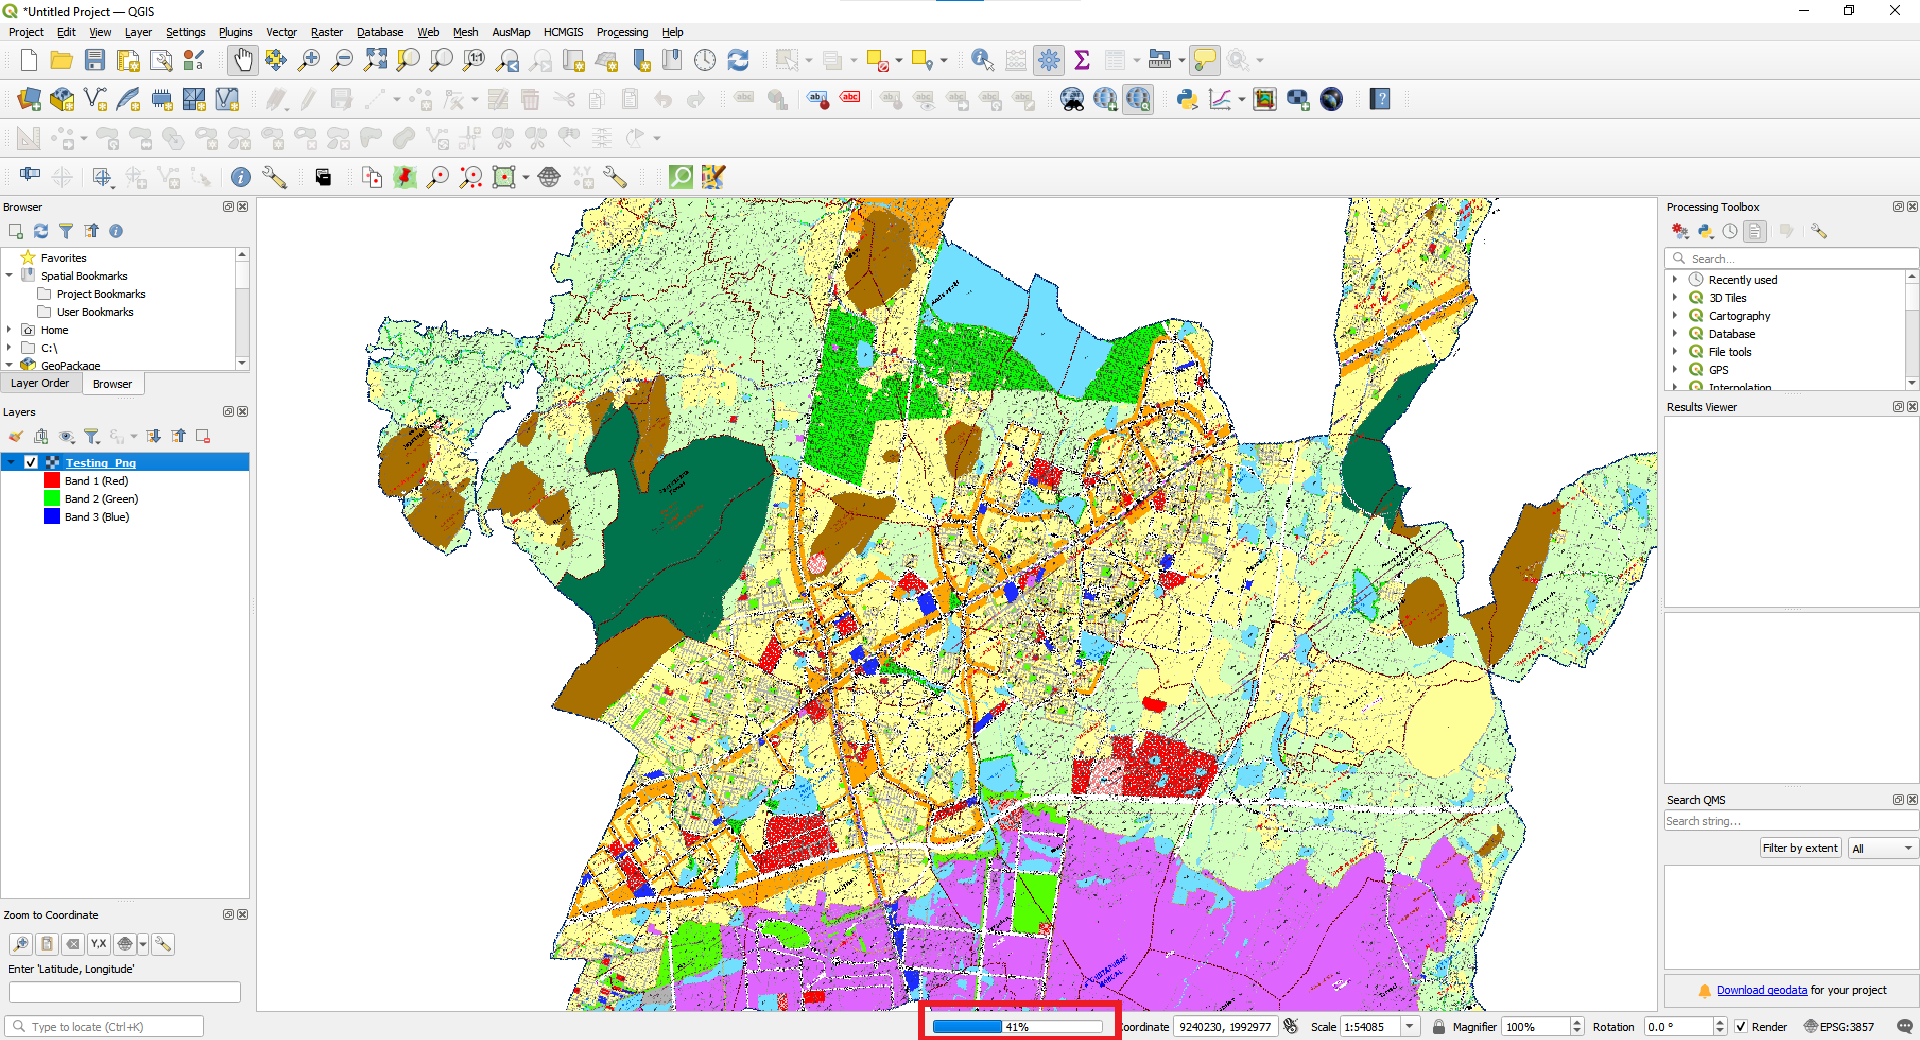
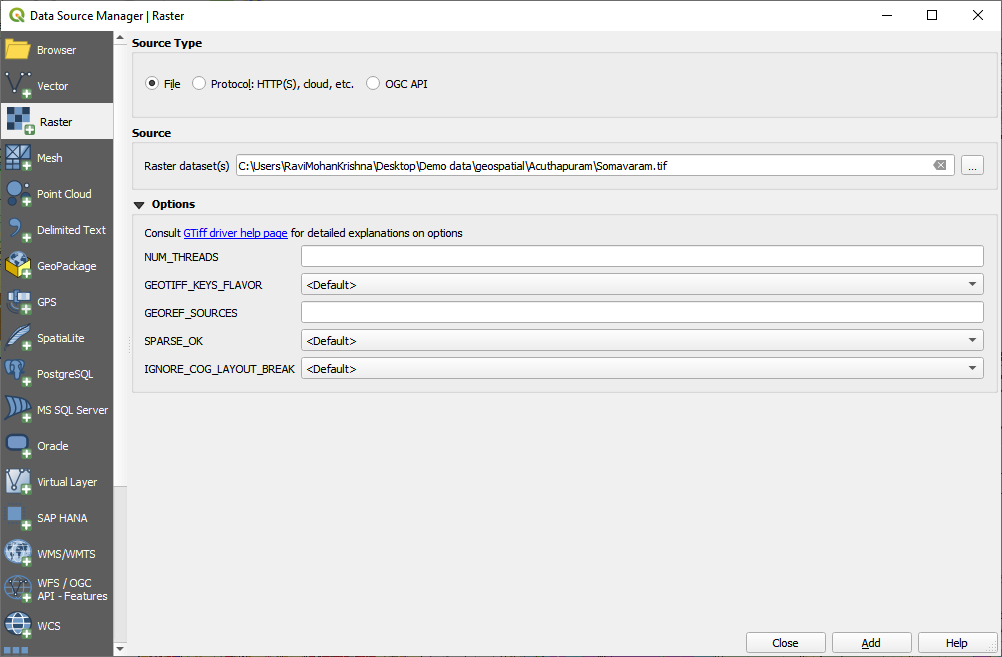
Load the GeoTIFF File into QGIS
-
Open QGIS and create a new project.
-
Go to Layer → Add Raster Layer.
-
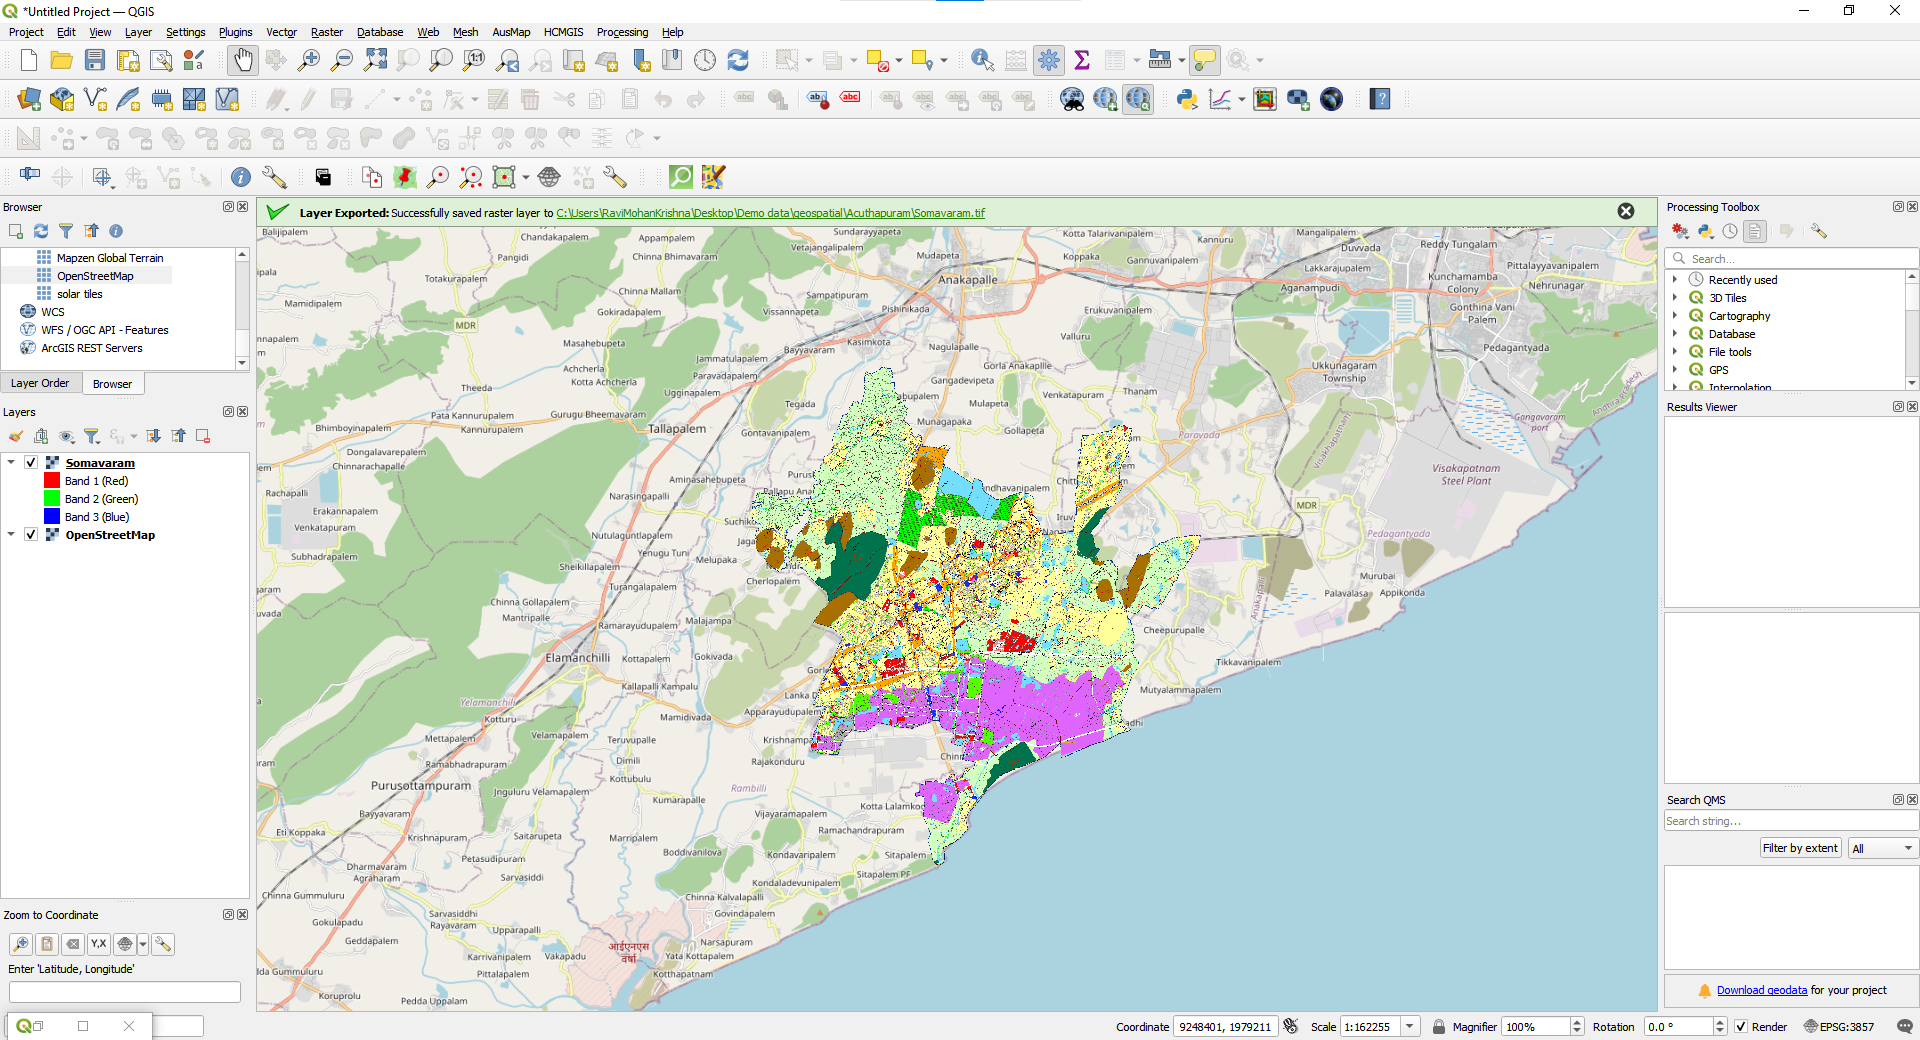
Select the GeoTIFF (.tif) file and click Open.
-
Ensure the raster is correctly georeferenced by checking alignment with basemaps.
-
-
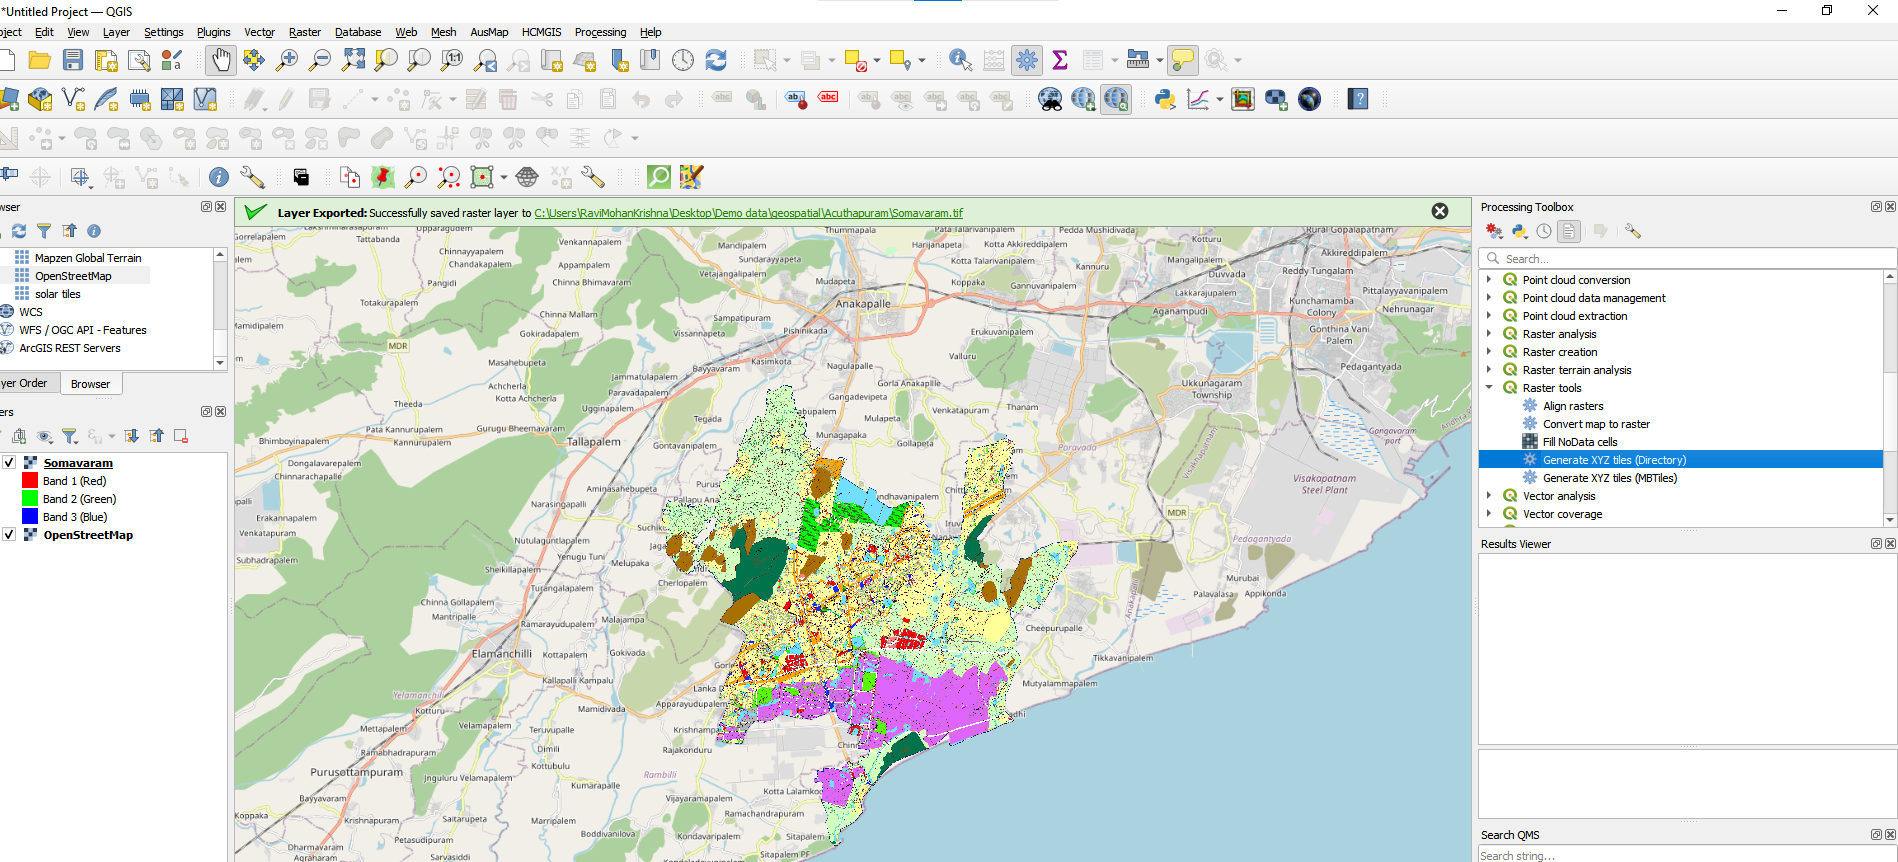
Convert GeoTIFF to XYZ Tiles
-
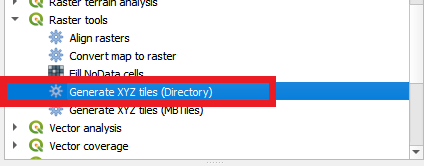
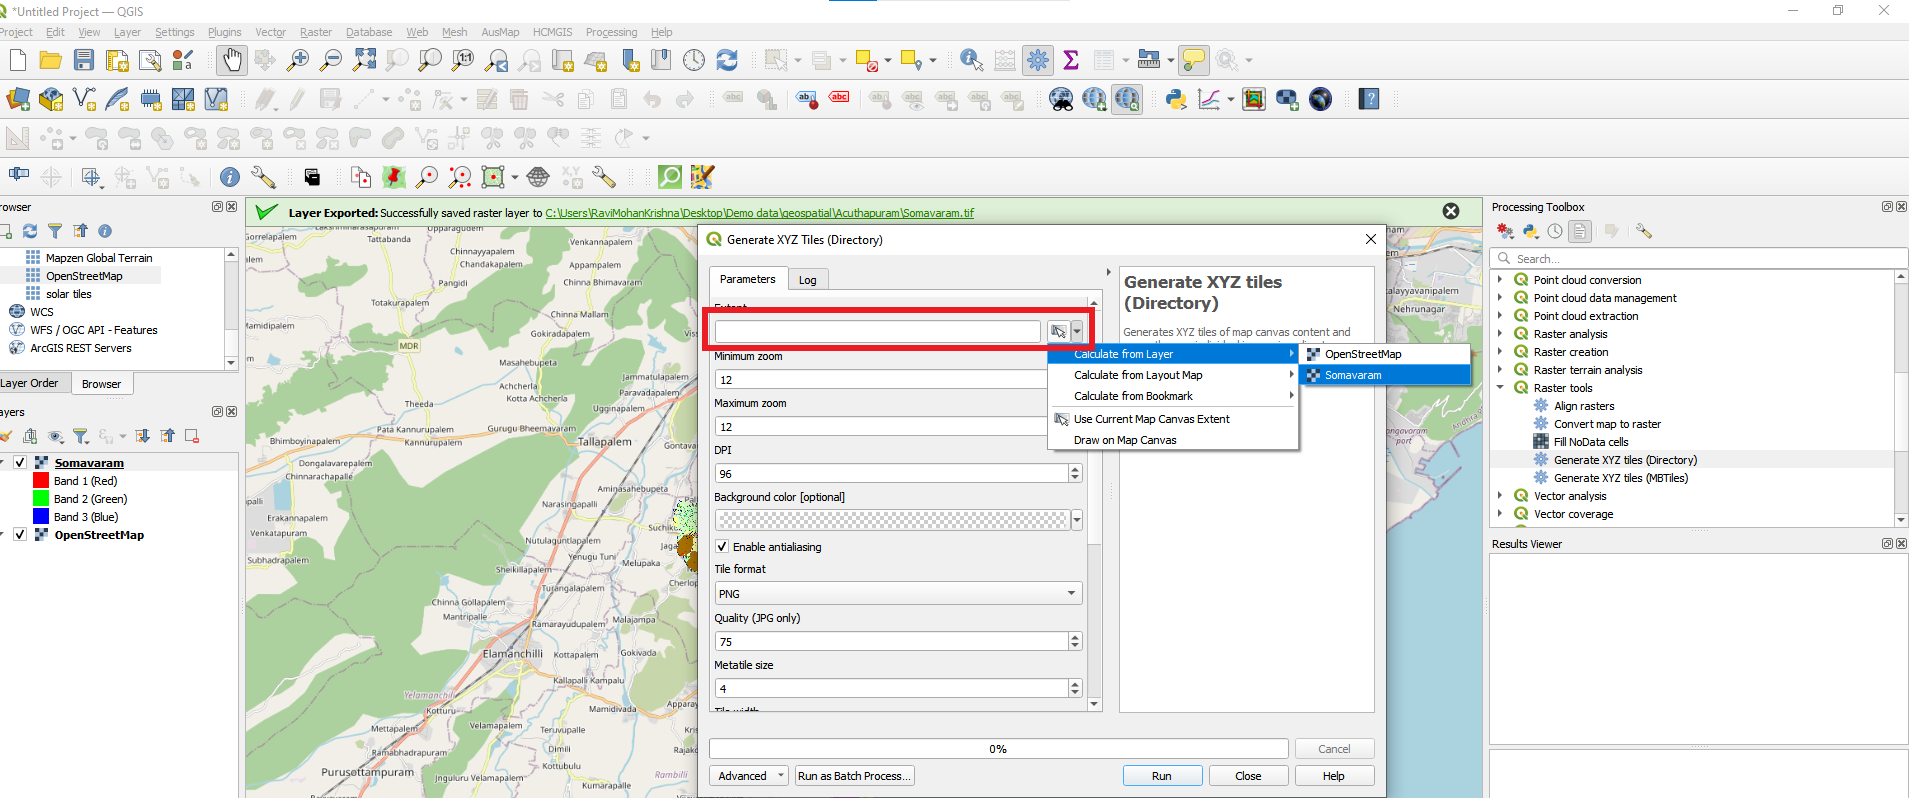
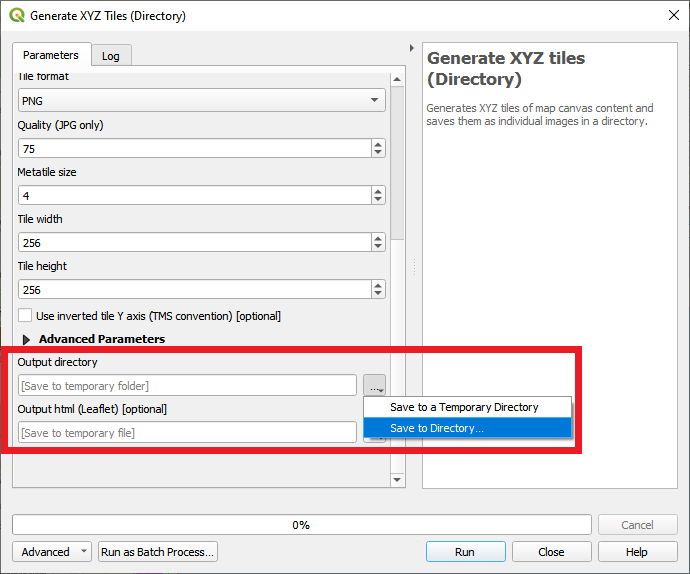
Go to Processing Toolbox → Search for Generate XYZ Tiles (Directory).
-
Click Generate XYZ Tiles (Directory).
-
In the Parameters window:
-
Input Layer: Select the GeoTIFF file.
-
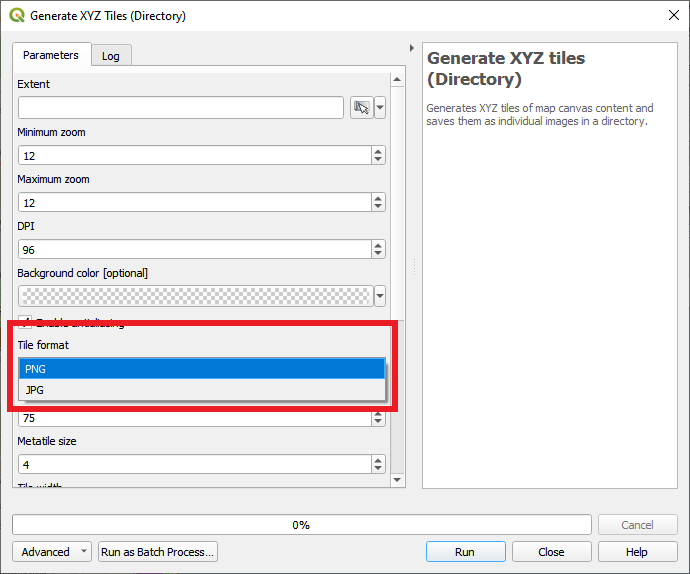
Tile Format: Choose PNG.
-
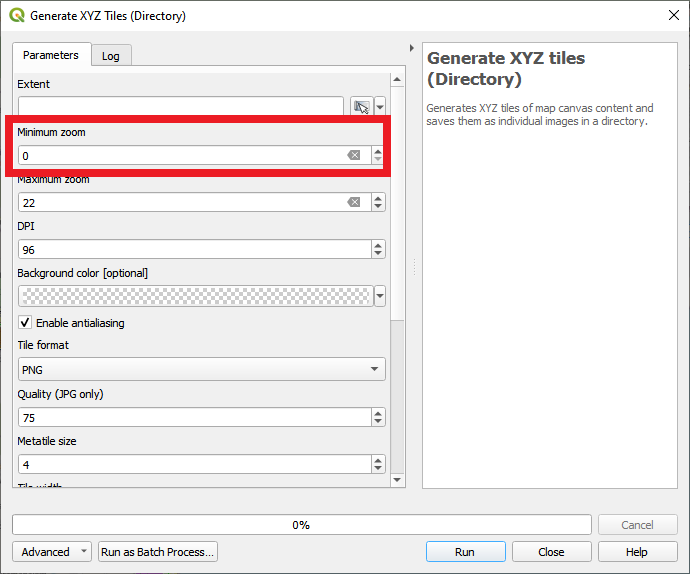
Min Zoom Level: Set it to 0.
-
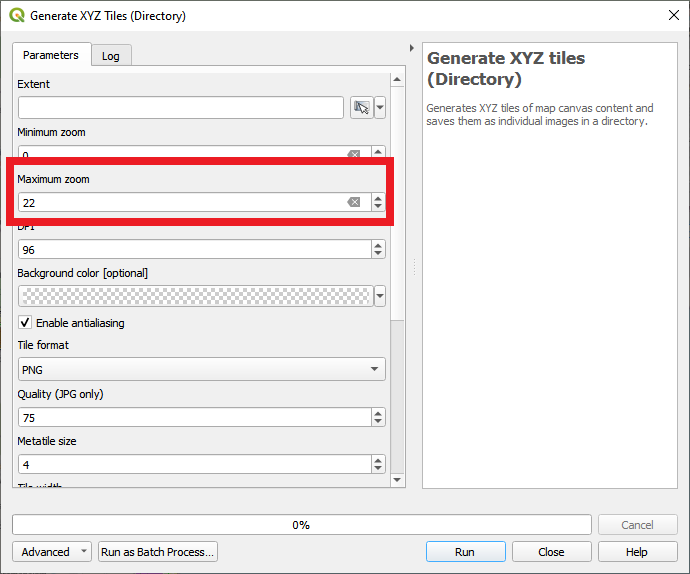
Max Zoom Level: Set it to 22 (highest detail level).
-
Tile Directory: Choose an output folder to store the tiles.
-
-
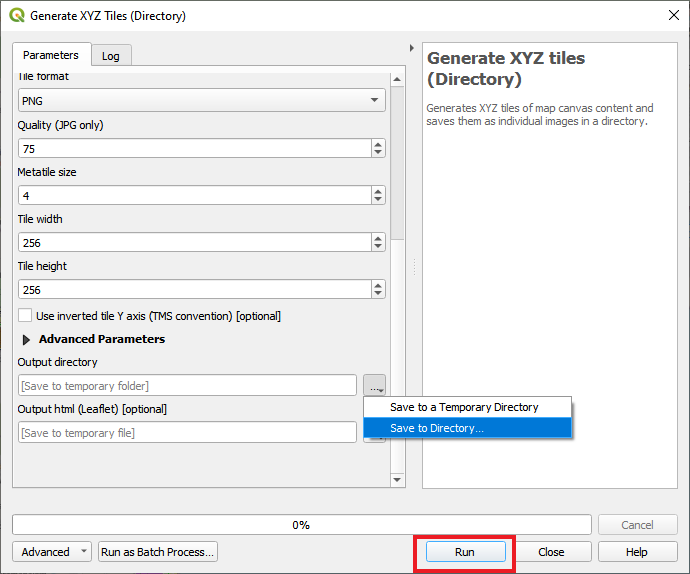
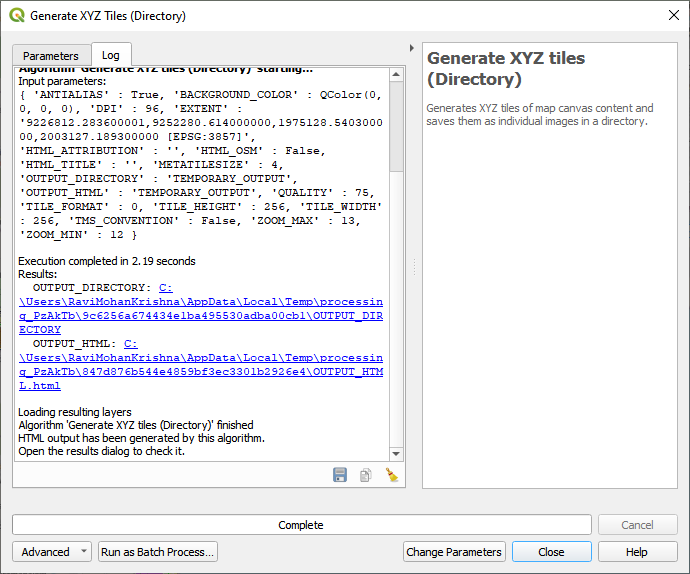
Click Run to generate XYZ tiles.
-
-
Export XYZ Tiles as PNG
-
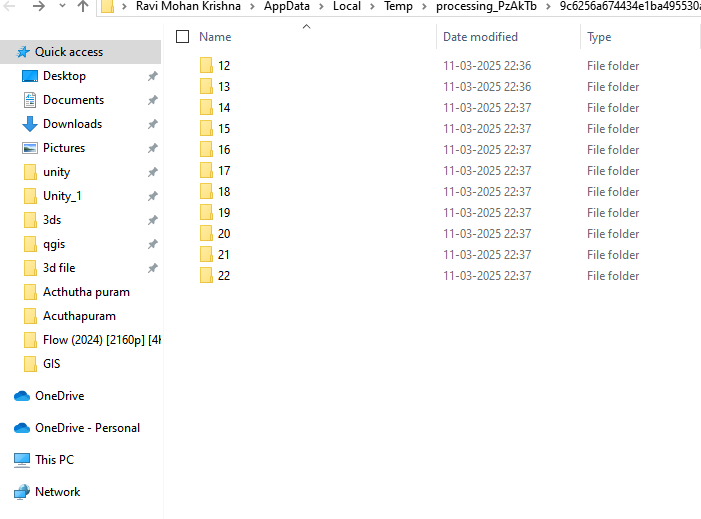
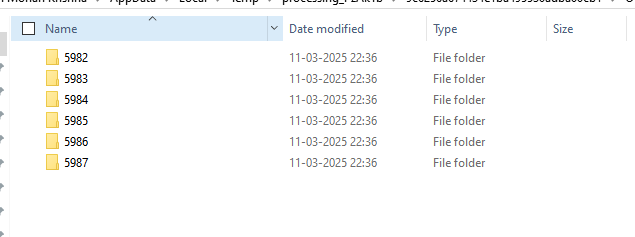
Navigate to the output directory where the tiles are stored.
-
The tiles will be stored in a folder structure based on zoom levels.
-
Each tile is a PNG image and follows the XYZ tile scheme.
-
-
Upload and View XYZ tiles in Snapdpl Platform
-
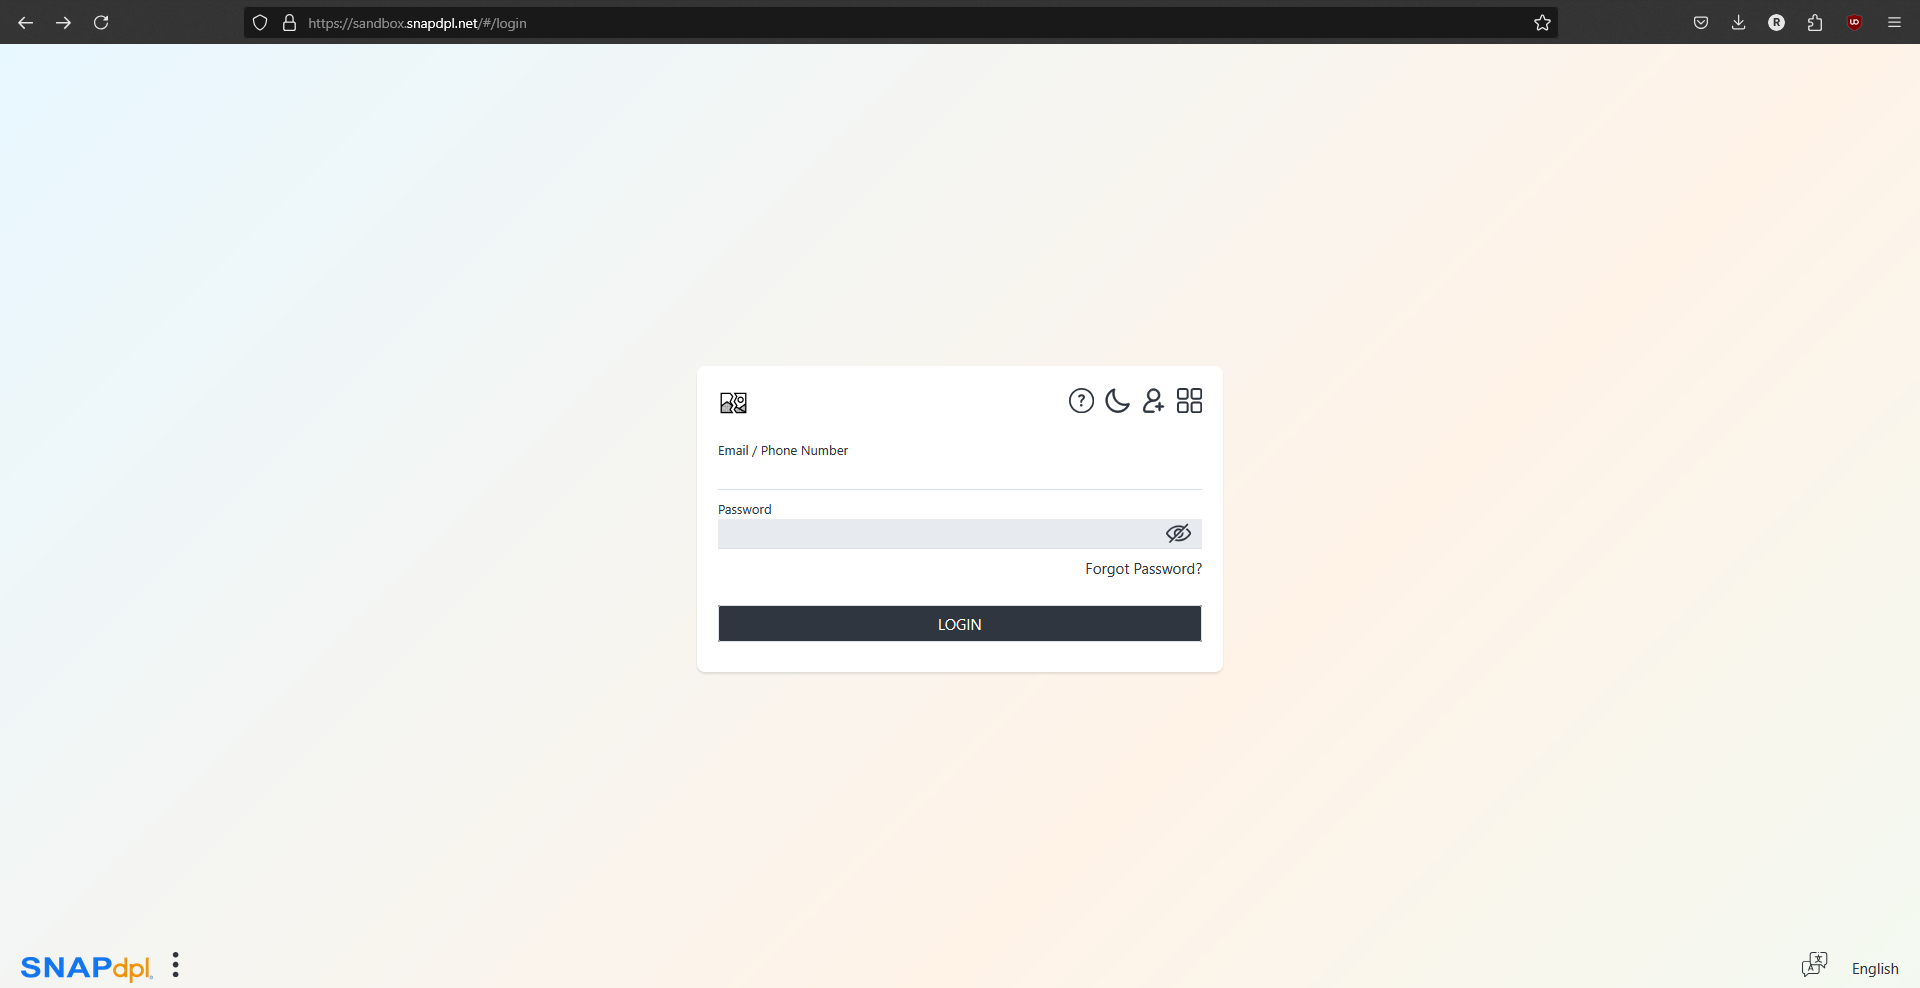
Open sandbox.snapdpl.net or click on below [link] (https://sandbox.snapdpl.net)
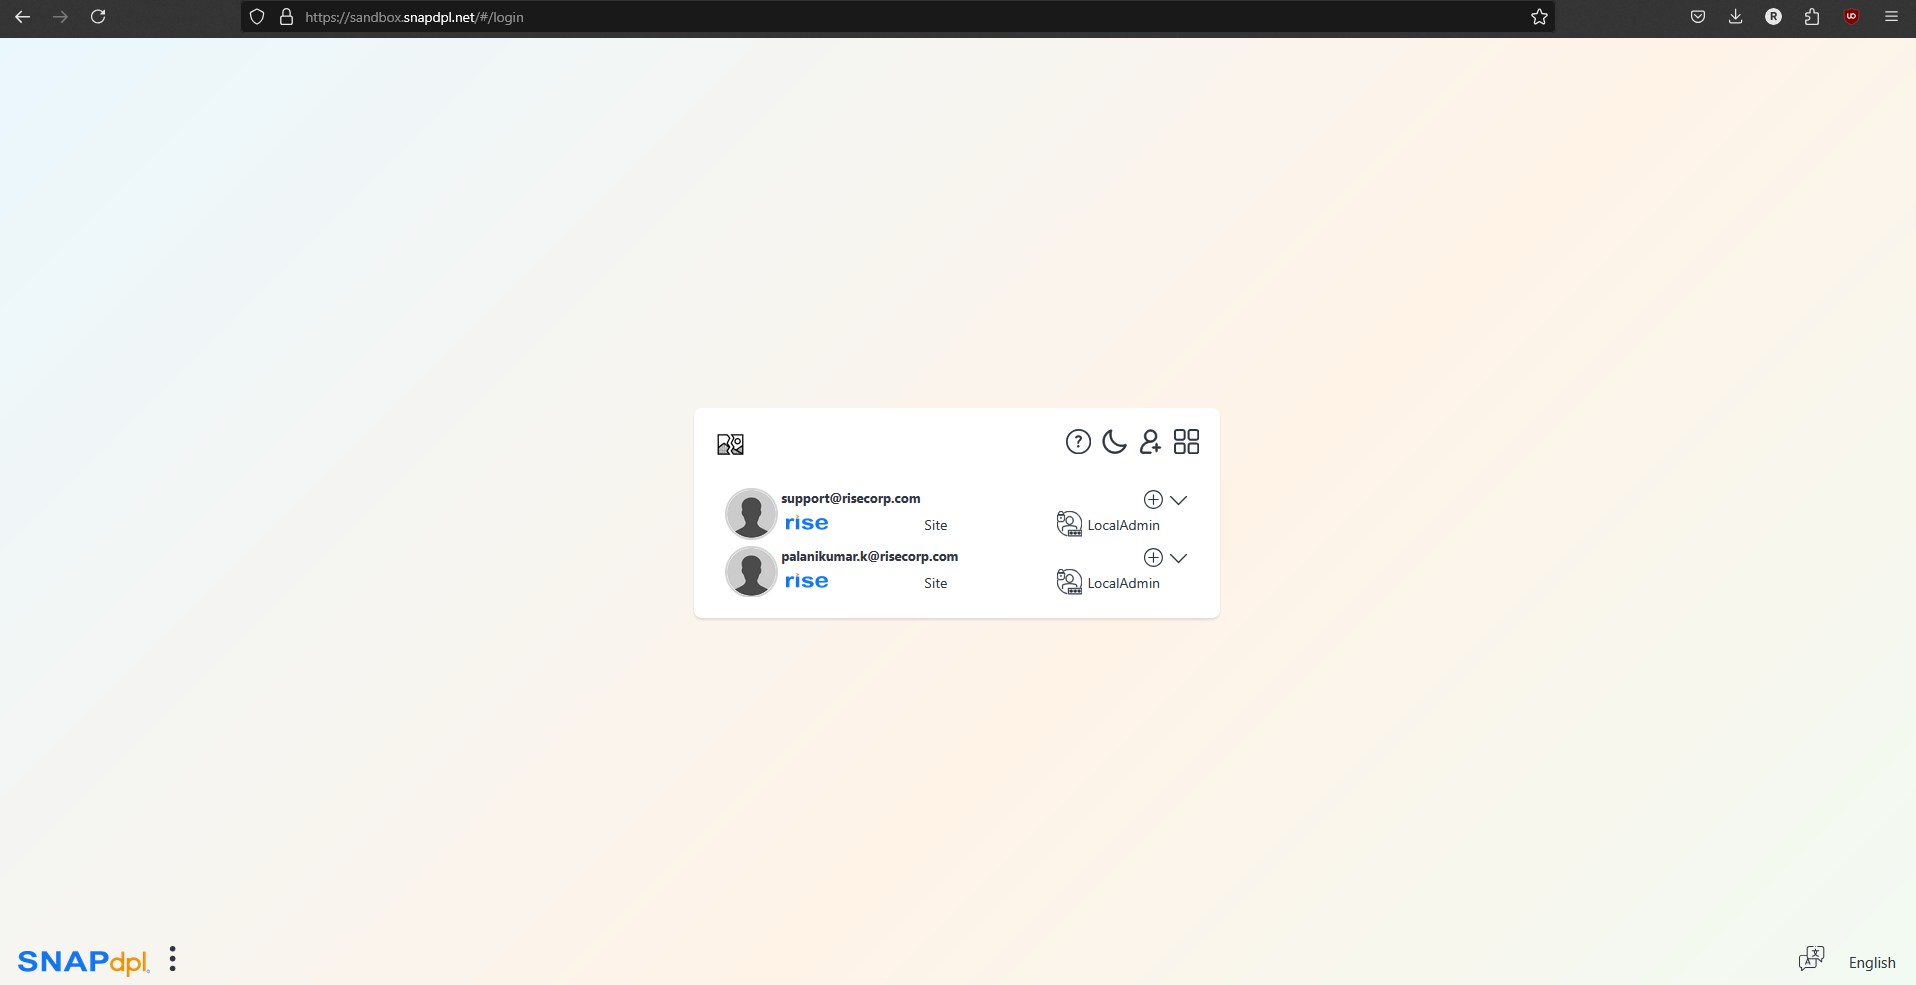
-
Log in with valid credentials.
Create new Space
-
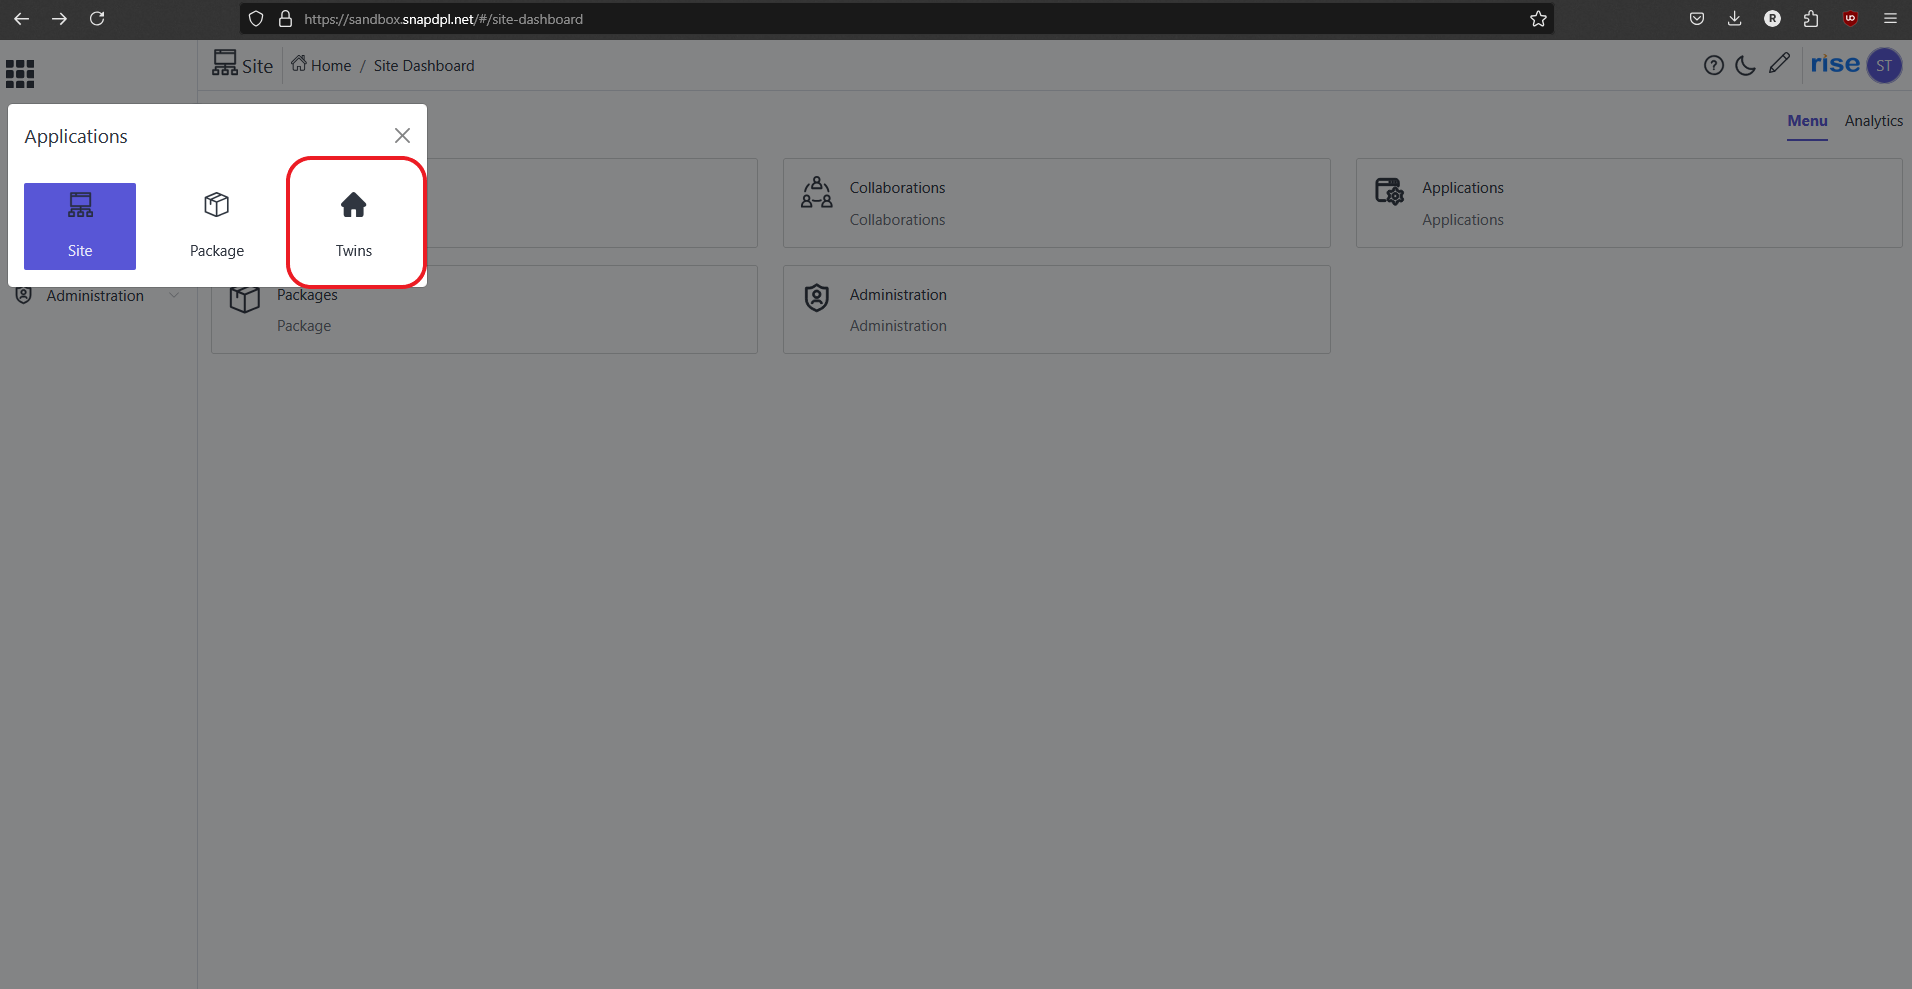
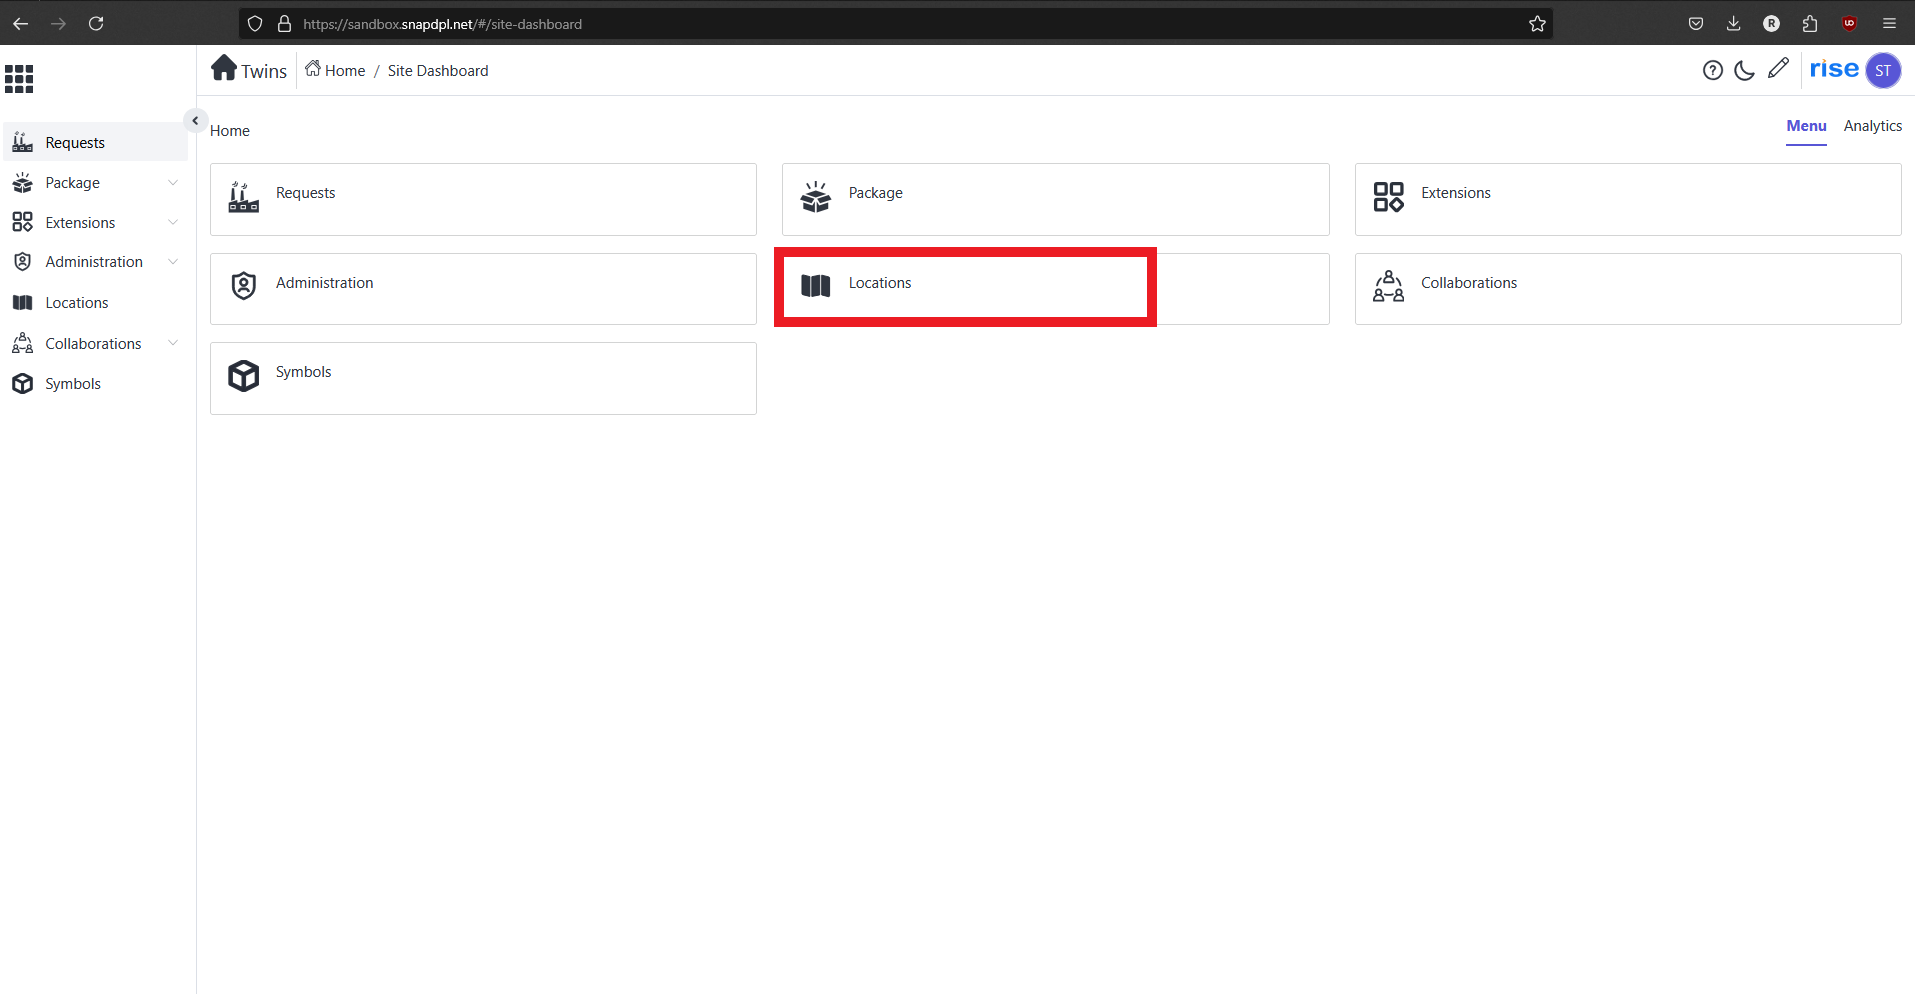
Click the Home icon and select the Twins application.
-
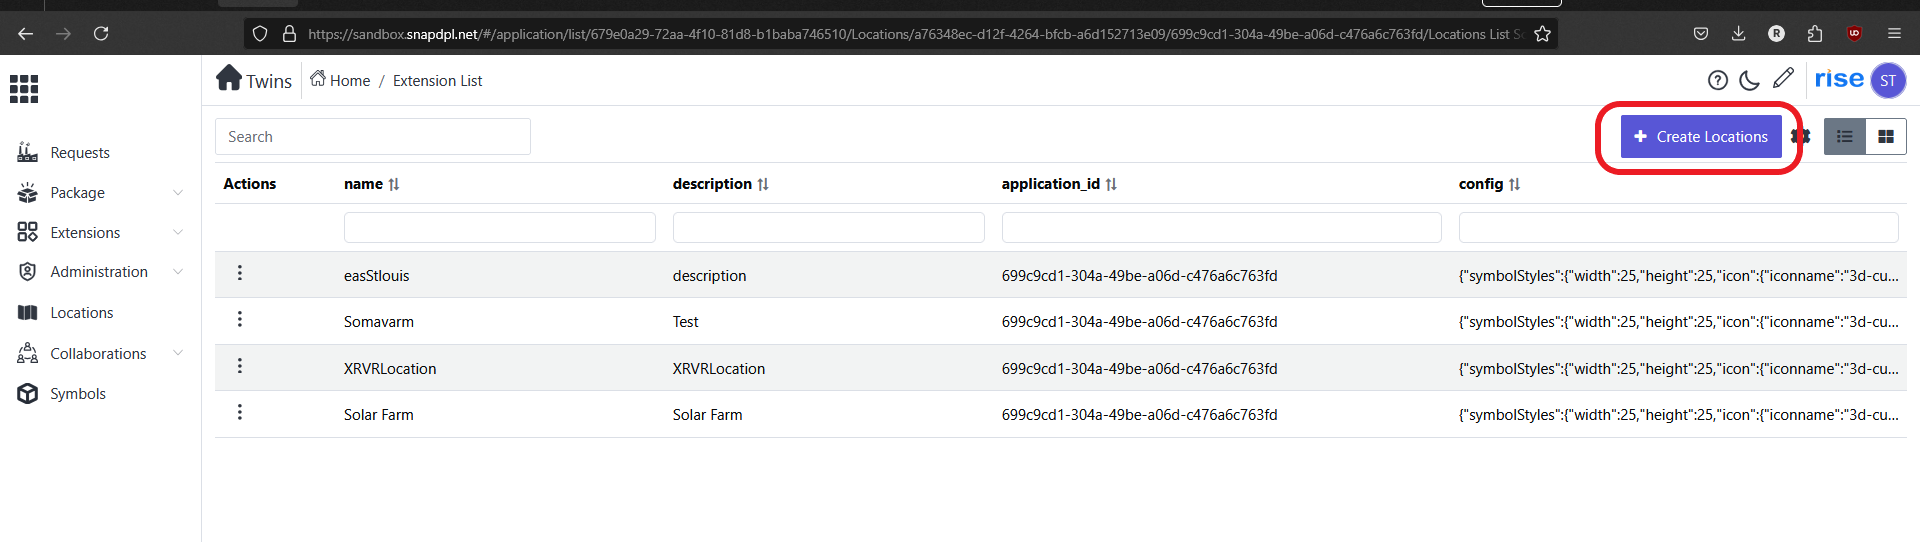
Go to Location → Create Location.
-
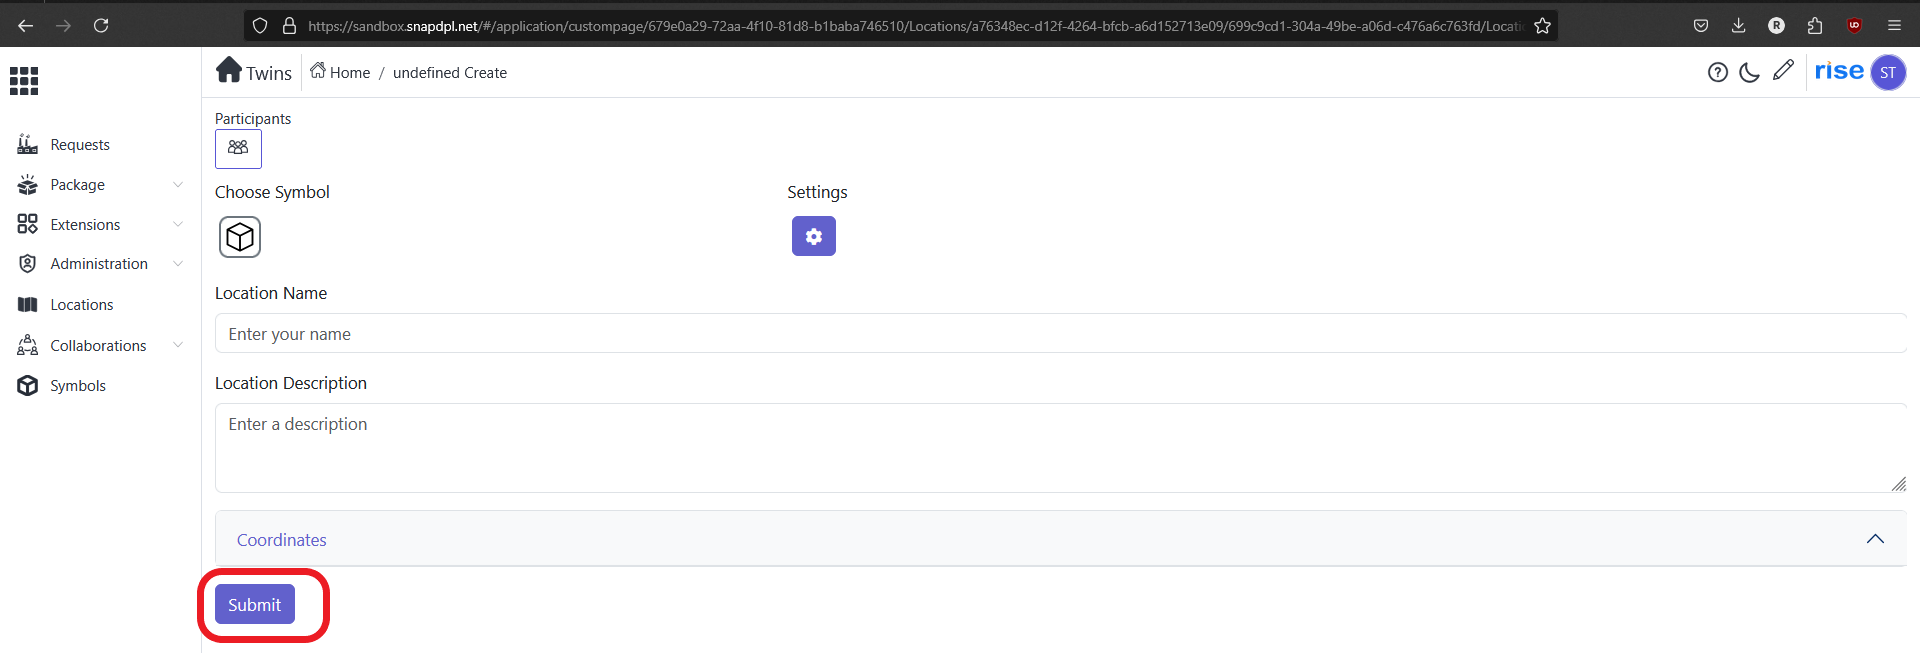
Fill in the required fields and submit.
-
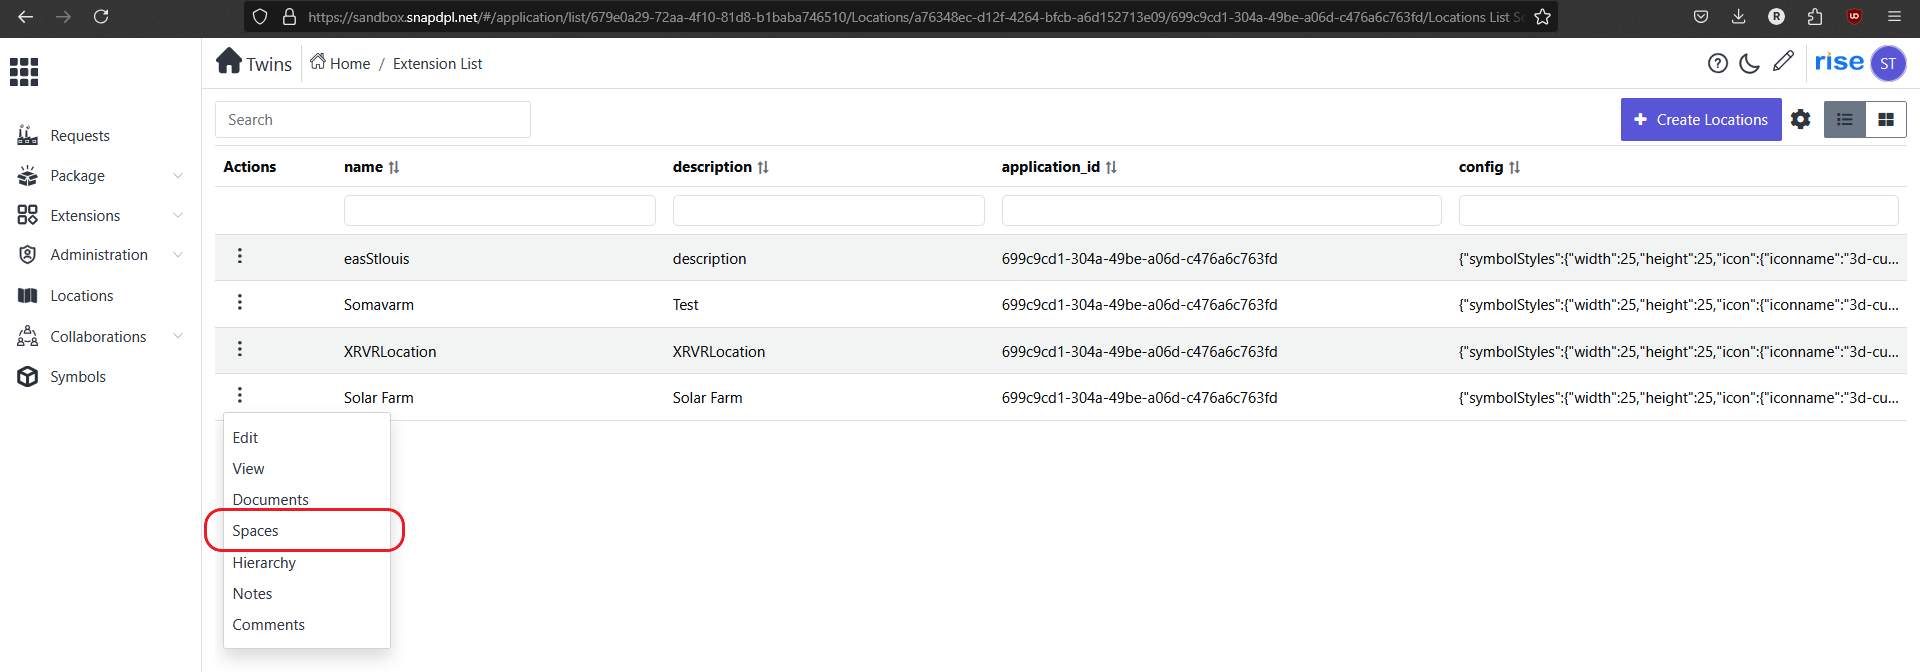
Click on 'action button' on created location and select 'spaces'. Spaces page will open.
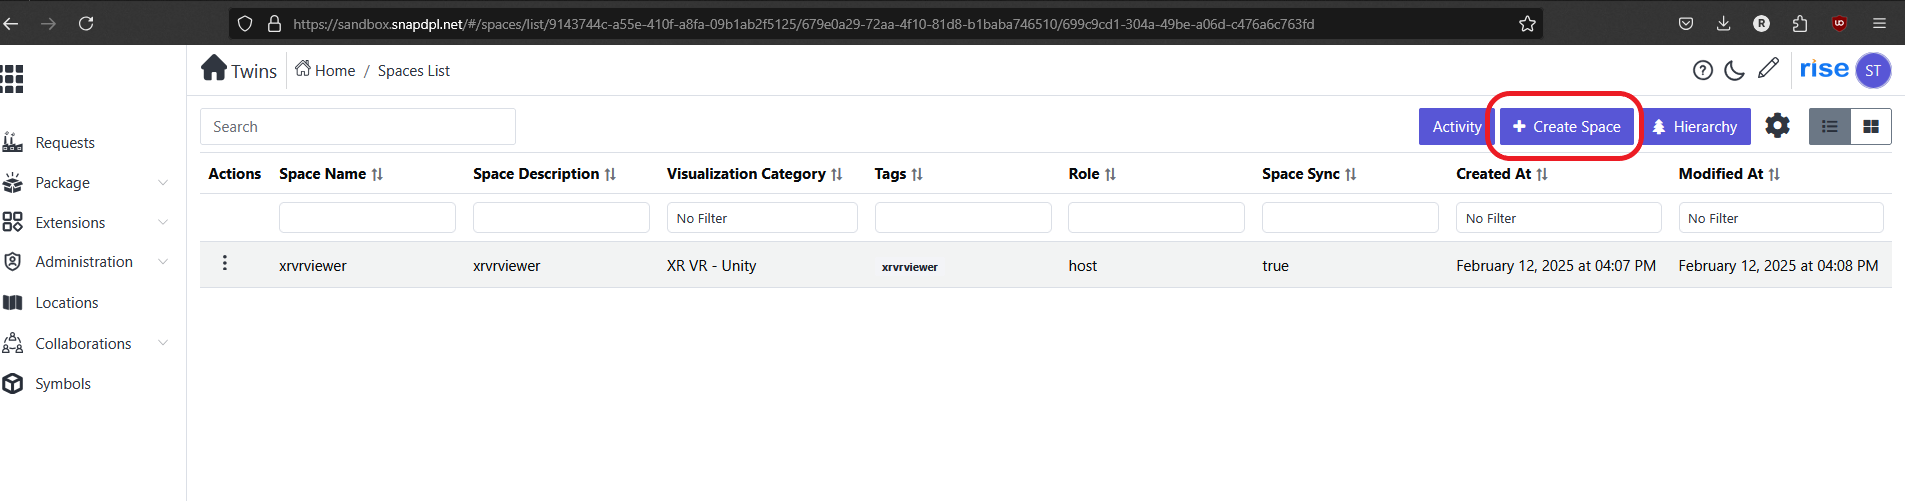
-
Click on ' create space' and choose Maps category are 'Geospatilal- Bing, Geospatial-Google and Geospatial-Openstreet maps' .
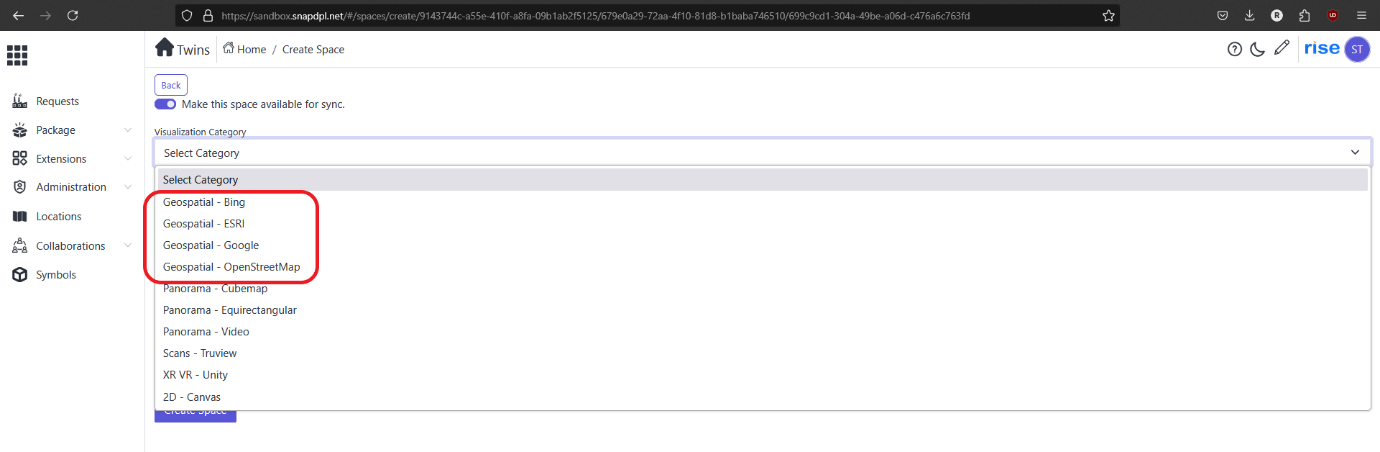
-
Fill all filed and click on create space.
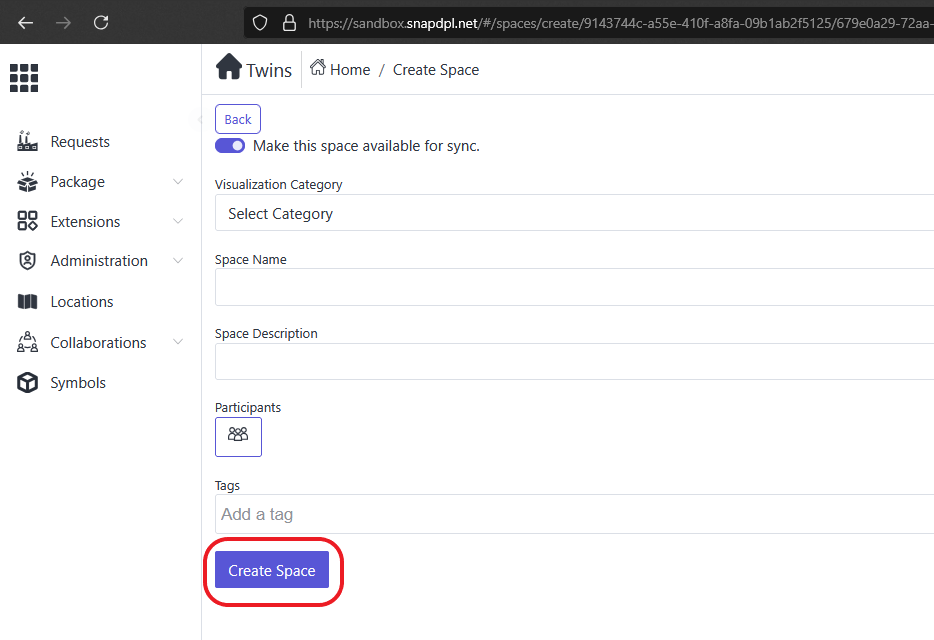
-
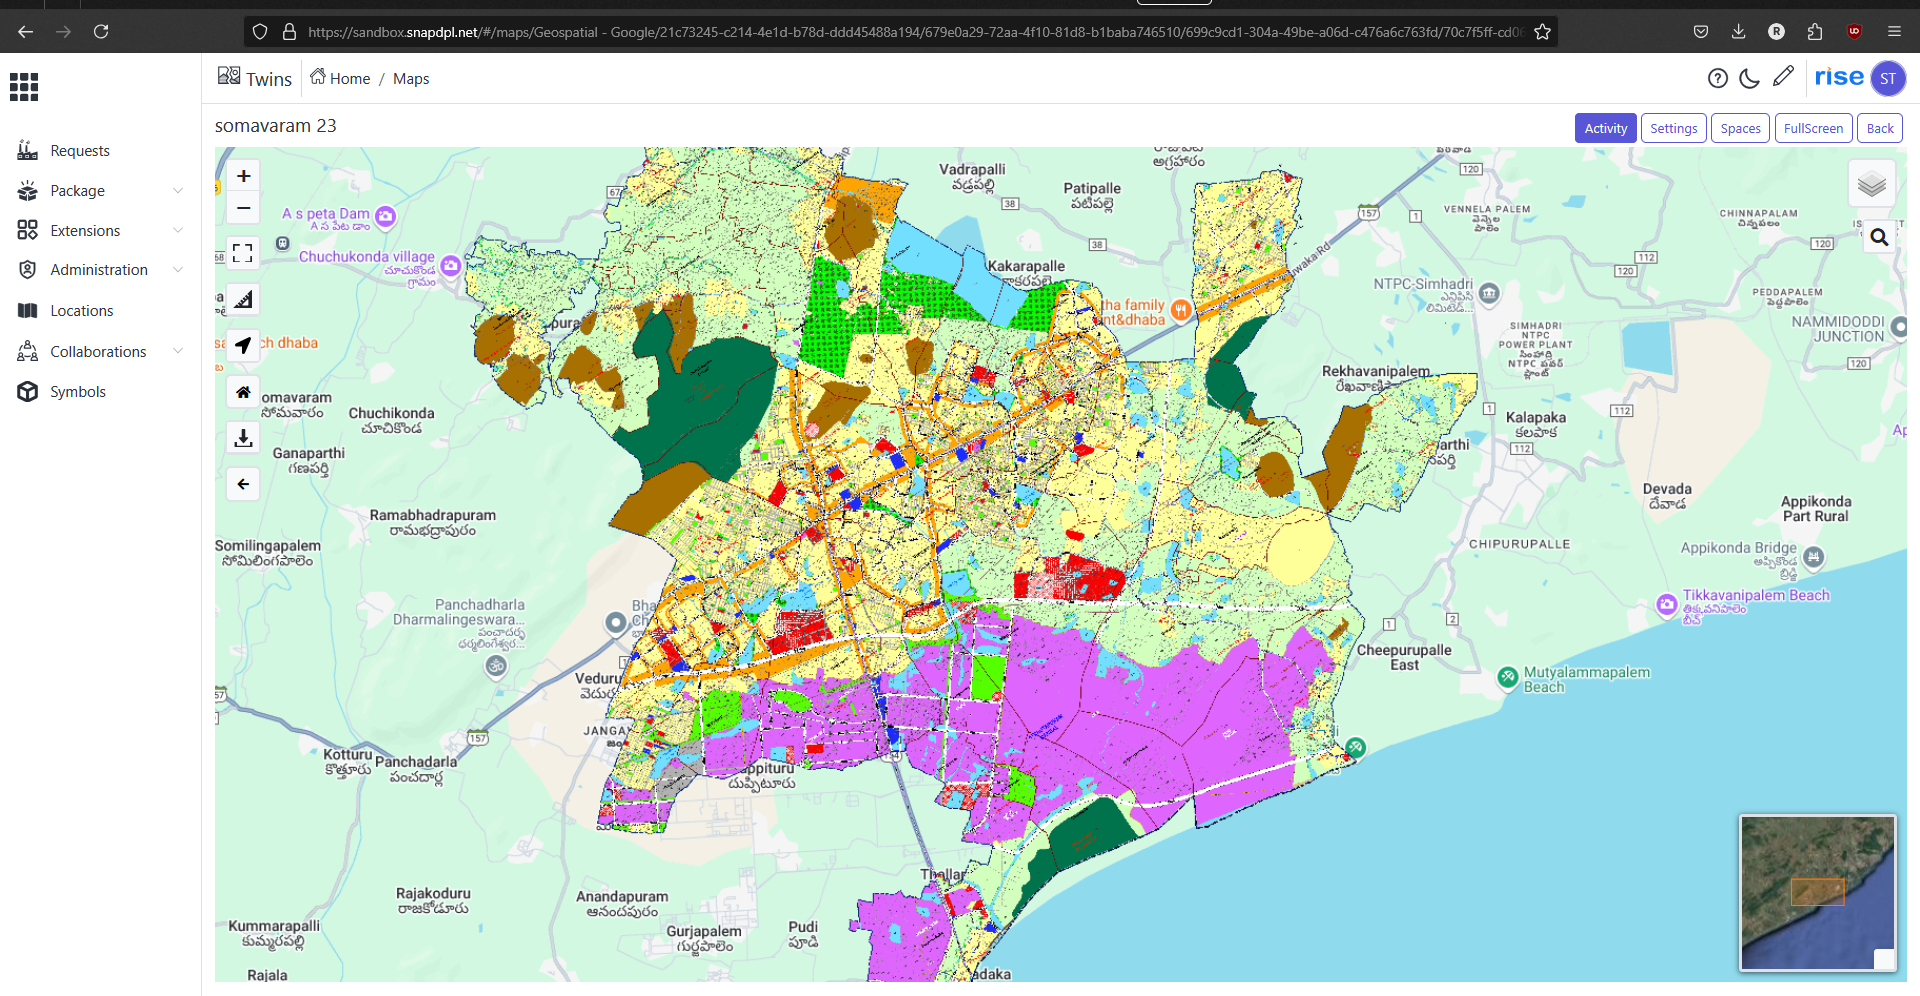
Created space will shown with selected Geospatial map.
Example : If we selected Google maps in category . It will show created name with google maps- Note : To upload the XYZ file first we need to create new content package.
Upload XYZ tiles
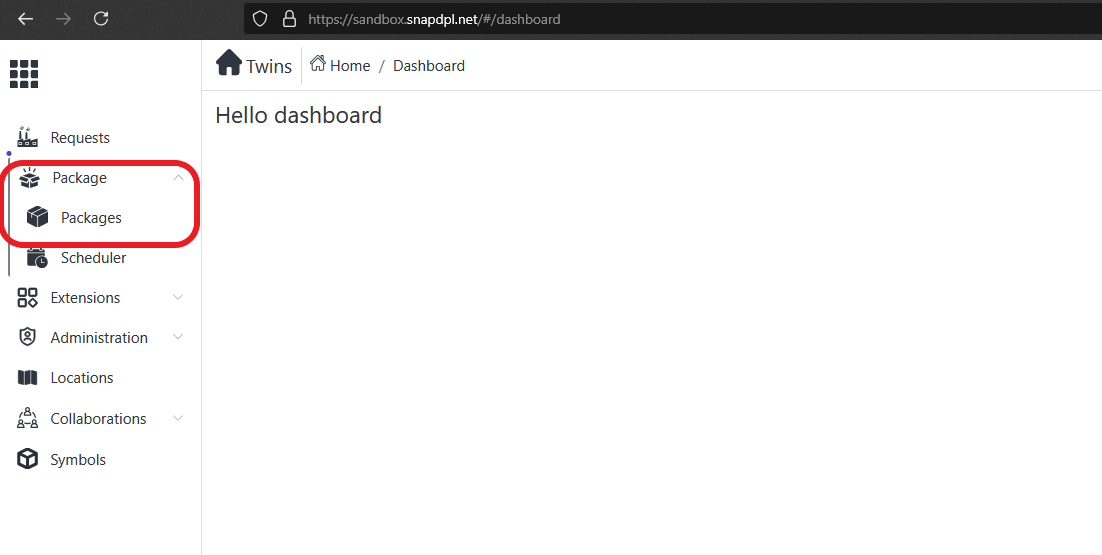
-
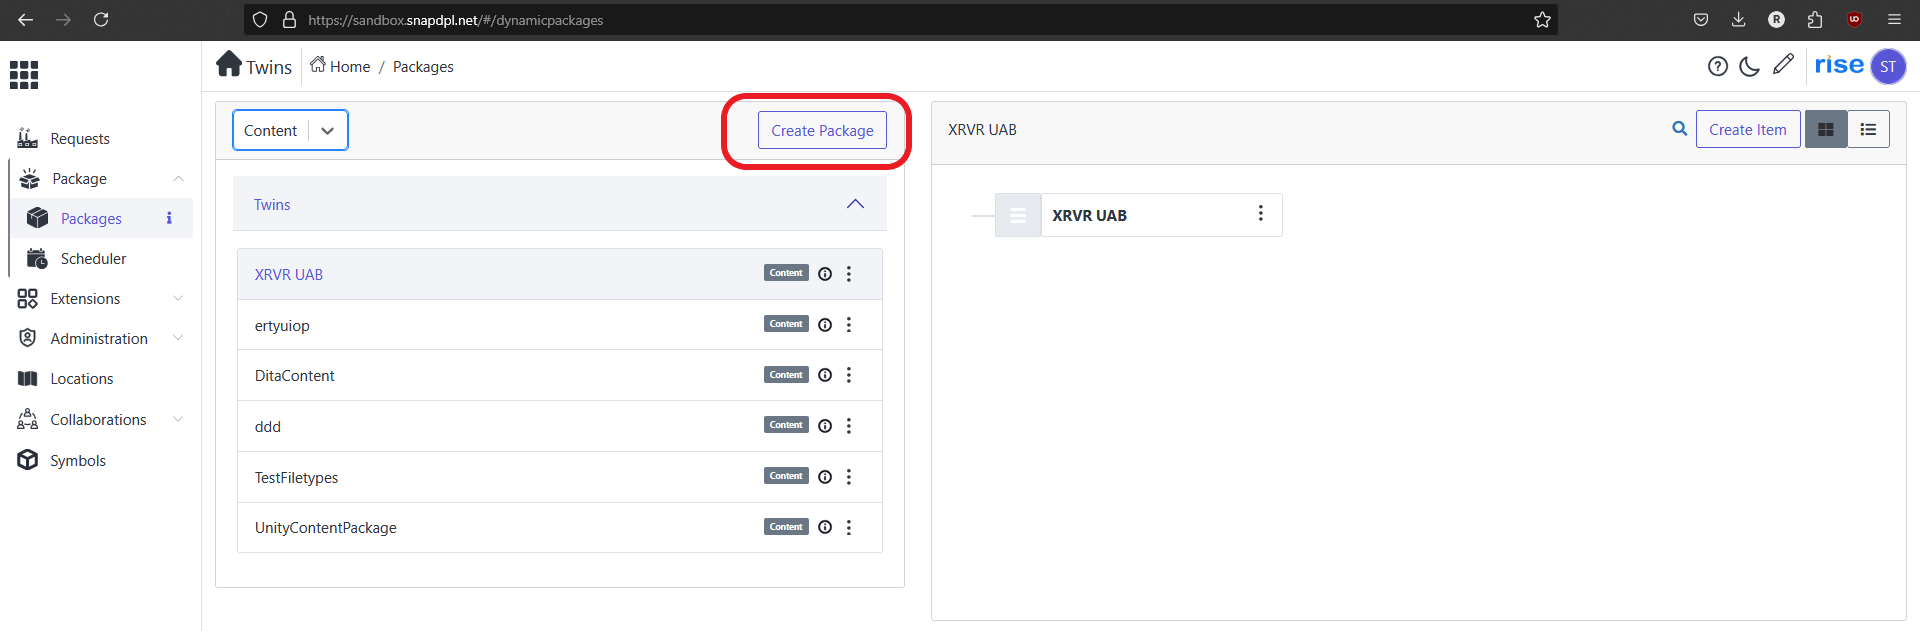
To create Content package Go back to home. In side menu bar Click on 'package' and select 'packages'.
-
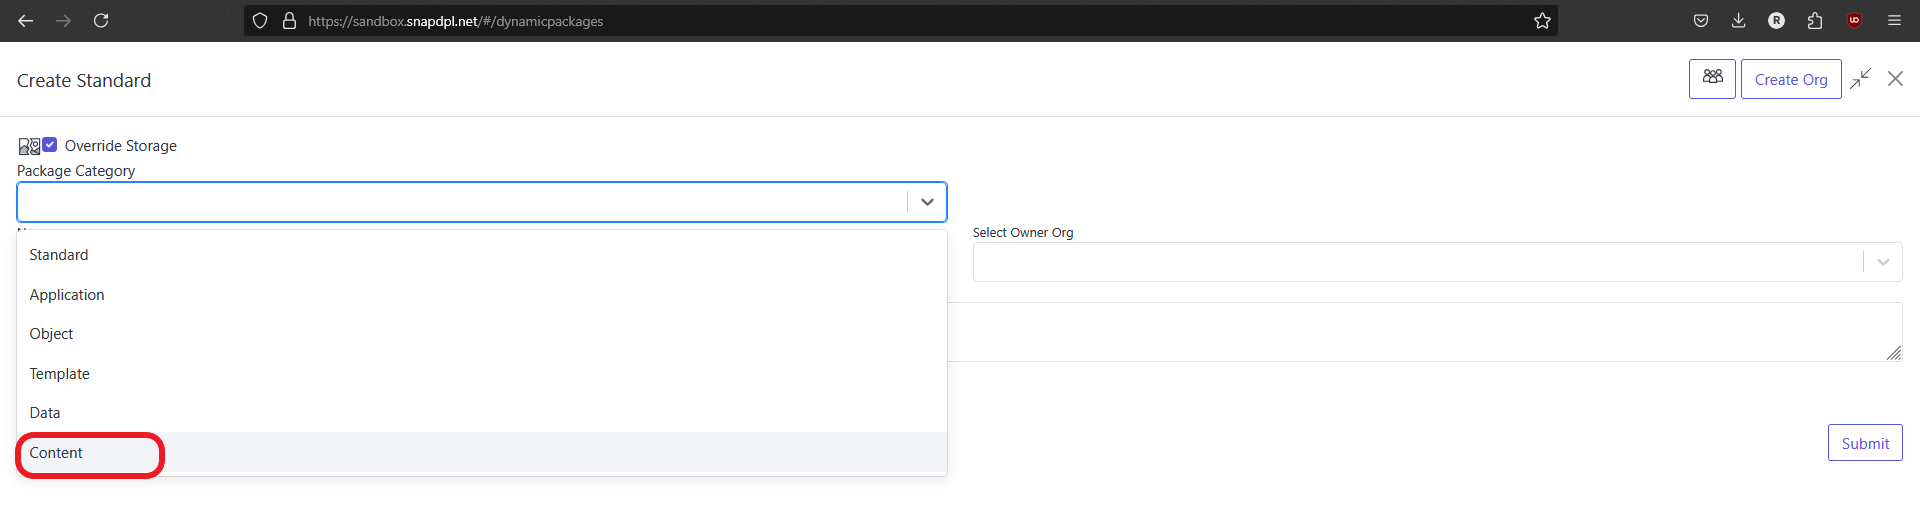
Click on 'Create package' button. Create standard page will open.
-
In package category choose 'content' option . And fill fields.
-
Click on 'submit' to create package.

-
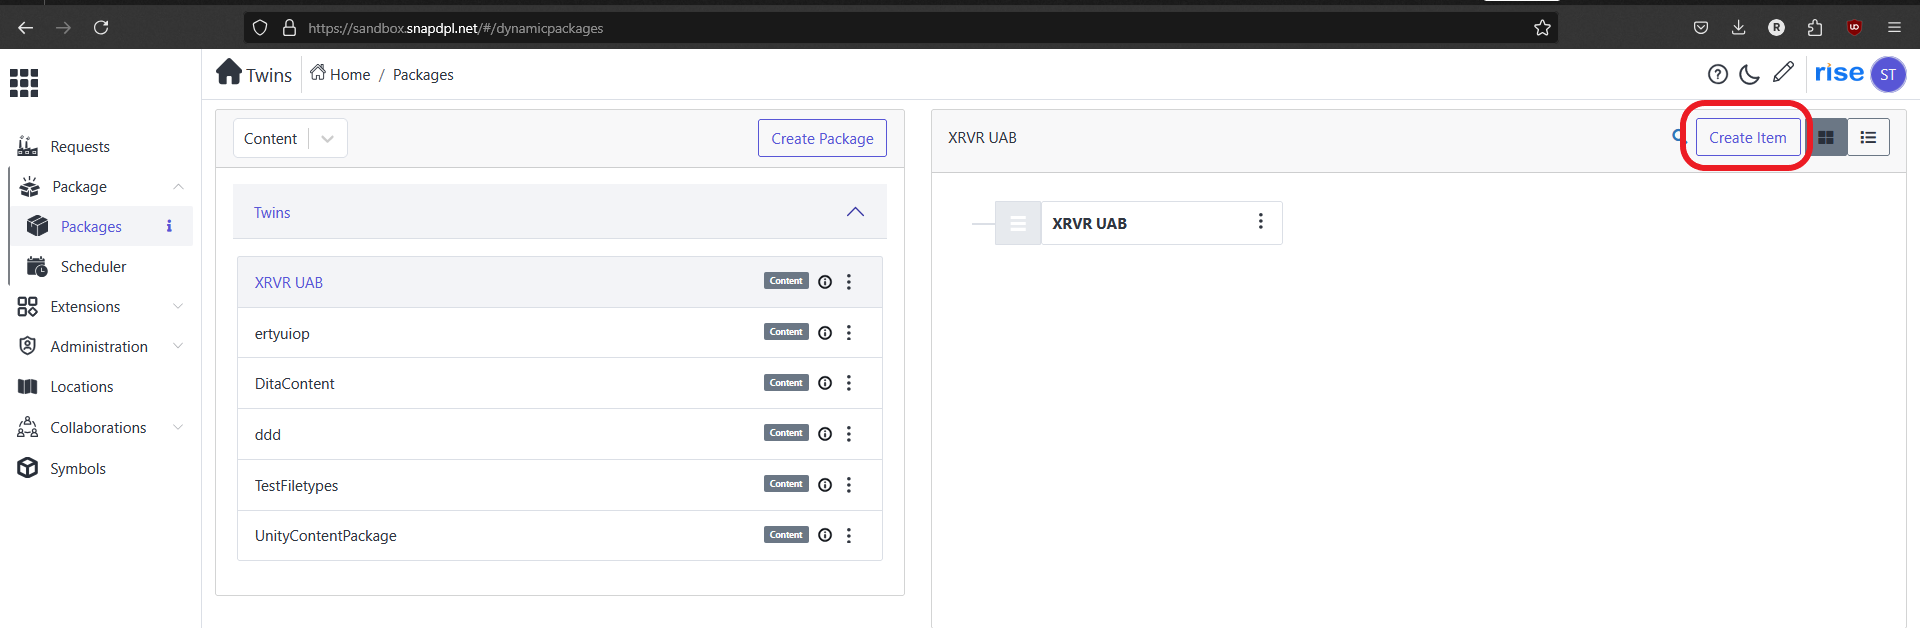
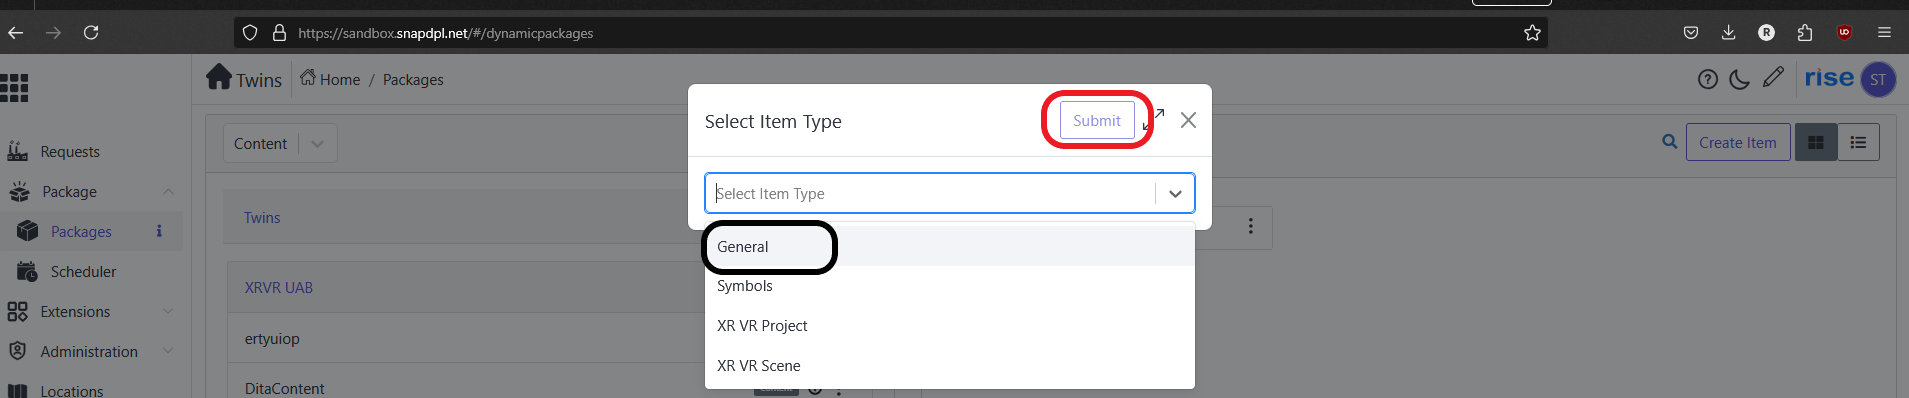
Select newly created package and find 'create item' button and click on it. Popup page will open.
-
Select 'General' and click on 'submit'.
-
Fill the fields in 'details' menu and click on 'submit' button.

-
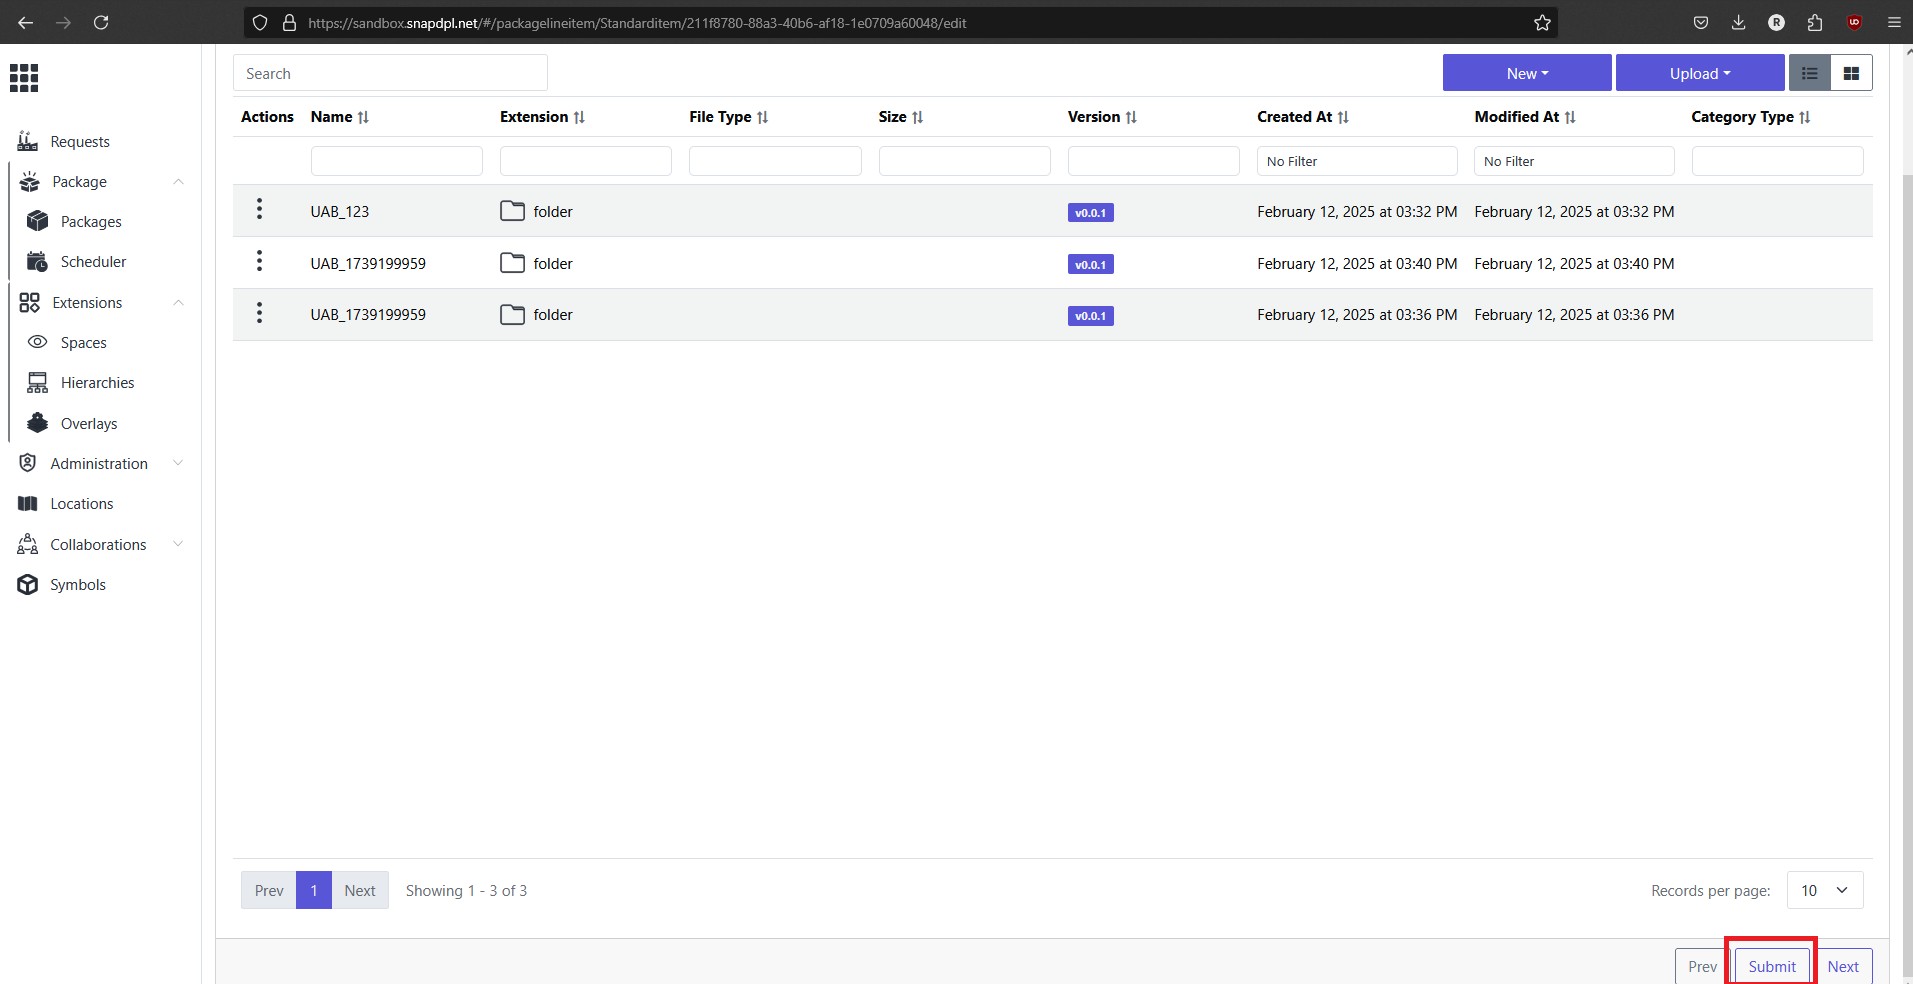
New line time will created. Click on 'actionbutton' and select 'edit' button.
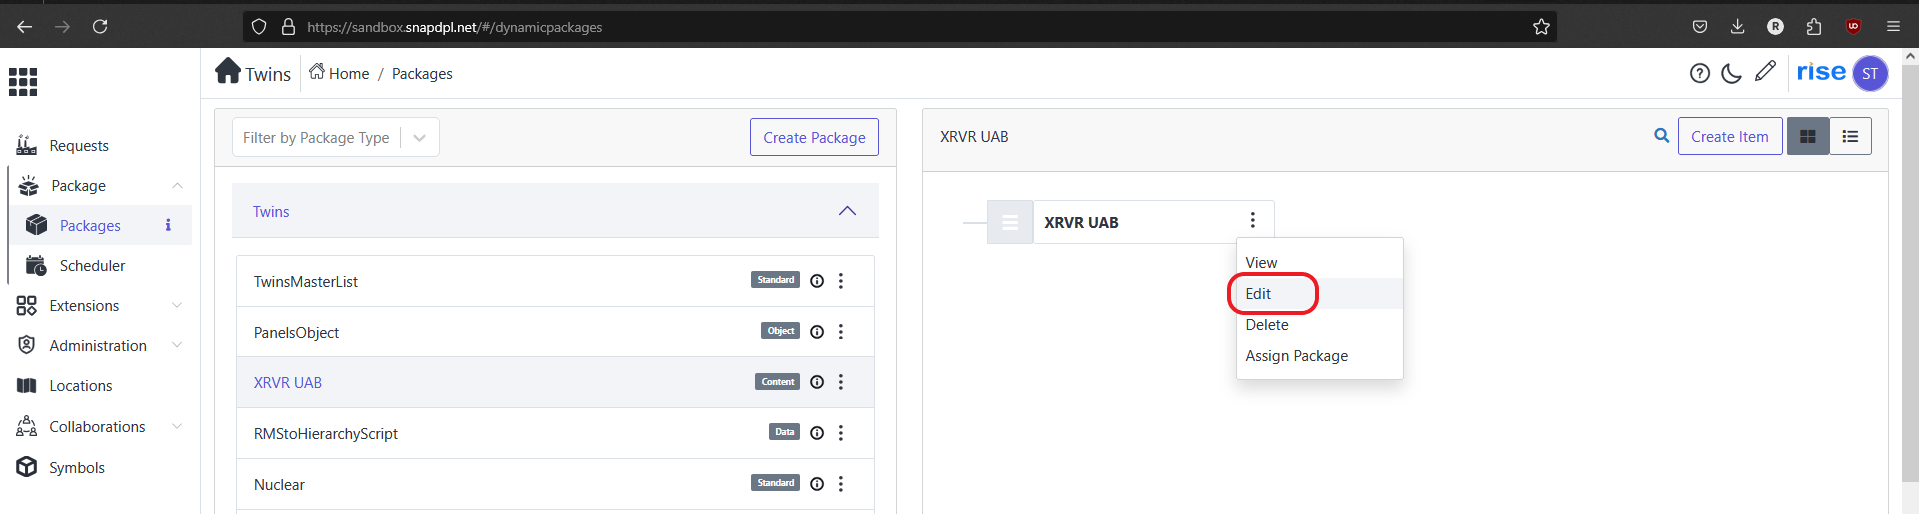
-
Click on 'Documents' option . In Actions 'click on 'upload' and select 'Files'. Popup page will open.
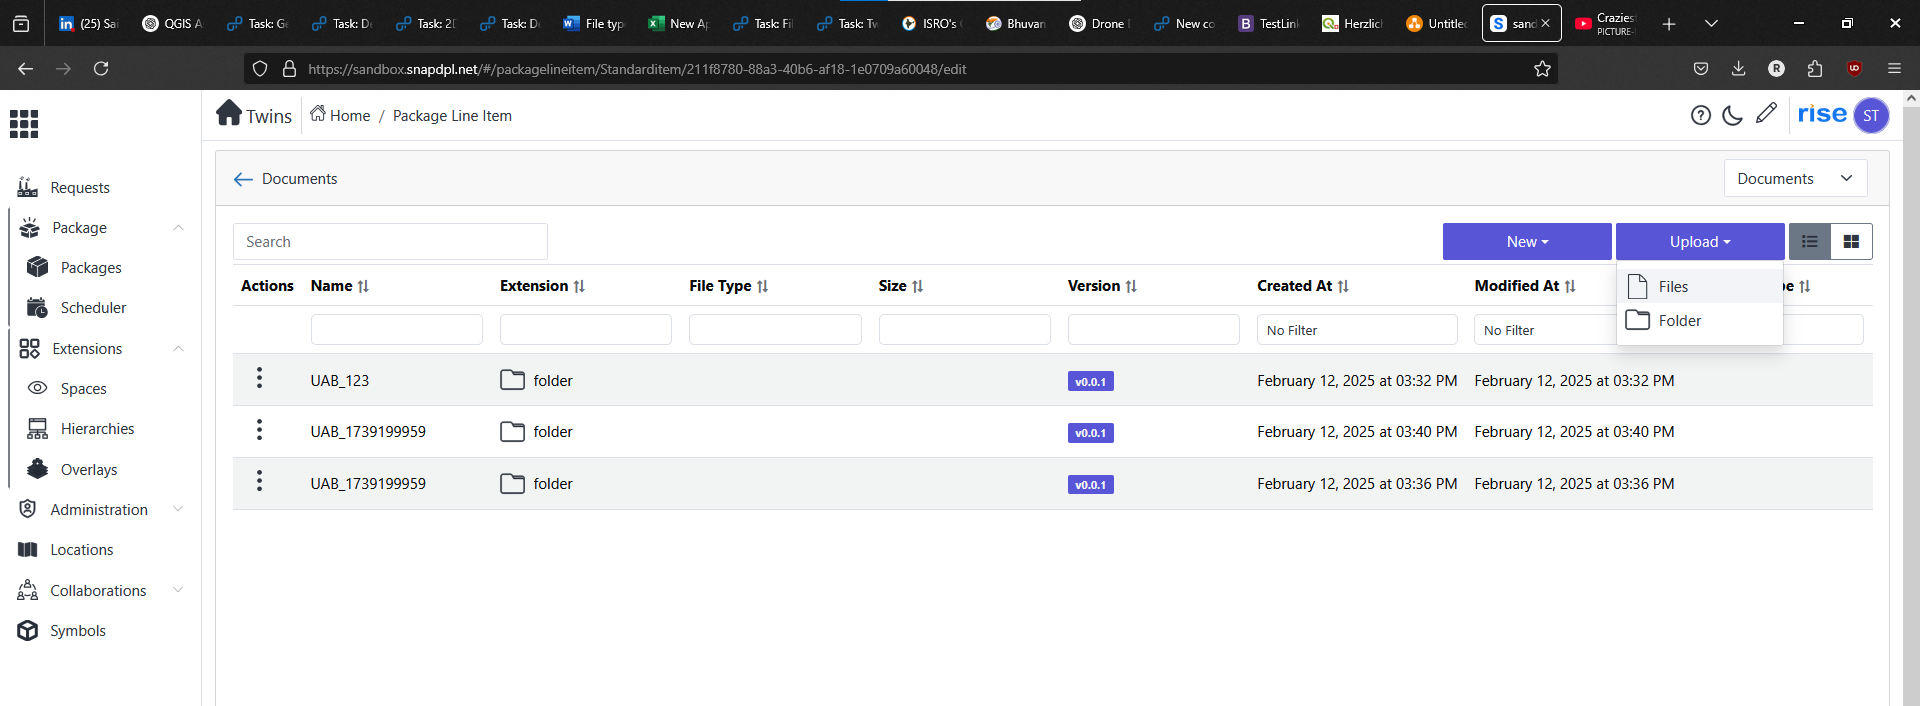
-
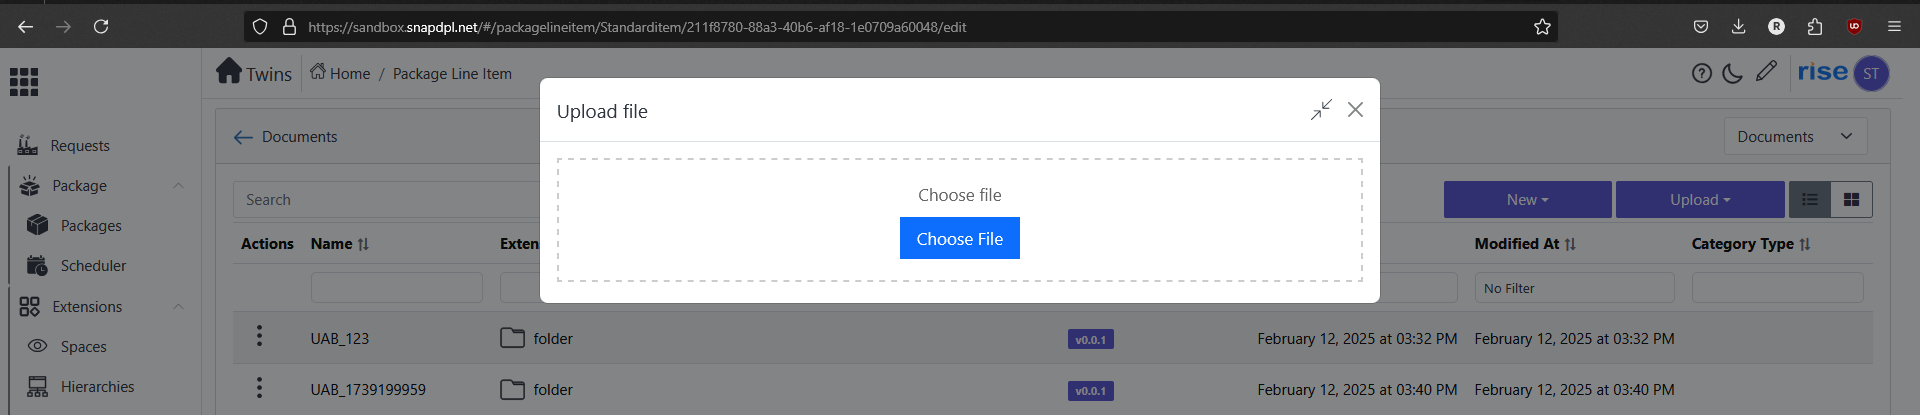
Click on 'choose file'. Locate the local storage and click 'open'.

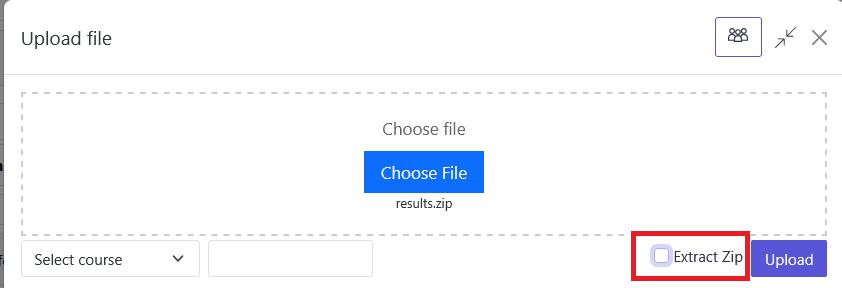
-
Check box the 'Extract zip' option. After that Click on 'upload'. Selected file shown in document page.
-
Click on 'submit' to upload the file. It takes some to complete the uploading process.
Assign data to space
-
After that go to created space Page . And click on click on 'action button' on selected space.
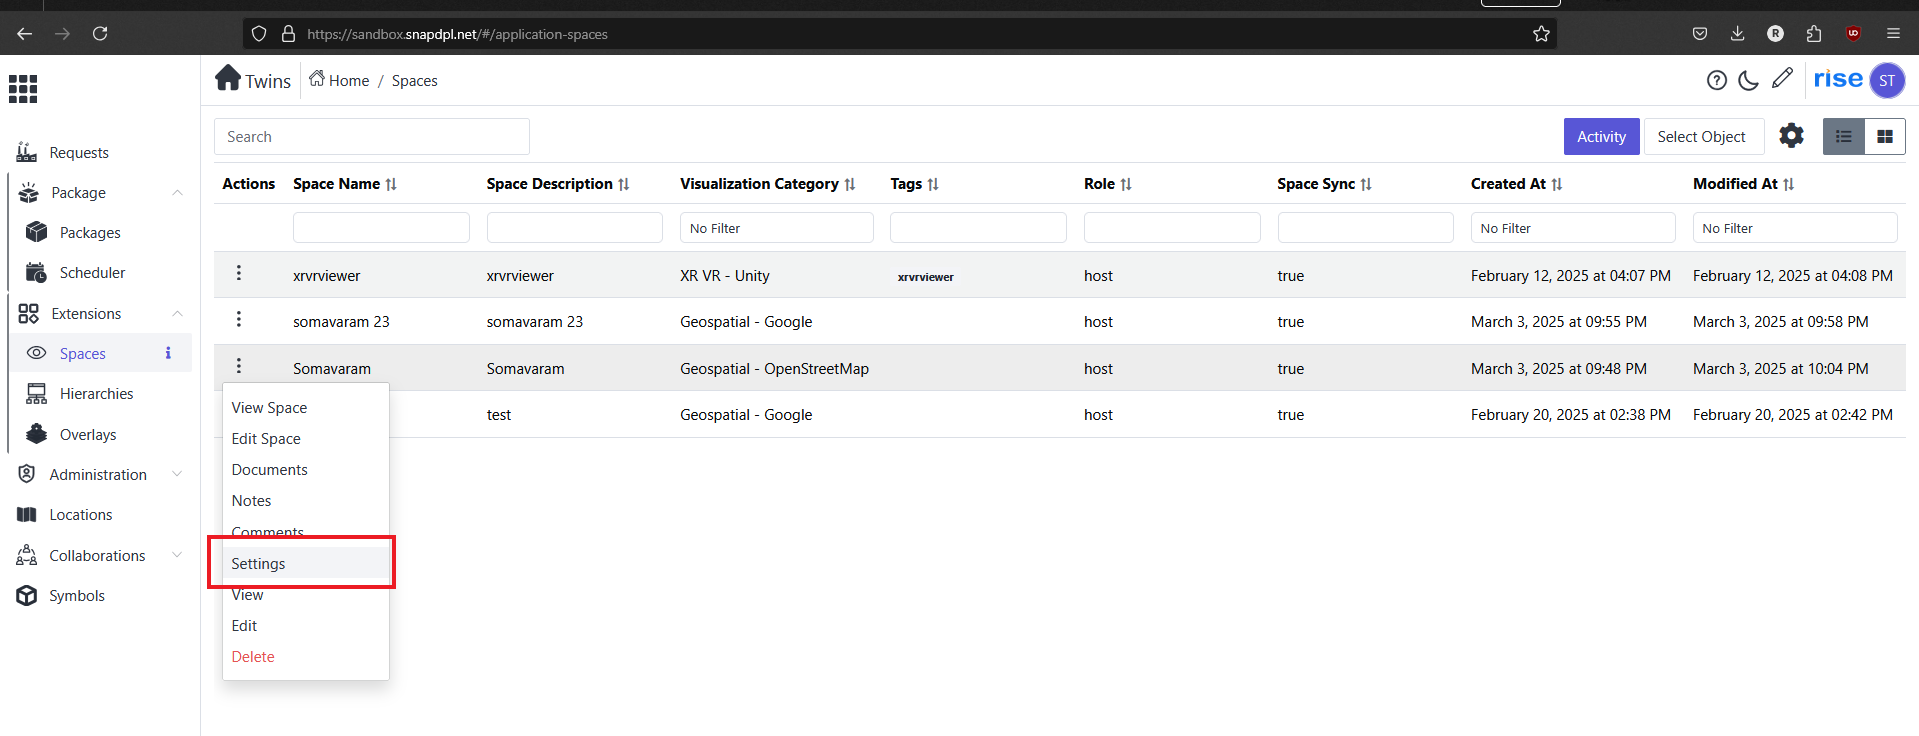
-
Click on ' Setting' option.
-
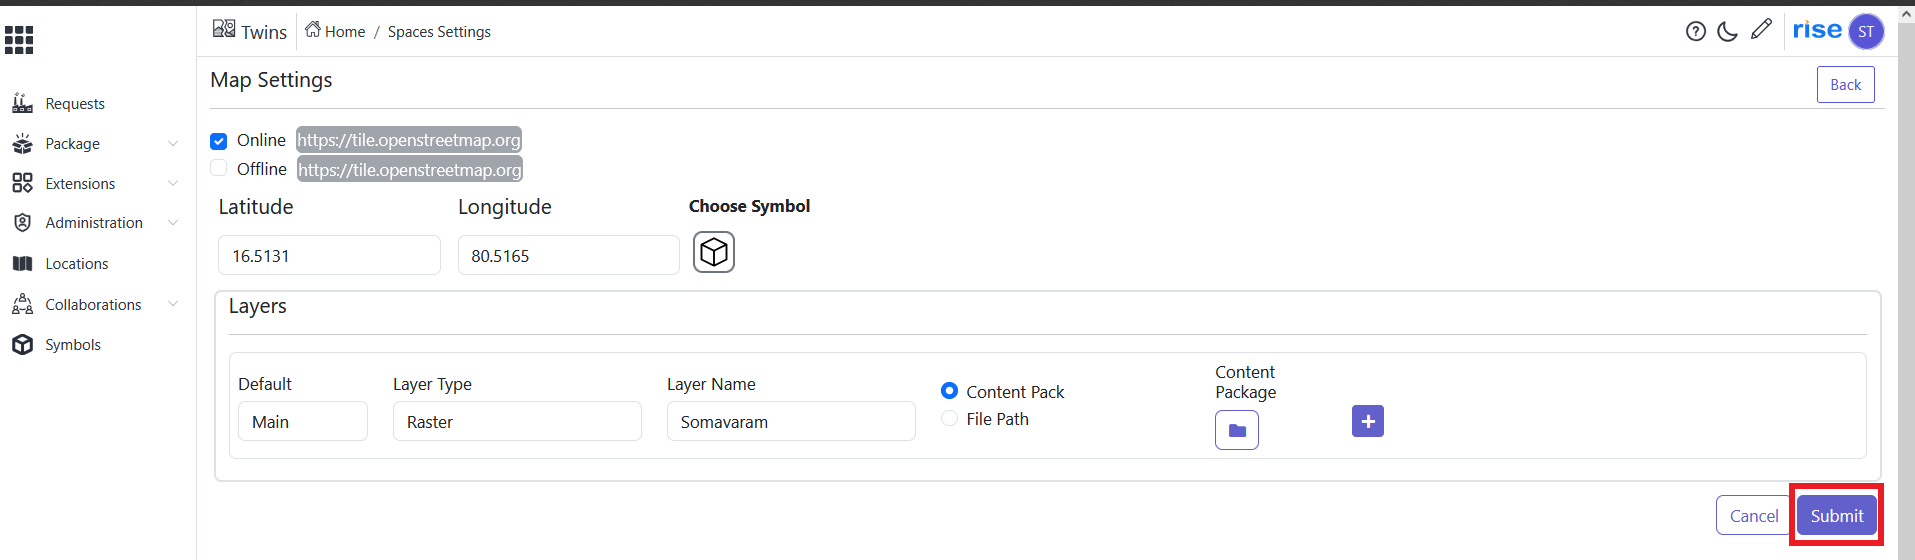
Select check box 'online' to view tiles. And fill the latitude and longitude values to view the area.

-
In 'default' menu select option as a 'main'. In come to layer type select 'Raster'.
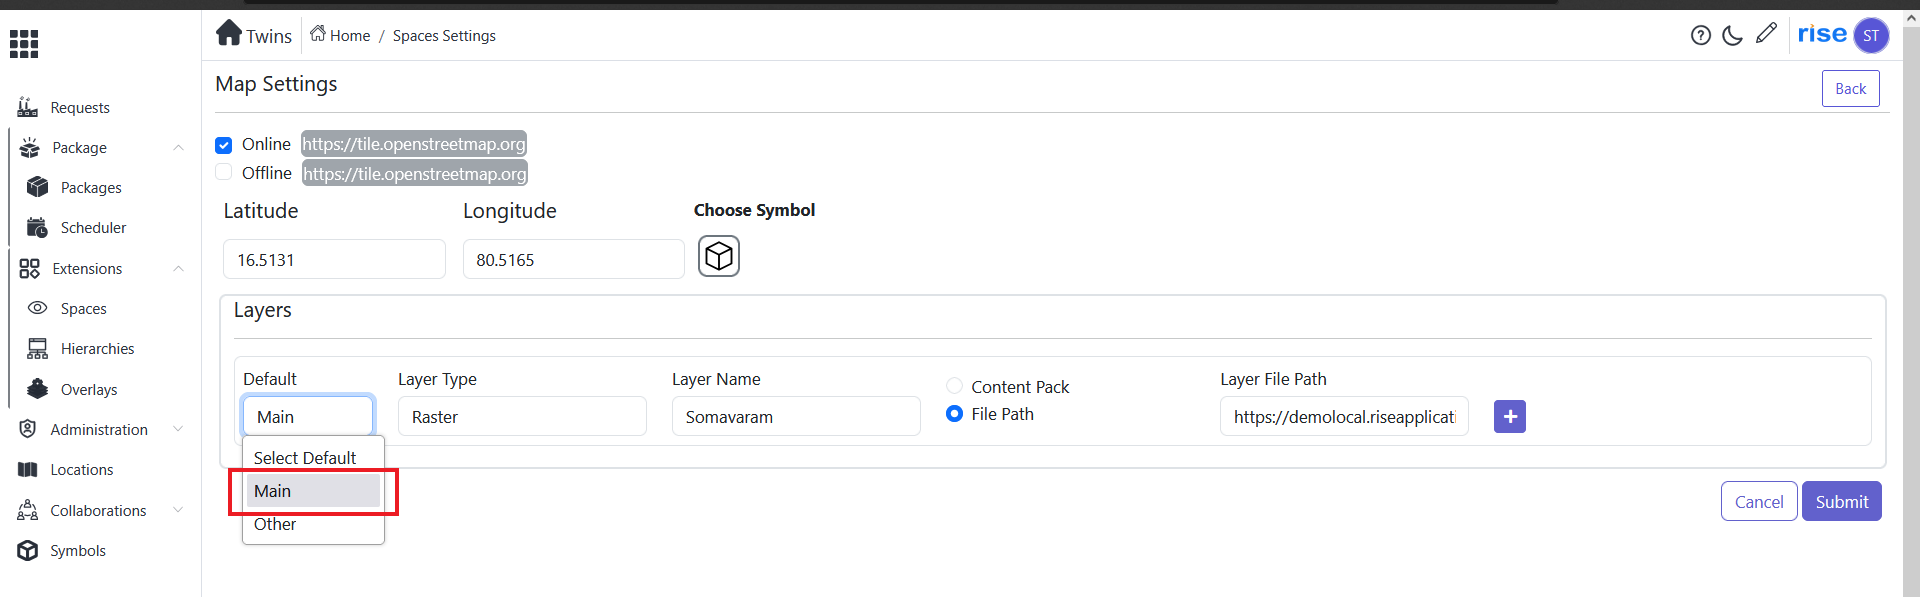
-
Fill name in layer name. And select content pack option, click on 'File icon'.
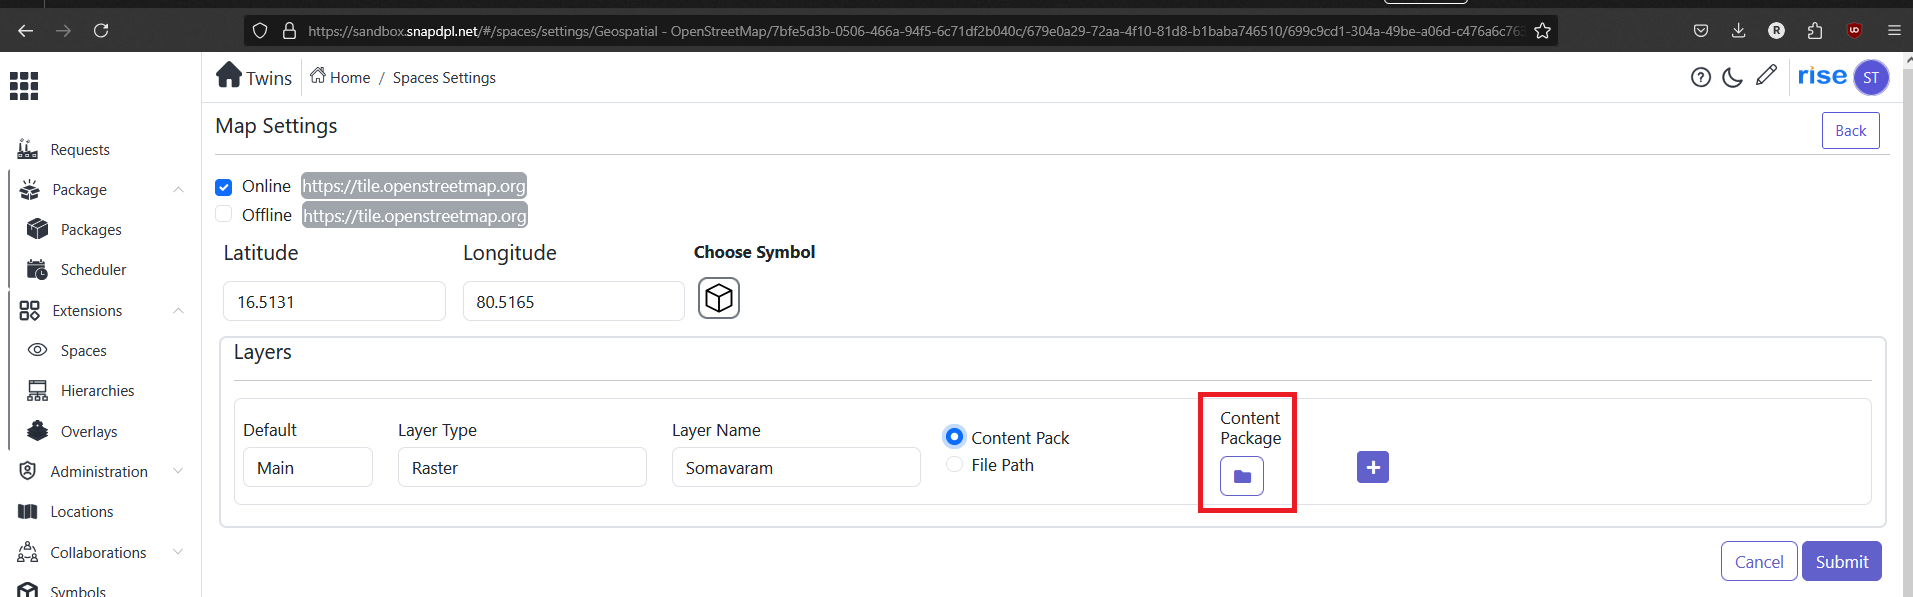
-
In Content Package popup shows , choose created content package.
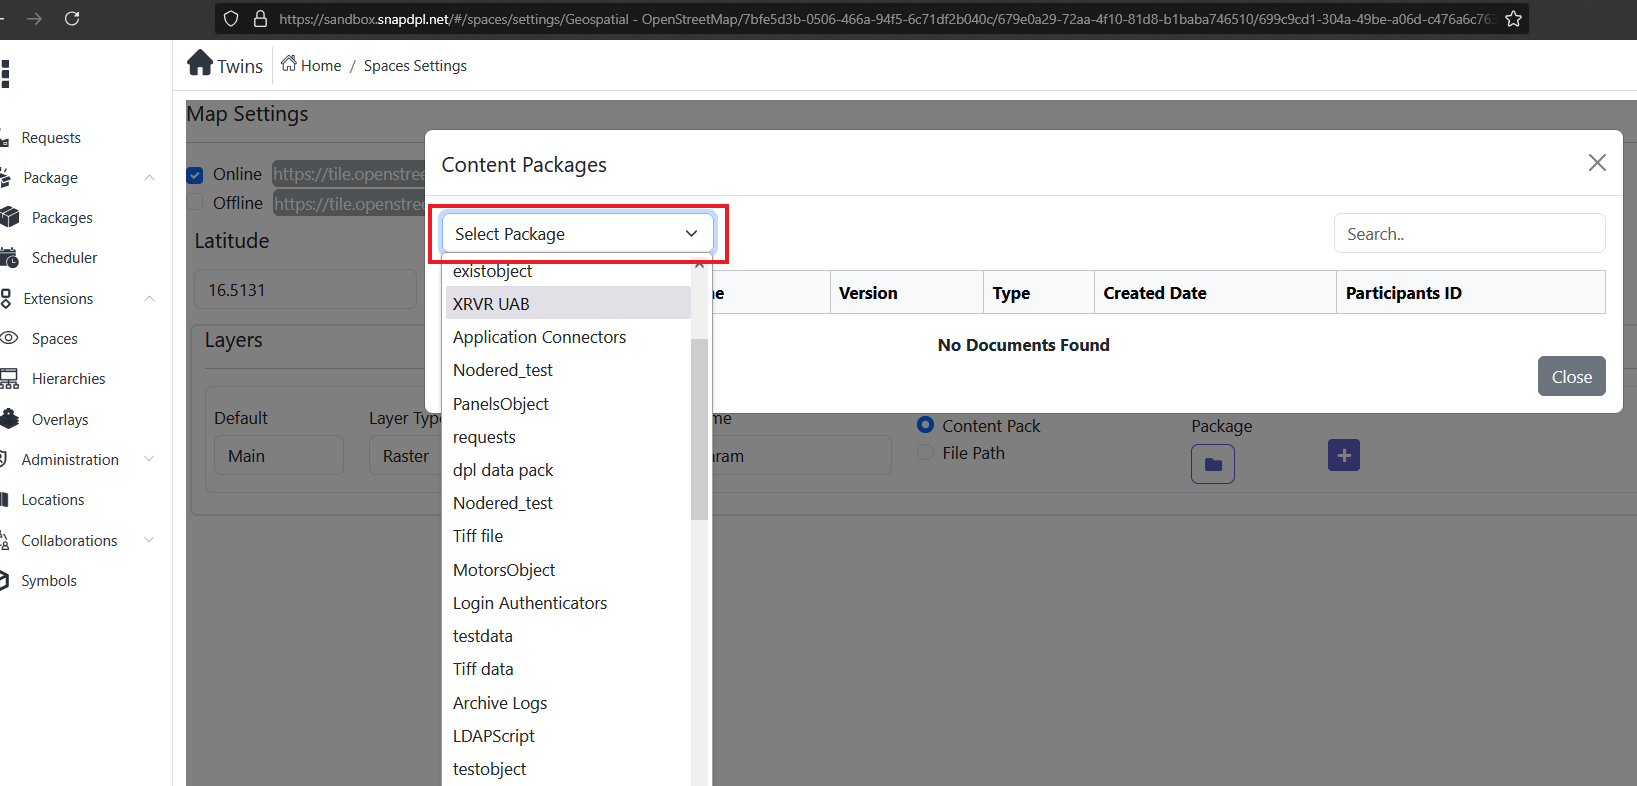
-
Check box the upload file .Click on close. Popup will close.
-
Click on 'submit' to assign the file to space.
View space
-
Click on home icon and select 'twins' application.
-
Click on 'action button' on selected created location.
-
Select 'space'. Space page will open.
-
Click on 'action button' on selected space.
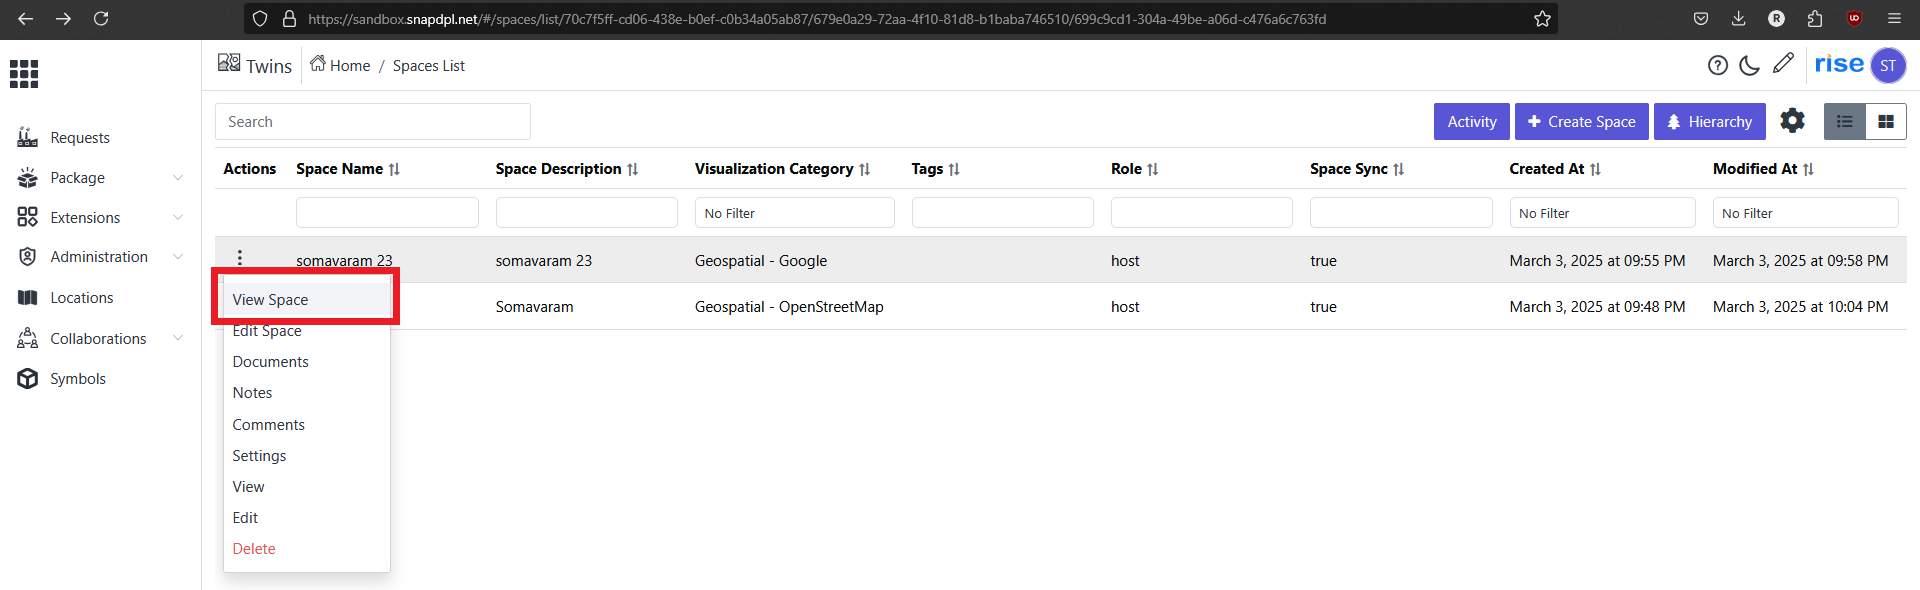
-
Click on 'view space' option to view the space.
Geospatial Layer Requirements Document Introduction
This document outlines the requirements for integrating various geospatial layers into. the SNAPDPL platform. It defines how data for different categories such as buildings, roads, and natural resources is acquired, processed, and visualized, along with the essential requirements for each
Required Layers and Data Acquisition Method
-
Buildings
a. How Data is Acquired:
i. Comes from Mee Bhoomi, municipal GIS databases, satellite imagery, and survey data.
ii. Can be extracted from government planning departments and land records.
b. Requirements:
i. Should include route connections to roads.
ii. Data should contain height, floors, material type, and purpose (residential/commercial/industrial).
iii. Building footprints should be in vector format.
iv. Integration with road and sewage plans is necessary.
v. Historical building information for urban planning.
-
Schools
a. How Data is Acquired:
i. Comes from government education portals, satellite imagery, and survey records.
b. Requirements:
i. Must include location, student capacity, type (public/private), and infrastructure details.
ii. Road network connectivity is required
iii. Should have zoning regulations and nearby facilities (hospitals, bus stops, etc.).
-
VUDA Planned Area
a. How Data is Acquired:
i. Data from VUDA (Visakhapatnam Urban Development Authority) planning department.
ii. Government zoning maps and real estate development plans.
b. Requirements:
i. Should display planned layouts, land use zoning, and development permissions.
ii. Integration with property tax and ownership records
iii. Overlay with transportation, water supply, and drainage plans.
-
Type of Road Networks
a. How Data is Acquired:
i. National Highway Authority (NHAI) databases.
ii. Municipal road maps and OpenStreetMap (OSM).
iii. Satellite imagery and traffic monitoring systems.
b. Requirements:
i. Must classify roads into highways, arterial roads, collector roads, and local streets.
ii. Should include lane count, speed limits, and condition assessment.
iii. Integration with traffic signals, junctions, and pedestrian pathways.
-
Sewage Plan
a. How Data is Acquired:
i. Municipal corporation data.
ii. Urban development departments and engineering maps.
b. Requirements:
i. Should include sewage pipeline networks, manholes, and treatment plants.
ii. Integration with residential and industrial areas for wastewater management.
iii. Data format should support both 2D and 3D underground network visualization.
-
Ground Level
a. How Data is Acquired:
i. Elevation models from Satellite DEM, LiDAR, and survey data.
ii. Government land records.
b. Requirements:
i. Should represent elevation contours and slope gradient.
ii. Needed for drainage planning, construction feasibility, and flood risk assessment.
-
Soil Properties
a. How Data is Acquired:
i. Government agricultural departments and soil research centers.
ii. Satellite-based soil moisture and fertility analysis.
b. Requirements:
i. Should include soil type, moisture content, erosion risk, and mineral composition.
ii. Useful for agriculture planning, construction stability, and environmental studies.
-
Forest Area
a. How Data is Acquired:
i. Forest department databases and remote sensing data.
ii. Environmental conservation agencies.
b. Requirements:
i. Should include tree density, forest type, biodiversity index, and conservation status.
ii. Integration with climate, wildlife habitat, and deforestation alerts.
-
Irrigation Layer
a. How Data is Acquired:
i. Irrigation department records and satellite-based water mapping.
ii. Agricultural survey reports.
b. Requirements:
i. Should include canal networks, reservoirs, irrigation efficiency, and crop dependency.
ii. Integration with groundwater levels and rainfall patterns.
-
Airports & Malls
a. How Data is Acquired:
i. Government infrastructure records and commercial databases.
ii. Aerial surveys and OpenStreetMap (OSM) data.
b. Requirements:
i. Airports should include runway details, terminal locations, and air traffic control zones.
ii. Malls should have footprint size, retail zoning, and parking availability.
iii. Integration with road and metro connectivity.
-
Climate and Temperature Data
a. How Data is Acquired:
i. Meteorological department datasets and satellite climate models.
ii. Real-time weather sensors and climate research organizations.
b. Requirements:
i. Should include temperature variations, precipitation, humidity levels, and seasonal changes.
ii. Integration with disaster risk zones (floods, cyclones, heatwaves, etc.).
iii. Data should be available in real-time and historical trends.