Truview Content Flow
Assign URL in Snapdpl platform
-
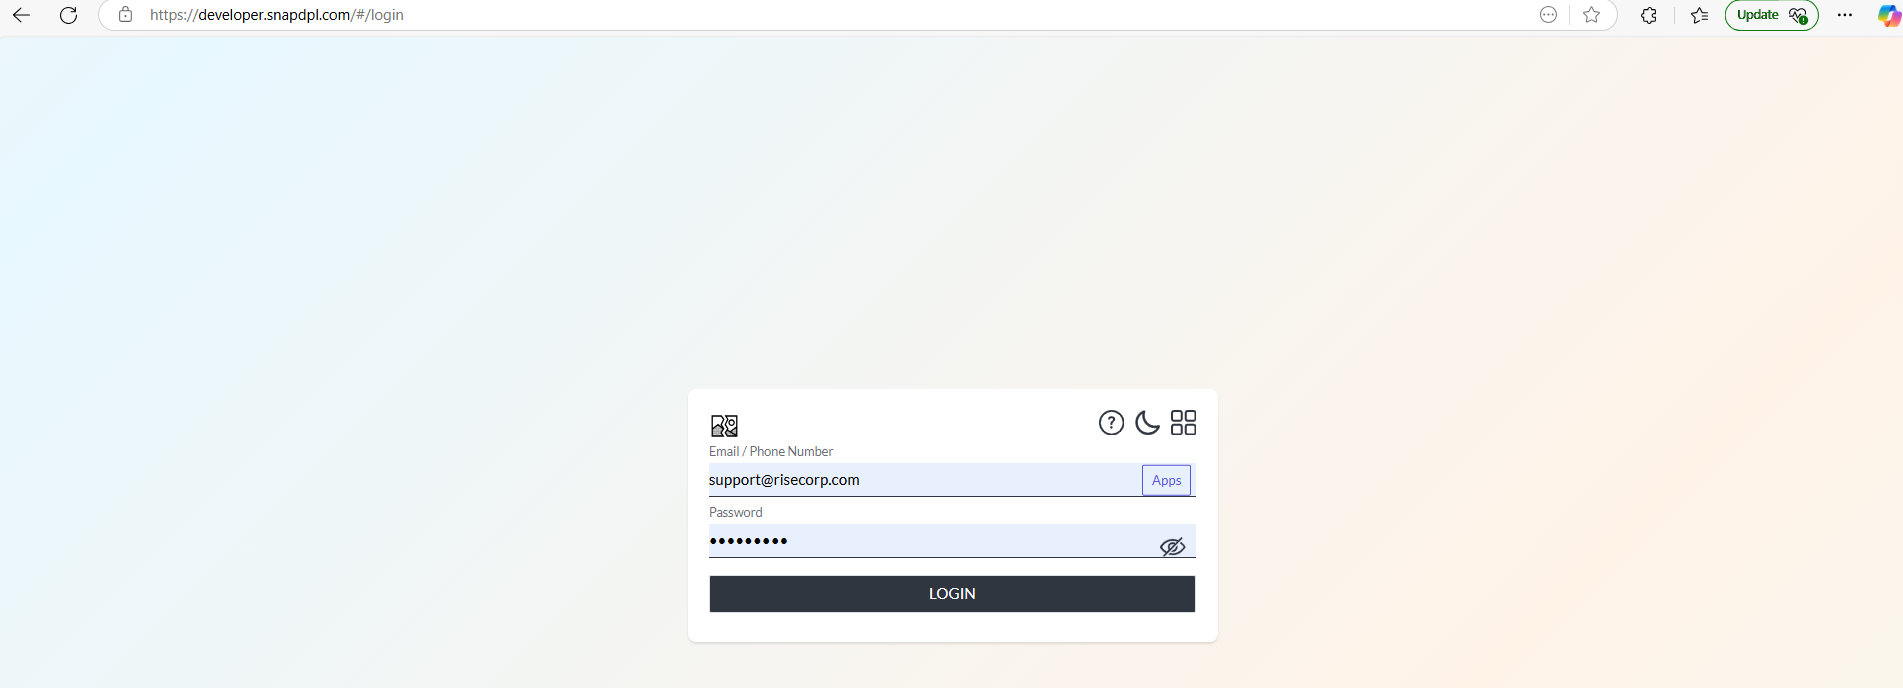
Open Snapdpl platform and login the page through valid credentials.
-
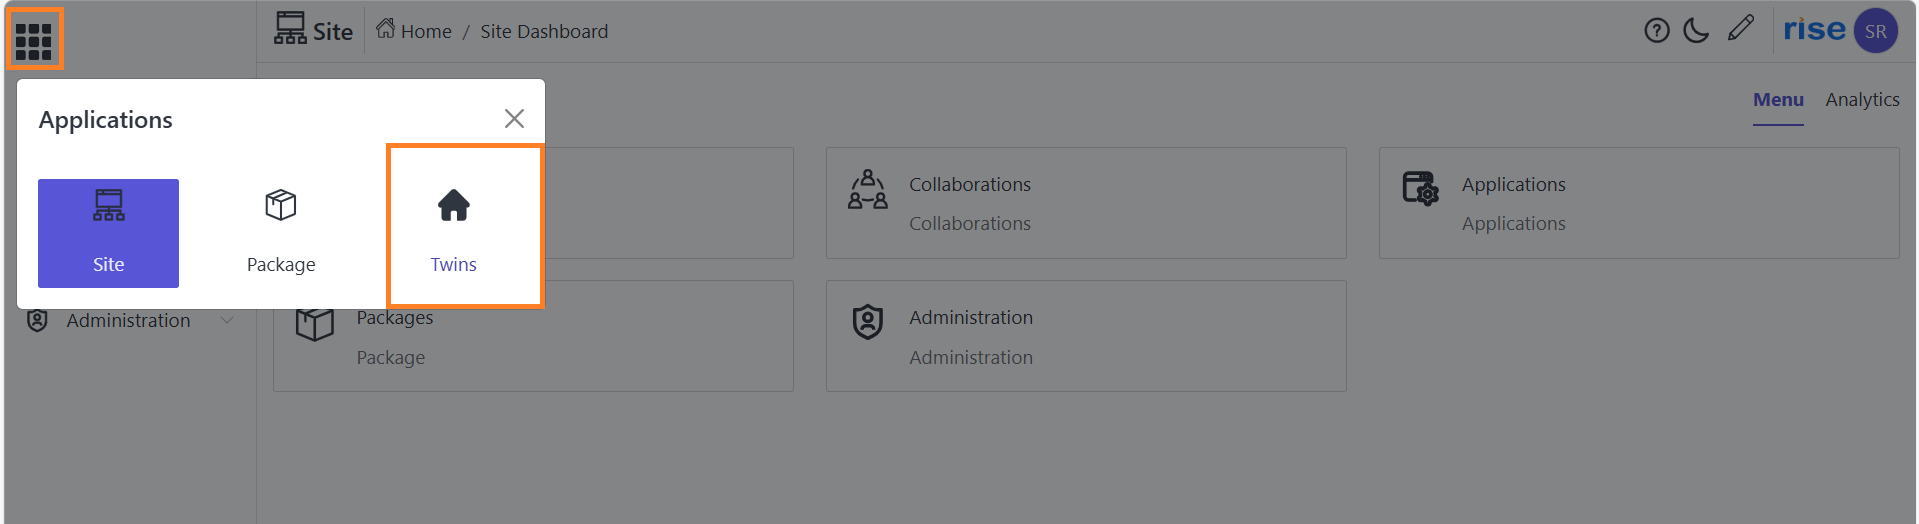
In home page click on application icon and select 'twins' option.
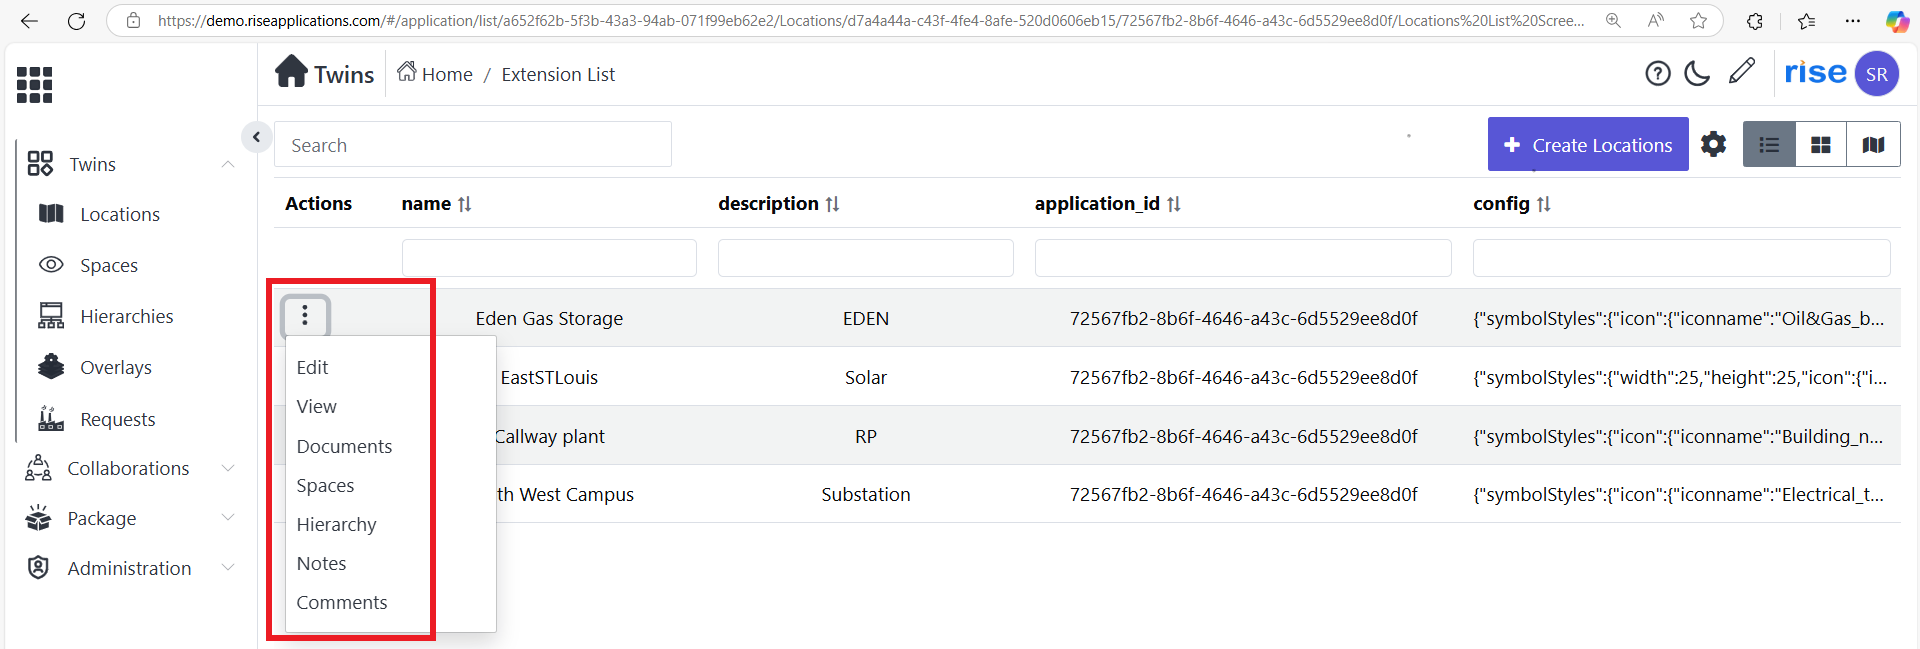
Create Location
-
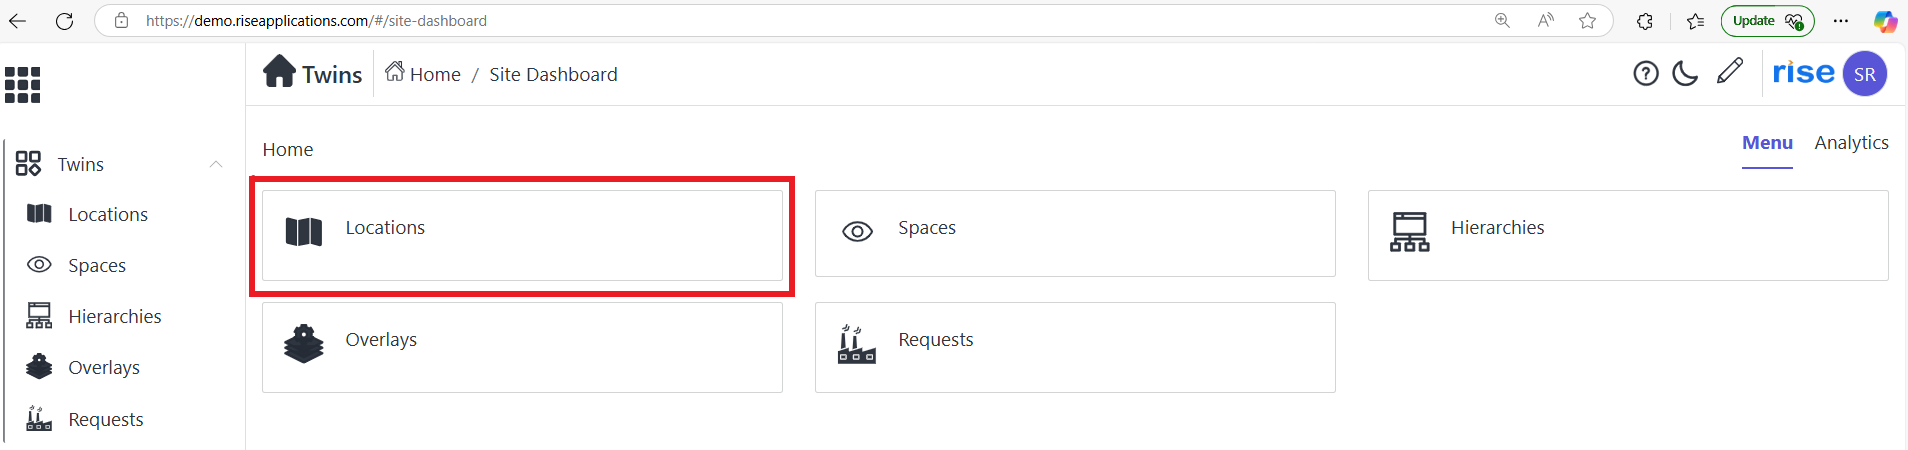
Click on 'location' option.
-
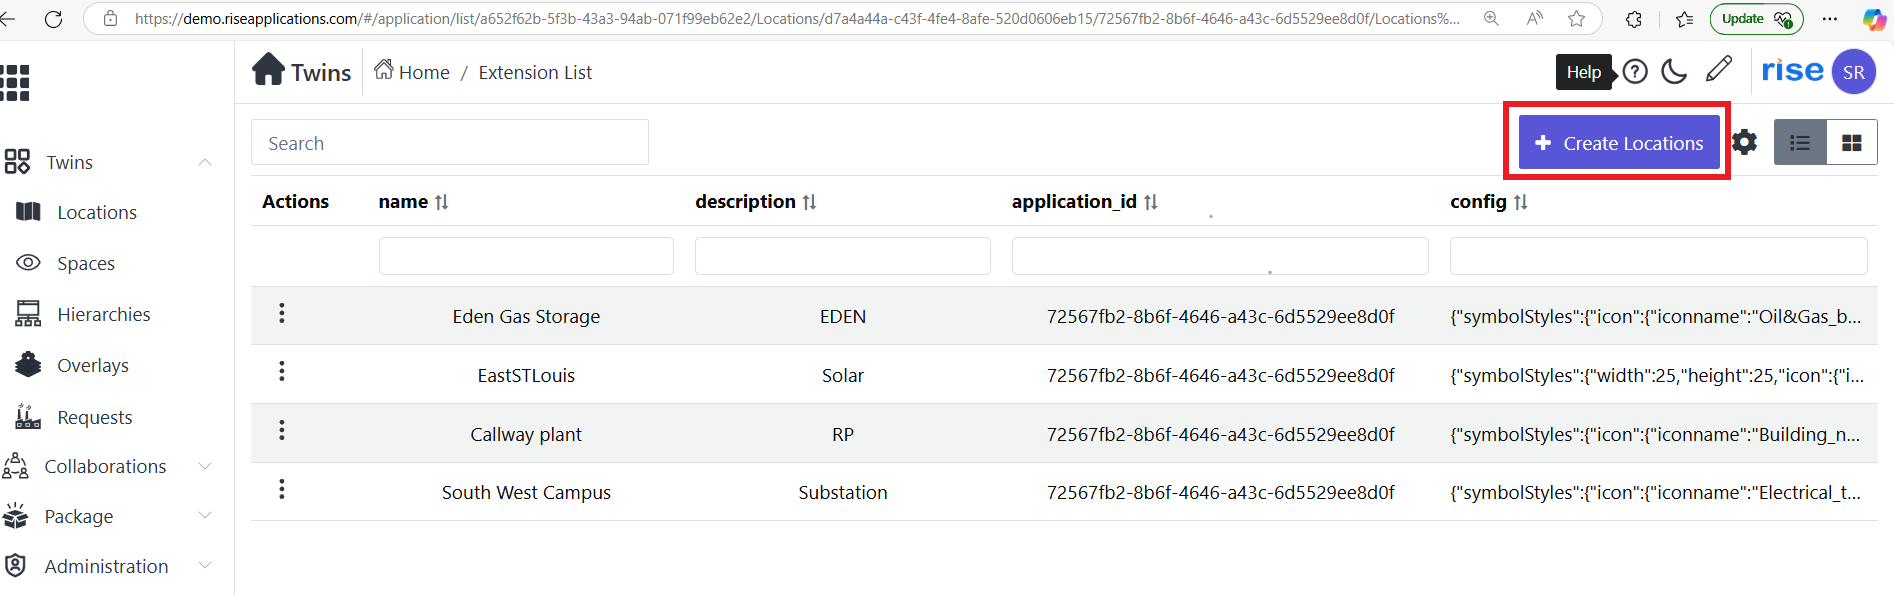
Click on 'create location' button.
-
Fill all requirements in 'create location page' .After that click on submit button.

Create Space
-
Click on 'action button' on created location option. And select 'spaces' options.
-
Click on 'create space' button.

-
Choose Visualization Category as 'Scan-truview and fill the necessary data.click on create space.
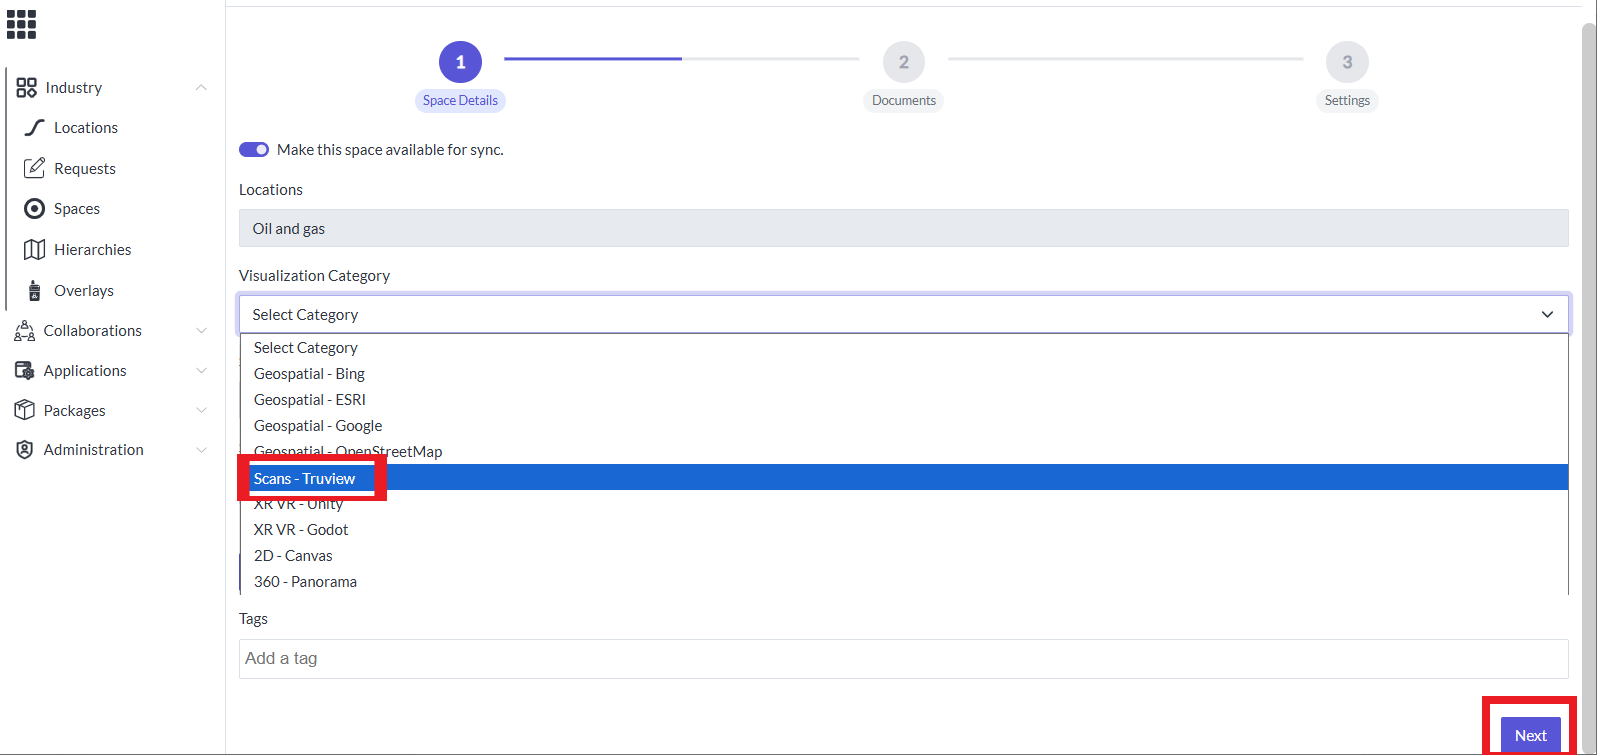
-
After that Truview setting will appear .
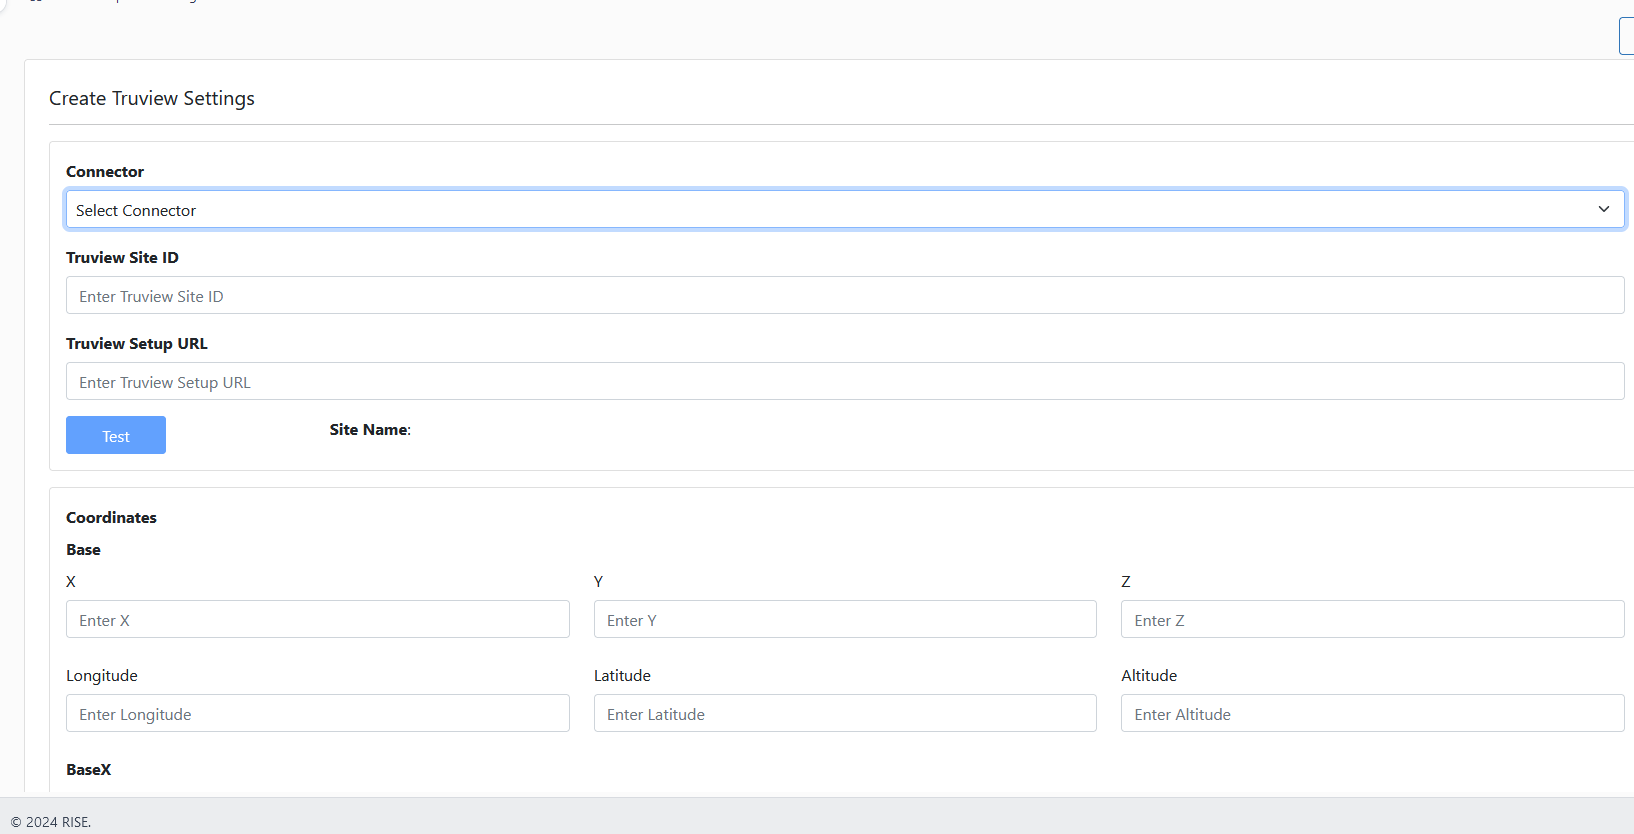
Truview Connector
-
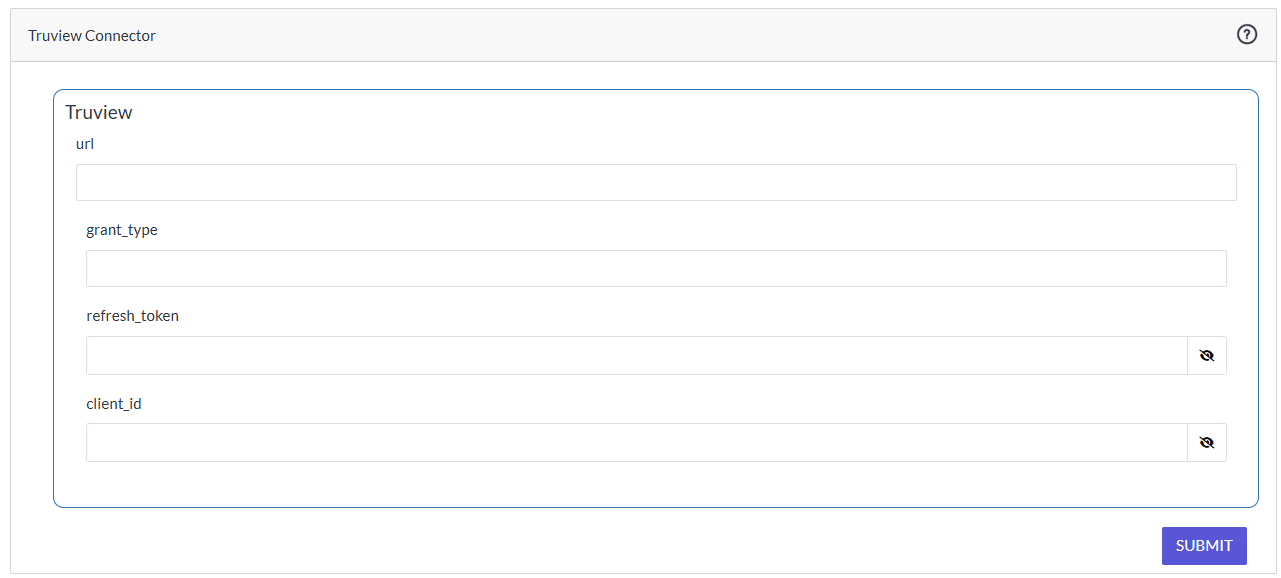
In the "Connector" dropdown, select "TruView Connector." Follow the steps below to enable the TruView connector.

-
On the 'Twins' page, go to 'Administration' and click on 'Settings'.
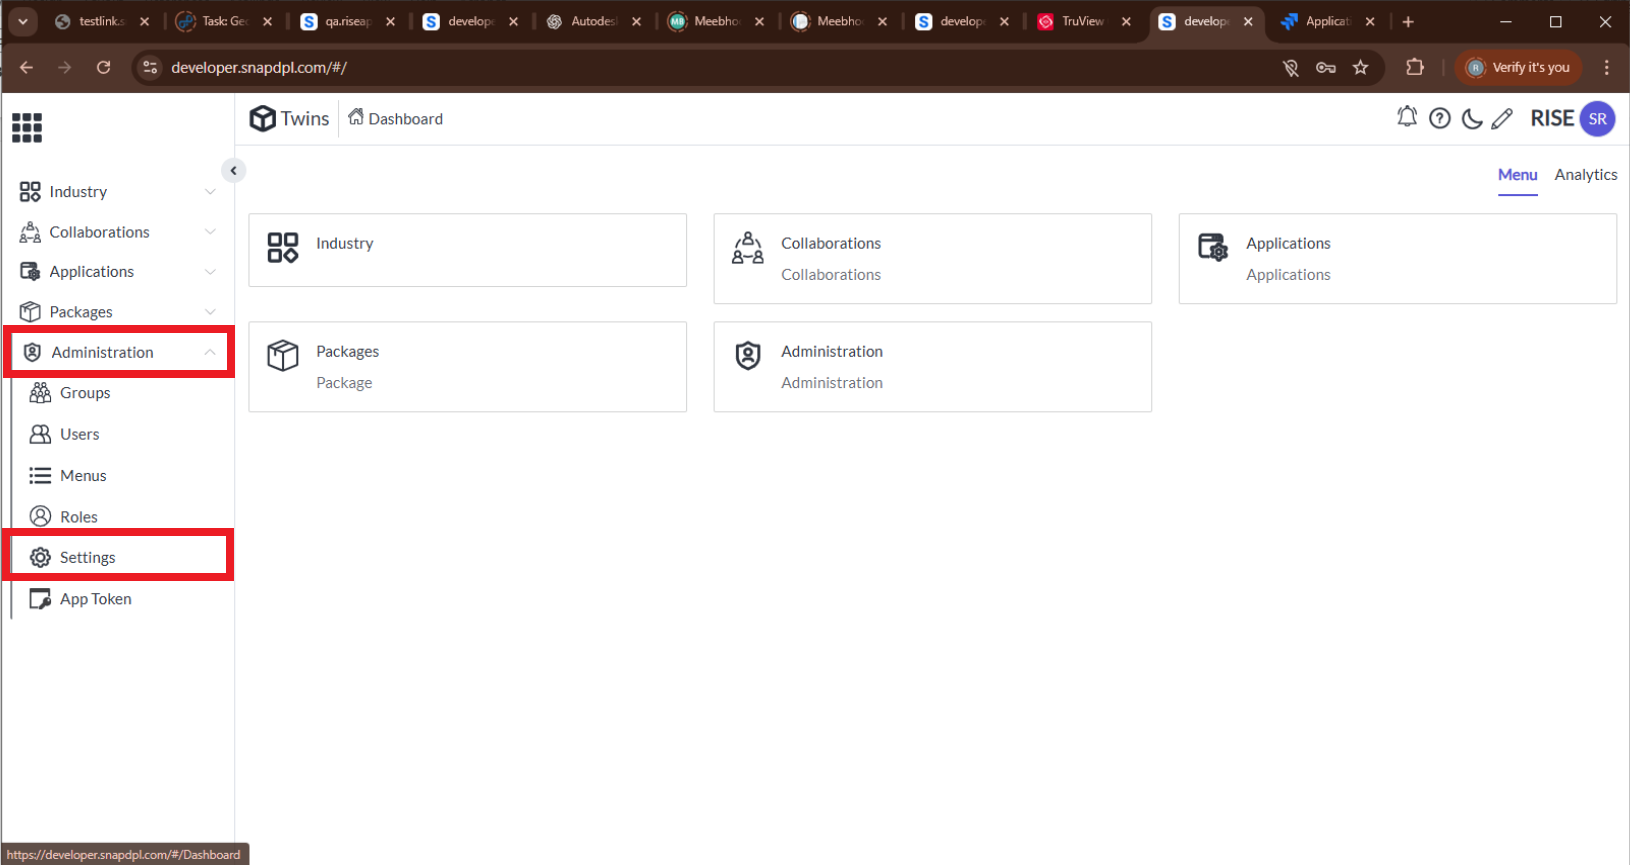
-
Select the 'Settings' menu and click on 'Twins Application'.
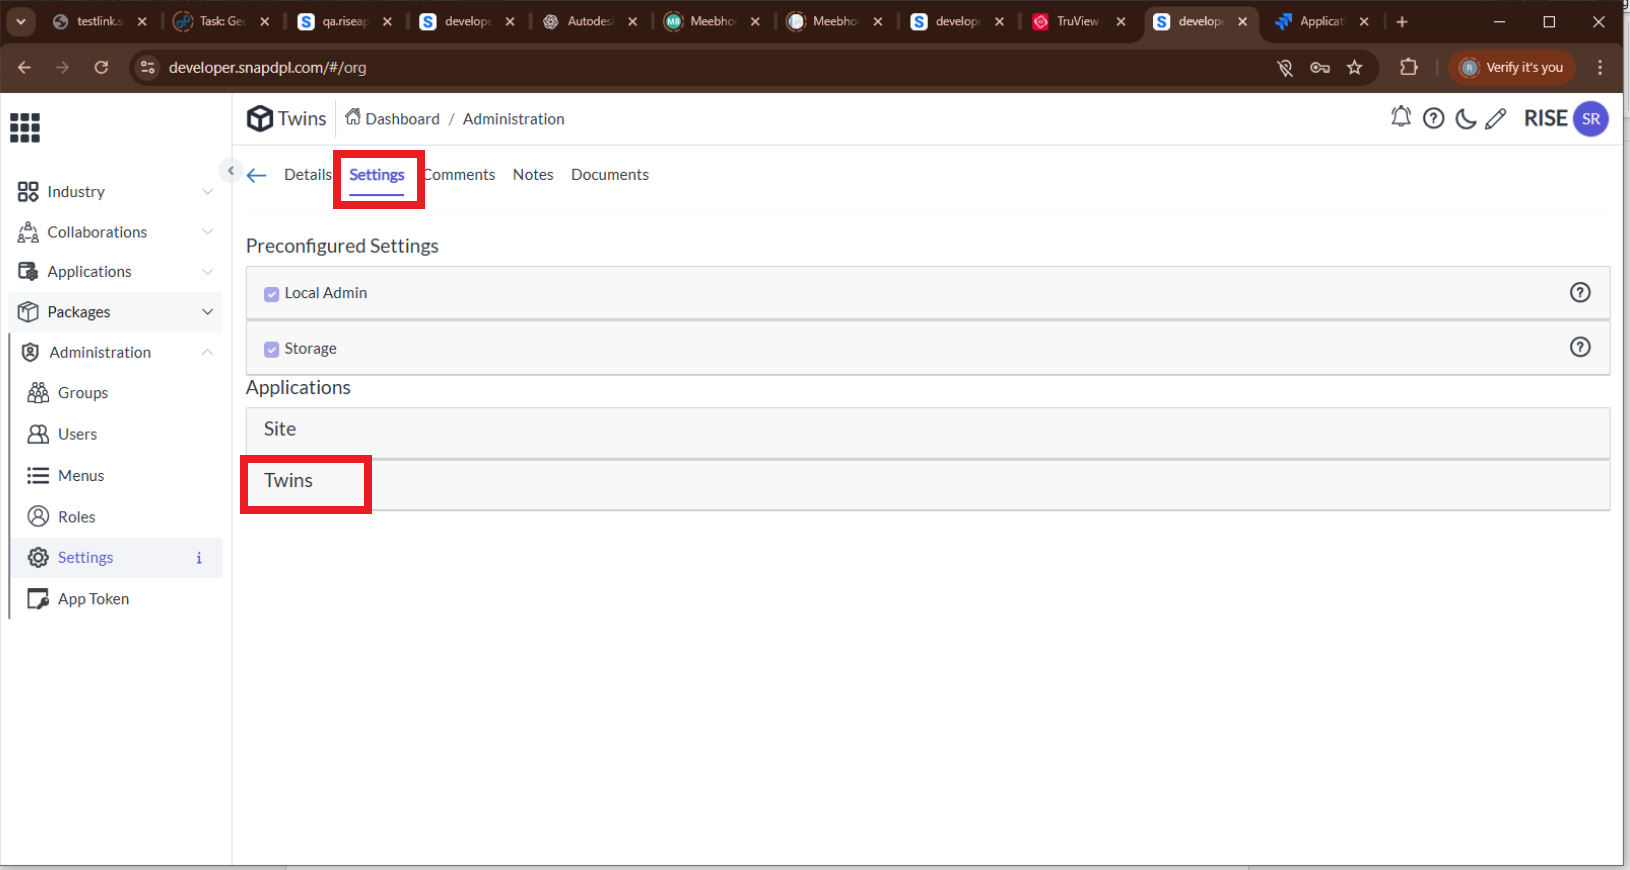
-
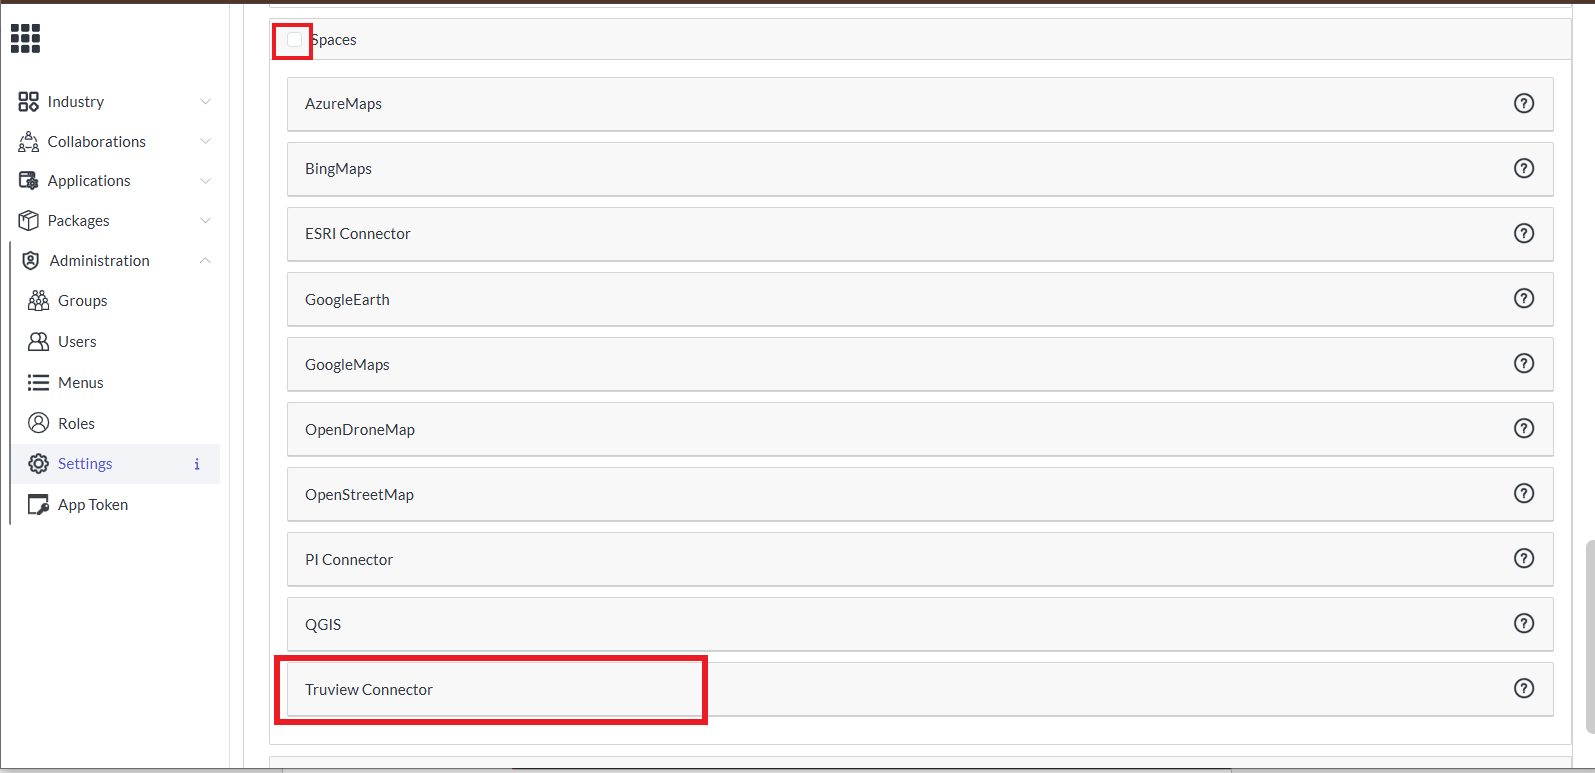
Scroll down to find the 'Space' menu. Enable it by 'checking the box', then click on 'TruView Connector' to expand the options.
-
To fill these fields, please log in to TruView Enterprise.
-
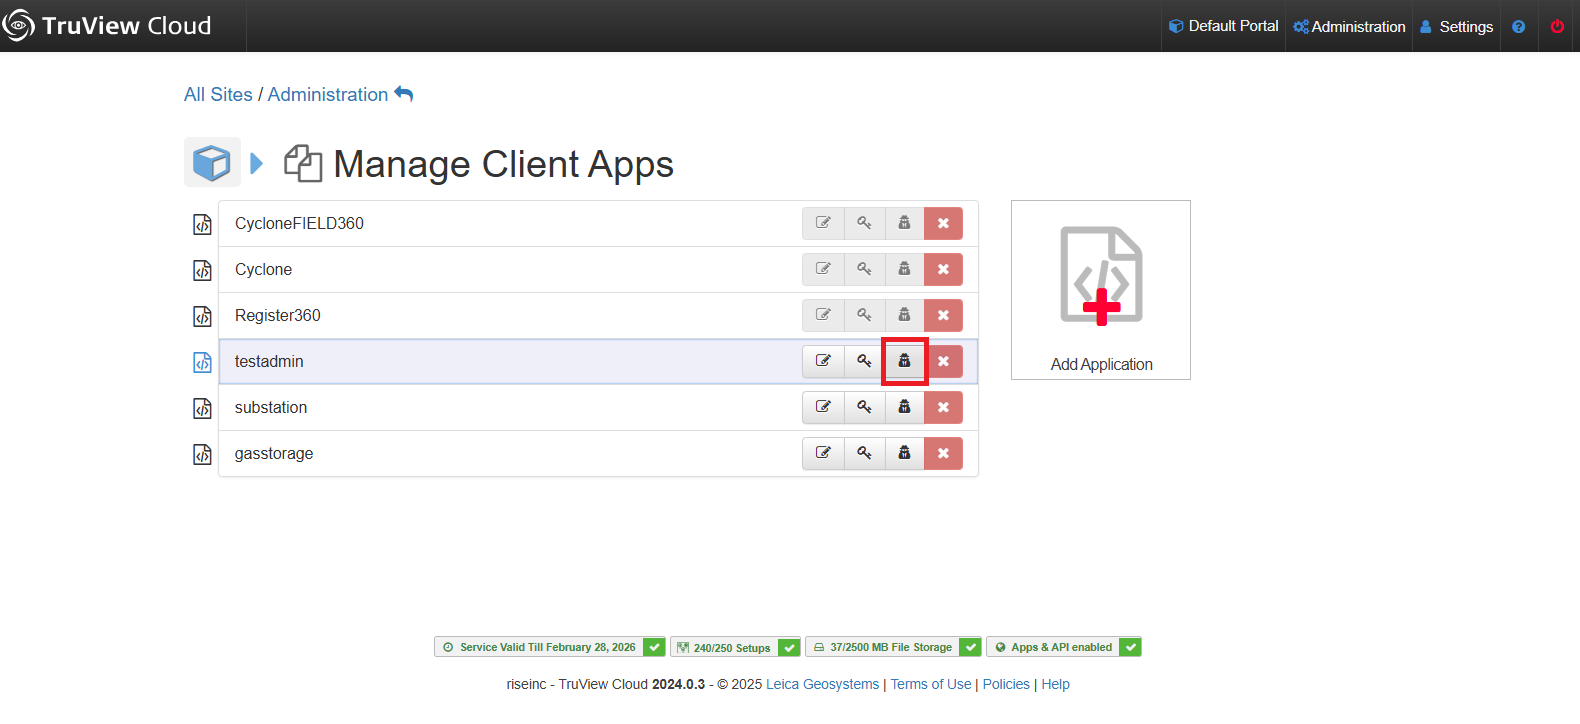
In the TruView site, go to the 'Administration' menu and select 'Manage Client Apps'.
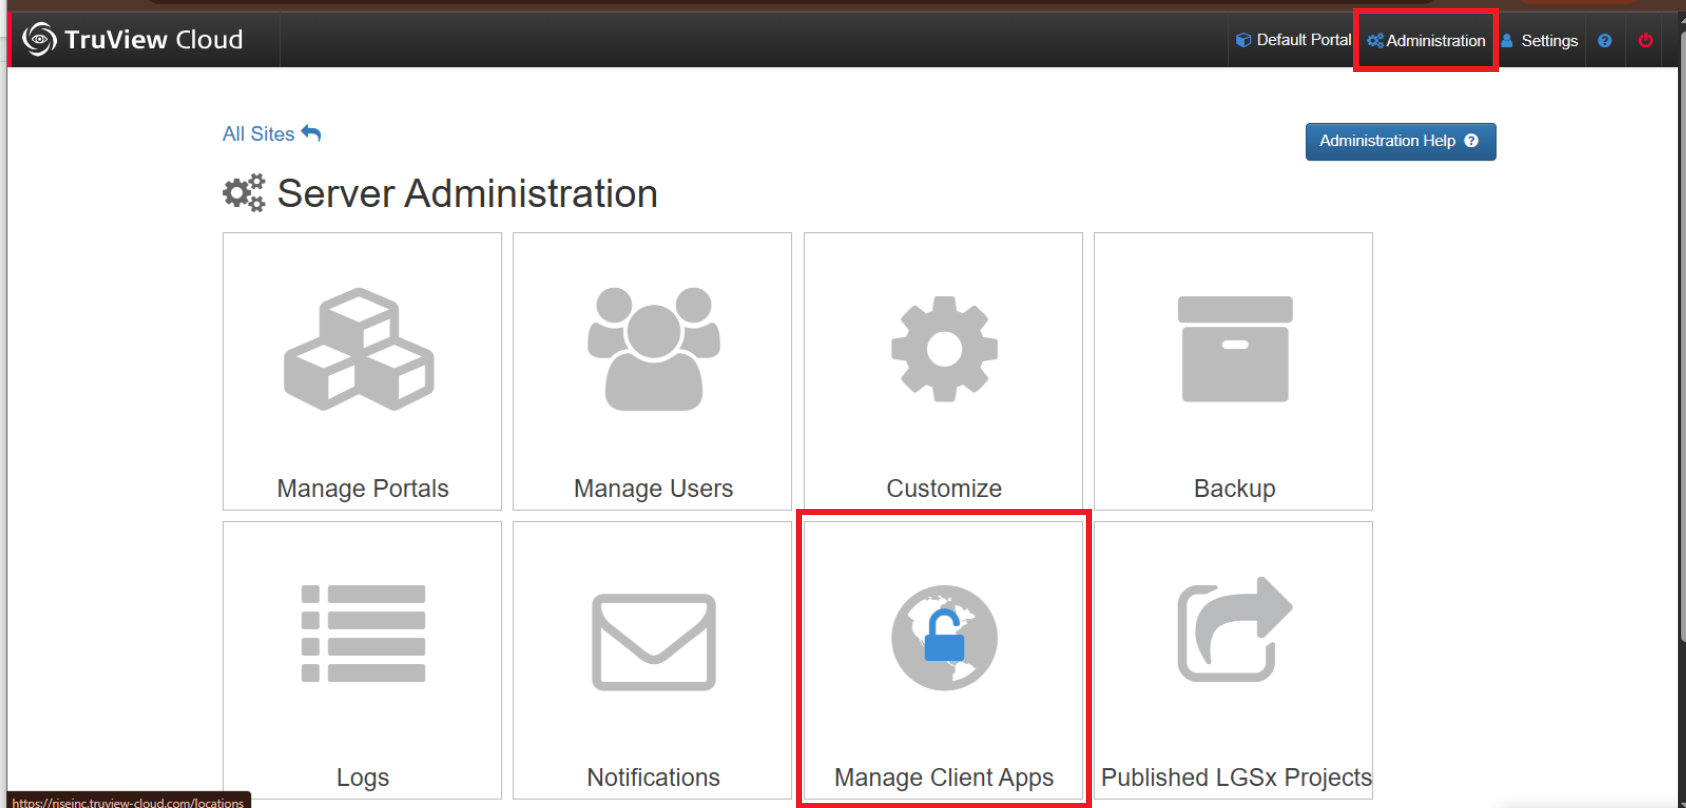
-
Select your application and click on the Testing SDK application.
-
-
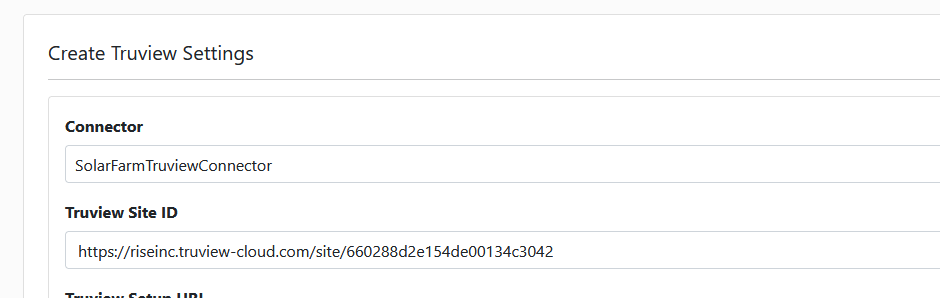
Fill "Truview site ID" in below manner.

-
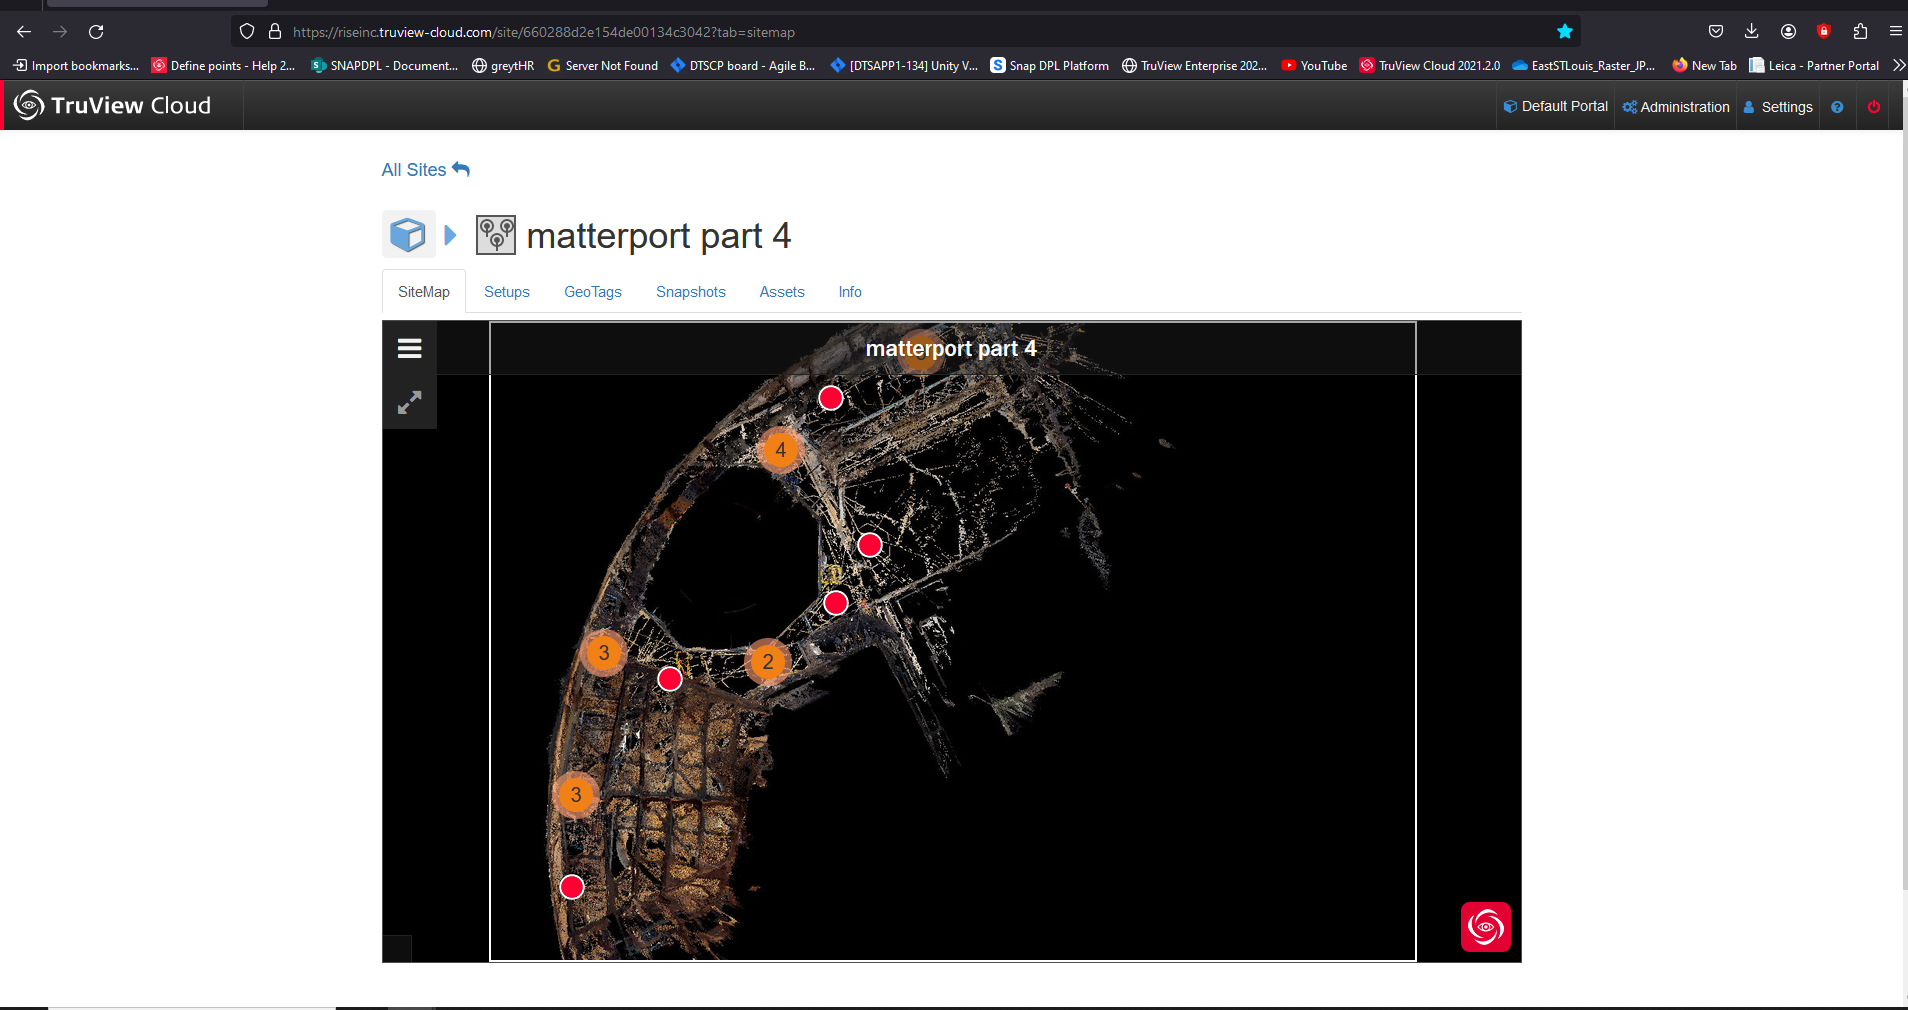
First login with your credentials in Truview cloud or Truview enterprise.
-
And choose your site map. And click on that.
-
Copy the the url upto "?" mark as shown below image.

-
Paste this URL in "Truview site ID".
-
-
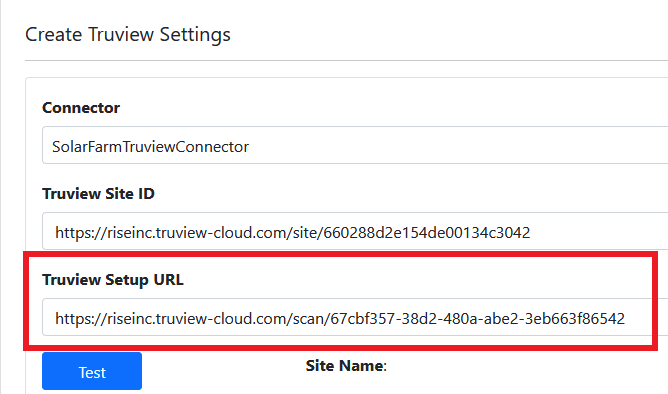
To fill "Truview setup URL" follow the below process.

-
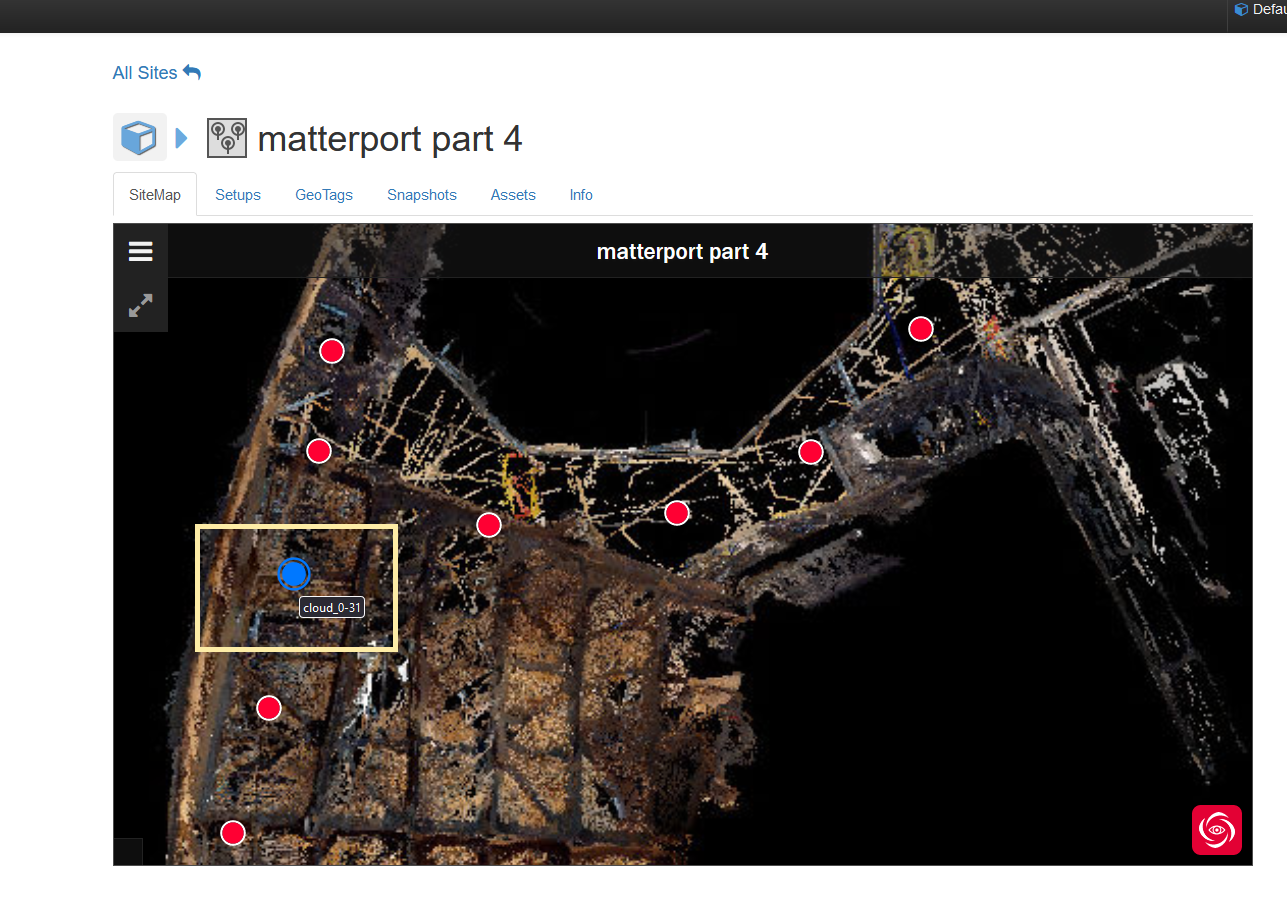
Go to your site and select any "setup" on site map.
-
Copy the url of setup like below image.
-
Paste the link in "Truview setup URL".
-
-
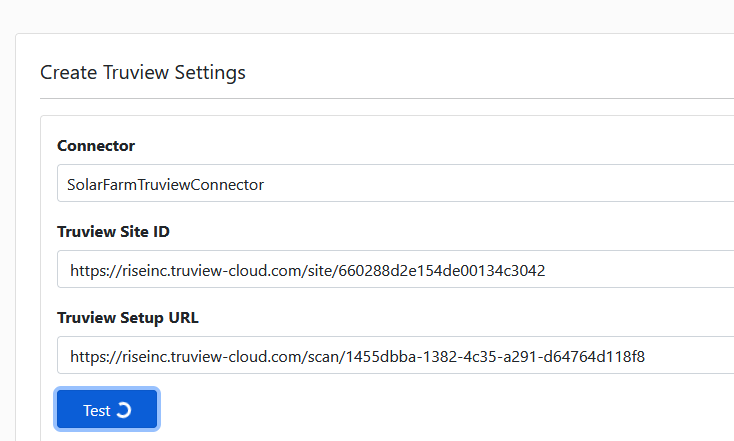
Click on " Test" for run the command.

-
It takes some time to upload.
-
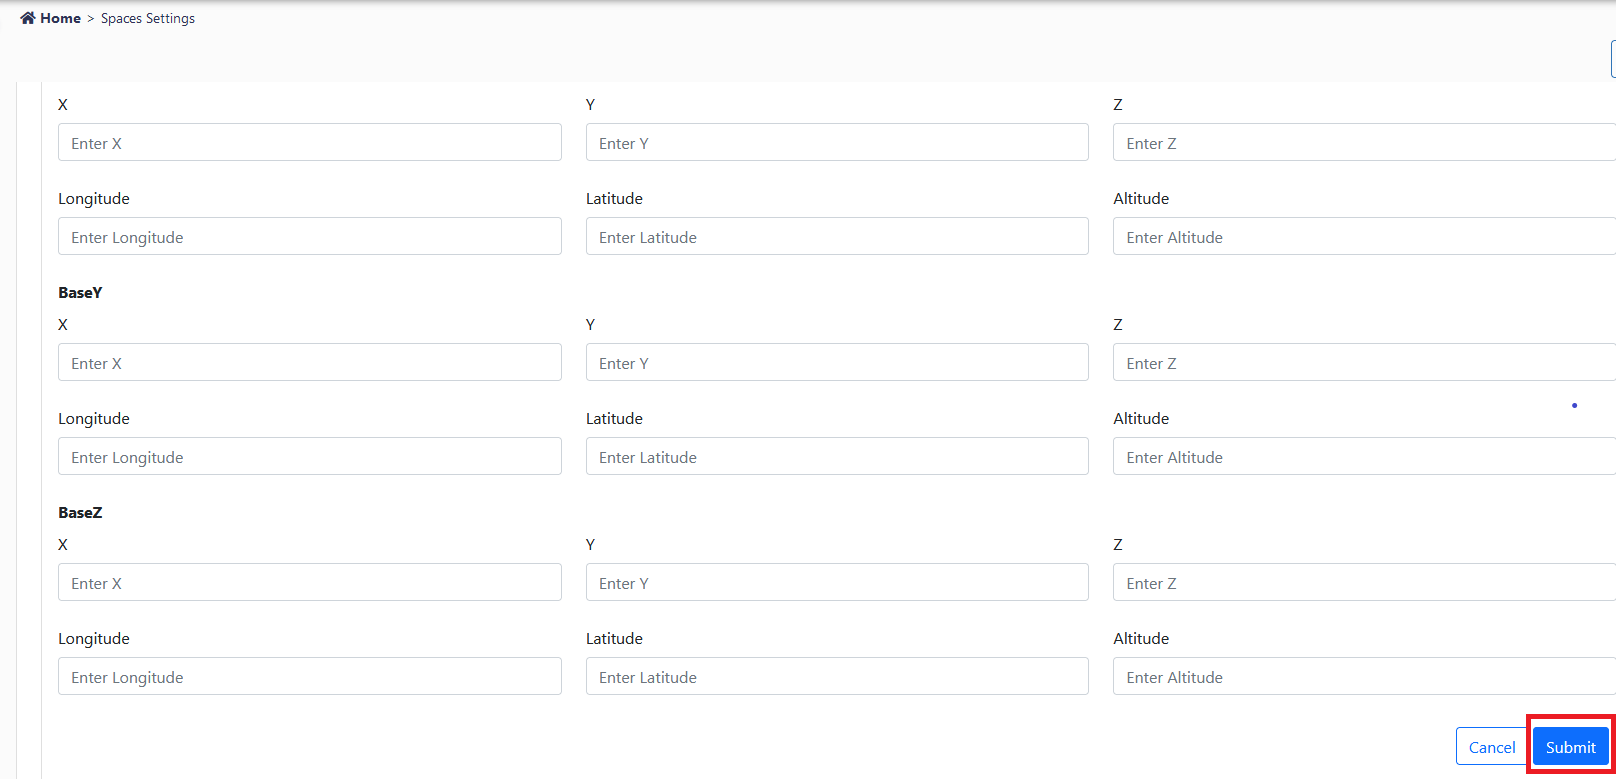
After scroll down and click on "Submit" to get into space.
-
The page will automatically get into spaces.

-
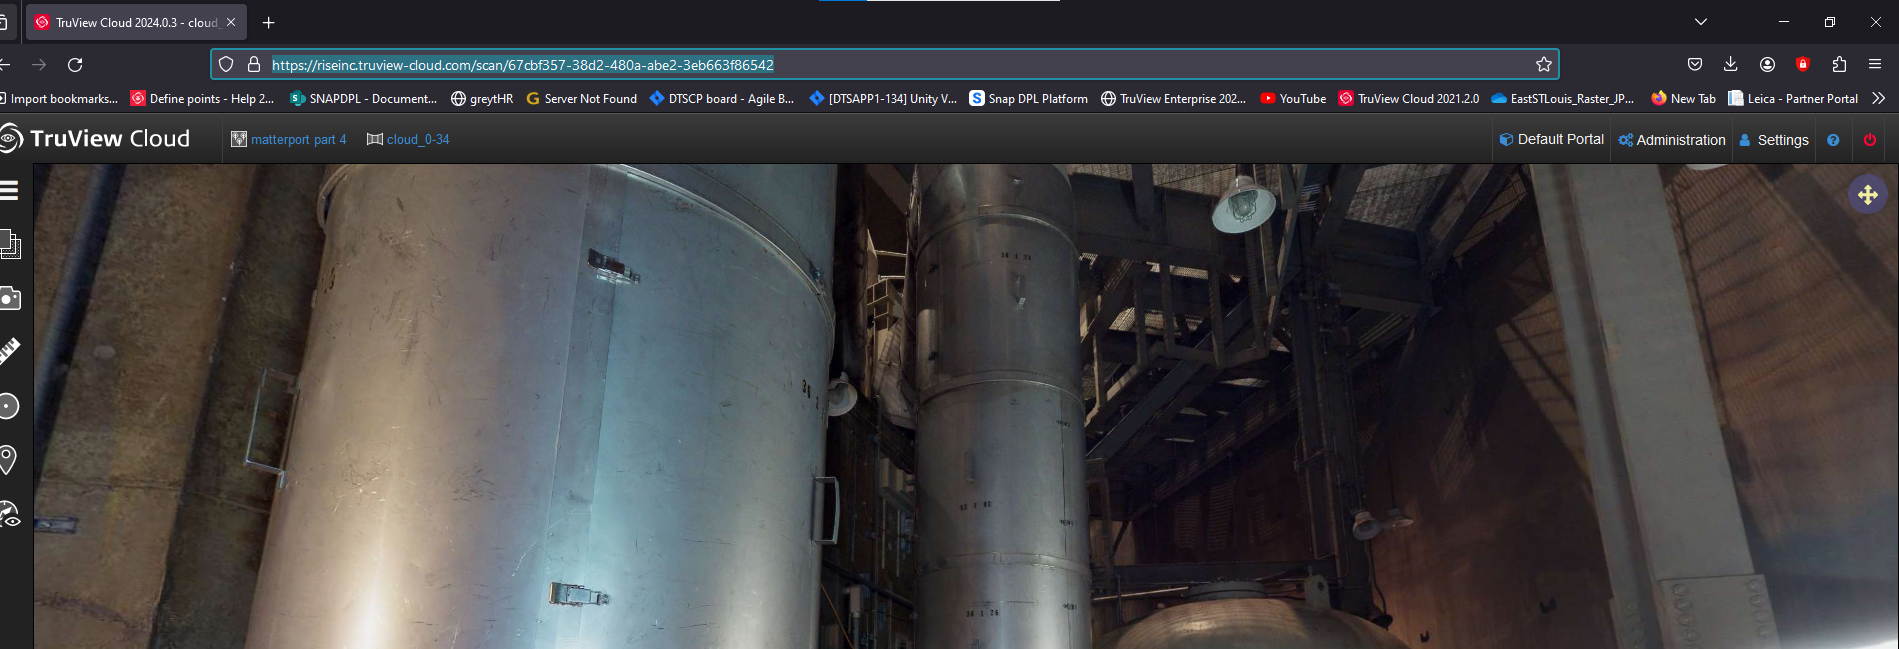
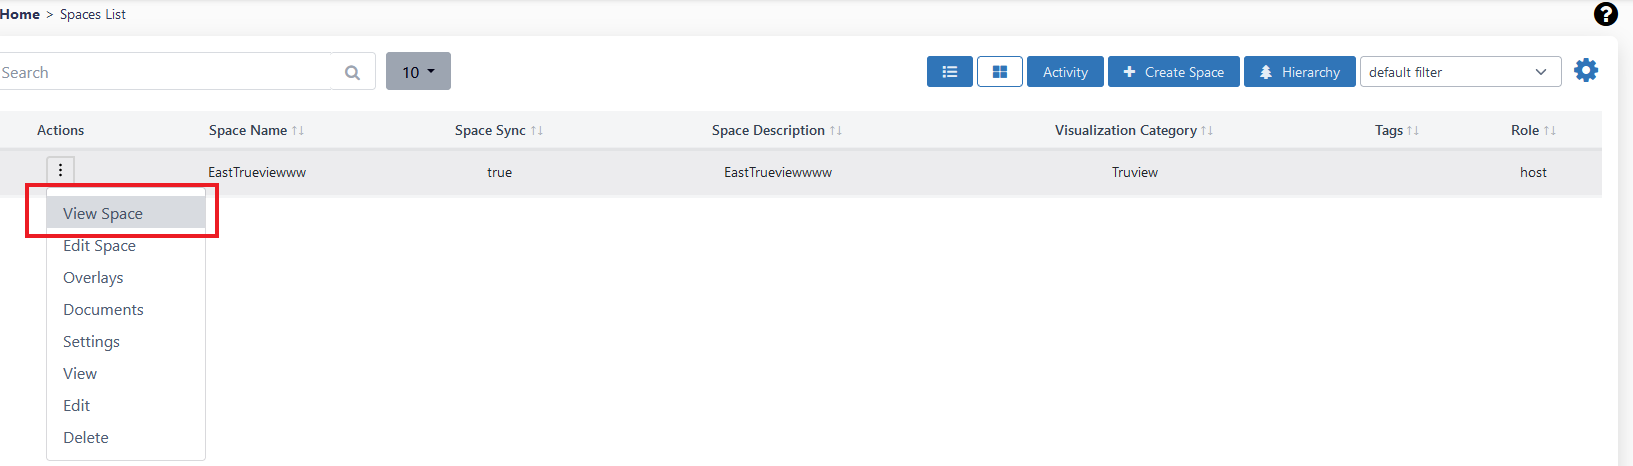
To view the space click on "action" button and select "view space".
-
Truview space will appear in below image.