Panorama Flow
Input sources
There are different types of cameras which produce 360° image.
which are
-
Insta 360 cameras
-
Leica cameras
-
Go Pro Cameras
-
Richo Theta camera
Insta 360 cameras
There are some cameras which supports 360 image which are.
-
Consumer & Action Cameras:
a. Insta360 GO 3 -- Tiny, wearable action camera (not full 360 but ultra-wide FOV).
b. Insta360 One X2 -- Predecessor to X3, still a great 360 action camera.
c. Insta360 One R (Twin Edition) -- Modular camera with both 360° and standard lenses.
-
Professional & High-End Cameras
a. Insta360 Pro 2 -- 8K 3D VR camera with professional-grade stabilization.
b. Insta360 Titan -- 11K resolution VR camera for high-end content creation.
Capture data
To capture data is possible respective device or through application called 'insta 360' it supports Android and IOS devices.
Note : For Android it supports OS 7.0 or higher.
For IOS it supports IOS 11.0 or higher.
capture 360 images in Insta 360 device
Capture Process
-
Power On & Setup
-
Turn on the Insta360 camera.
-
Adjust resolution and capture settings directly on the camera.
-
-
Positioning & Shooting
-
Mount the camera on a tripod or hold it steadily.
-
Ensure a clear, unobstructed view.
-
Press the capture button to take a 360° image.
-
The camera captures images from both lenses simultaneously, stitching them internally or during post-processing.
-
-
Storage & Transfer
-
Images are stored on a microSD card.
-
Files can be accessed via USB-C cable or direct SD card transfer to a computer.
-
Capturing Data Using the Insta360 App (Android & iOS)
-
Connecting the Camera
-
Turn on the Insta360 camera.
-
Enable Wi-Fi & Bluetooth on your phone.
-
Connect the phone to the camera's Wi-Fi network.
-
-
Camera Control & Settings
-
Open the Insta360 app.
-
Choose Photo or Video mode.
-
Adjust settings like:
-
Resolution (e.g., 5.7K, 4K)
-
HDR / Standard mode
-
Shutter speed & ISO (if manual mode is enabled)
-
-
-
Capturing a 360° Image
-
Tap the Shutter button in the app to capture an image.
-
The camera will stitch images internally or save them in RAW format for post-processing.
-
Note : Application can produces processed 360 jpg image format.
Downloading Captured Data (Android & iOS)
-
Transfer via Insta360 App
-
Open the album/gallery in the Insta360 app.
-
Select images/videos you want to download.
-
Tap "Download", and the files will transfer to your phone's storage.
- 1On iOS, files appear in the Photos app or Files app (depending on settings).
-
-
Transfer via USB or SD Card
-
Remove the microSD card from the camera.
-
Insert it into a card reader and connect it to a PC or phone.
-
Manually copy the files for further processing.
-
Leica 360 cameras
There are some cameras which supports 360 image which are
-
Leica BLK360 (G1 & G2) -- A compact LiDAR scanner with 360° imaging and thermal capabilities.
-
Leica RTC360 -- A high-end 3D laser scanner with automated 360° image capture.
-
Leica BLK2GO -- A handheld mobile mapping scanner with panoramic imaging.
-
Leica BLK ARC & BLK2FLY -- Autonomous scanning devices with built-in 360° cameras.
Capture Process in Leica 360° Cameras
-
Setup & Calibration
a. Power on the device and ensure a stable position on a tripod or mounting point.
b. If required, calibrate the camera to ensure accurate 360° capture.
-
Positioning & Environment Check8
a. Ensure the camera has a clear view of the surroundings.
b. Minimize moving objects in the scene for clean captures
-
Capturing the 360° Image
a. Press the capture button on the device or trigger remotely.
b. The camera captures multiple images in all directions.
c. For LiDAR models (BLK360, RTC360), the device also scans depth data for 3D mapping.
d. Automatic stitching processes the images into a seamless 360° panorama.
-
Storage & Saving
a. Captured 360° images are stored in E57, LGS, or JPEG formats.
b. Data is saved to internal memory or an external SD card.
-
Rico Theta cameras
-
Go pro cameras
Pre-processing
For each camera it has own processing flow. In below each section of cameras explained of its own processing flow.
Insta 360 cameras
Convert the Raw captured file through Insta 360 studio application.
Transferring Data from Insta360 Camera to Windows Laptop
Method 1: Direct USB Transfer
- Power on the Insta360 camera
-
Connect the camera to the laptop using a USB-C cable.
-
The camera should appear as a removable drive in File Explorer.
-
Open the folder and copy the files (e.g., INSP, INSV, DNG) to your
Method 2: microSD Card Transfer
-
Turn off the Insta360 camera.
-
Remove the microSD card from the camera.
-
Insert it into a card reader and connect it to the Windows laptop.
-
Open File Explorer → Navigate to the SD card → Copy the INSP files
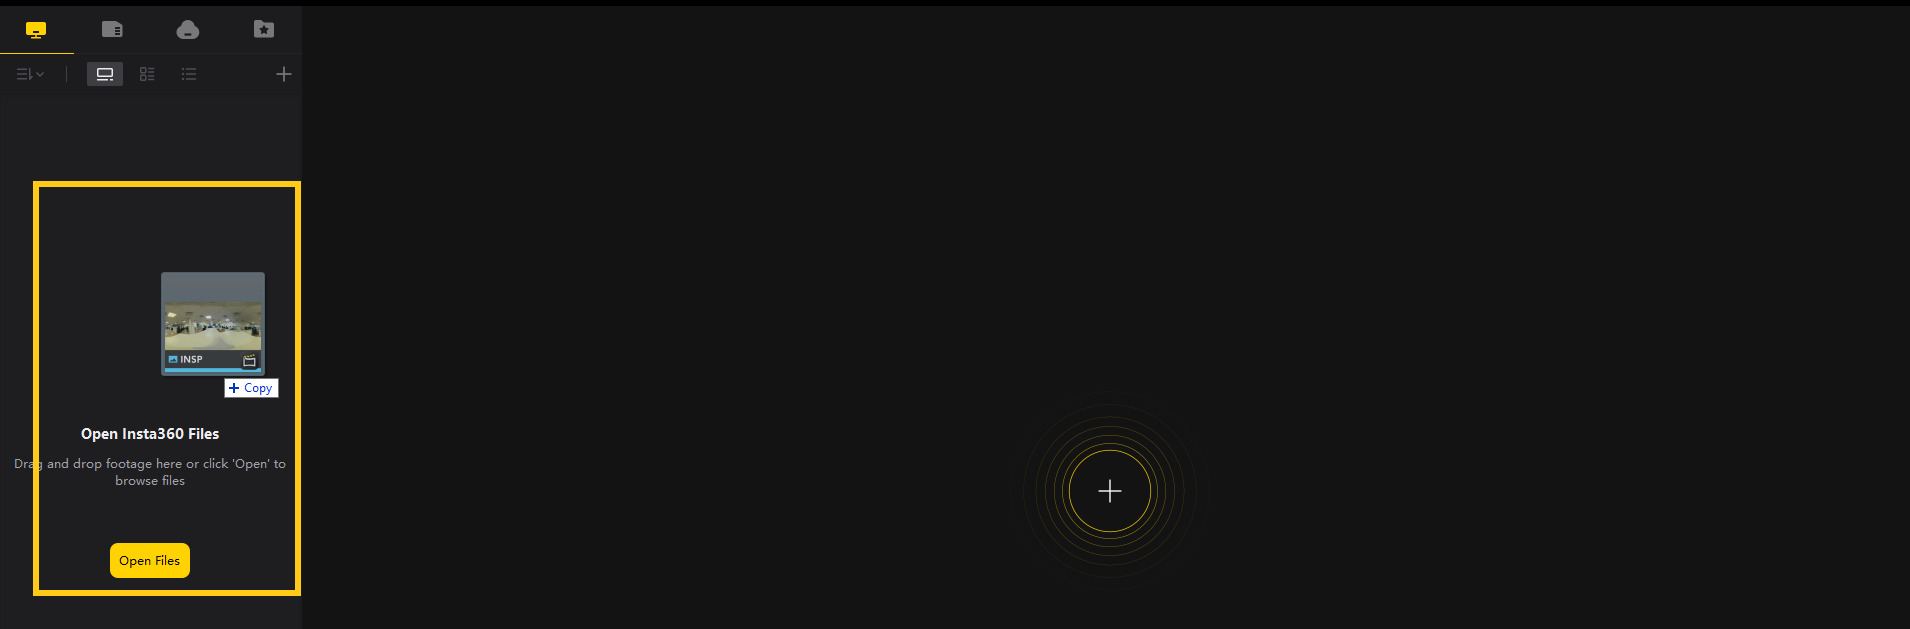
Processing RAW (INSP) to 360° JPG in Insta360 Studio
-
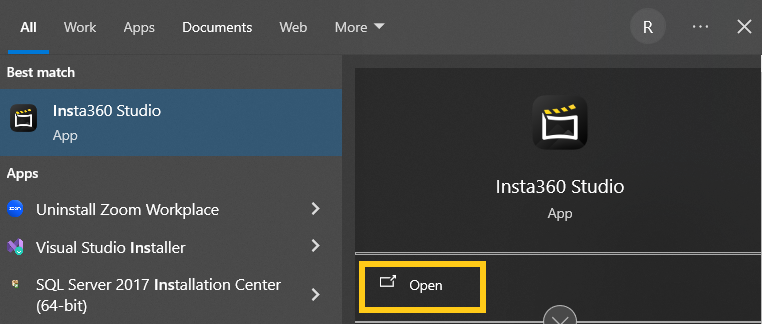
Install & Open Insta360 Studio
a. Download Insta360 Studio from the Insta360 website.
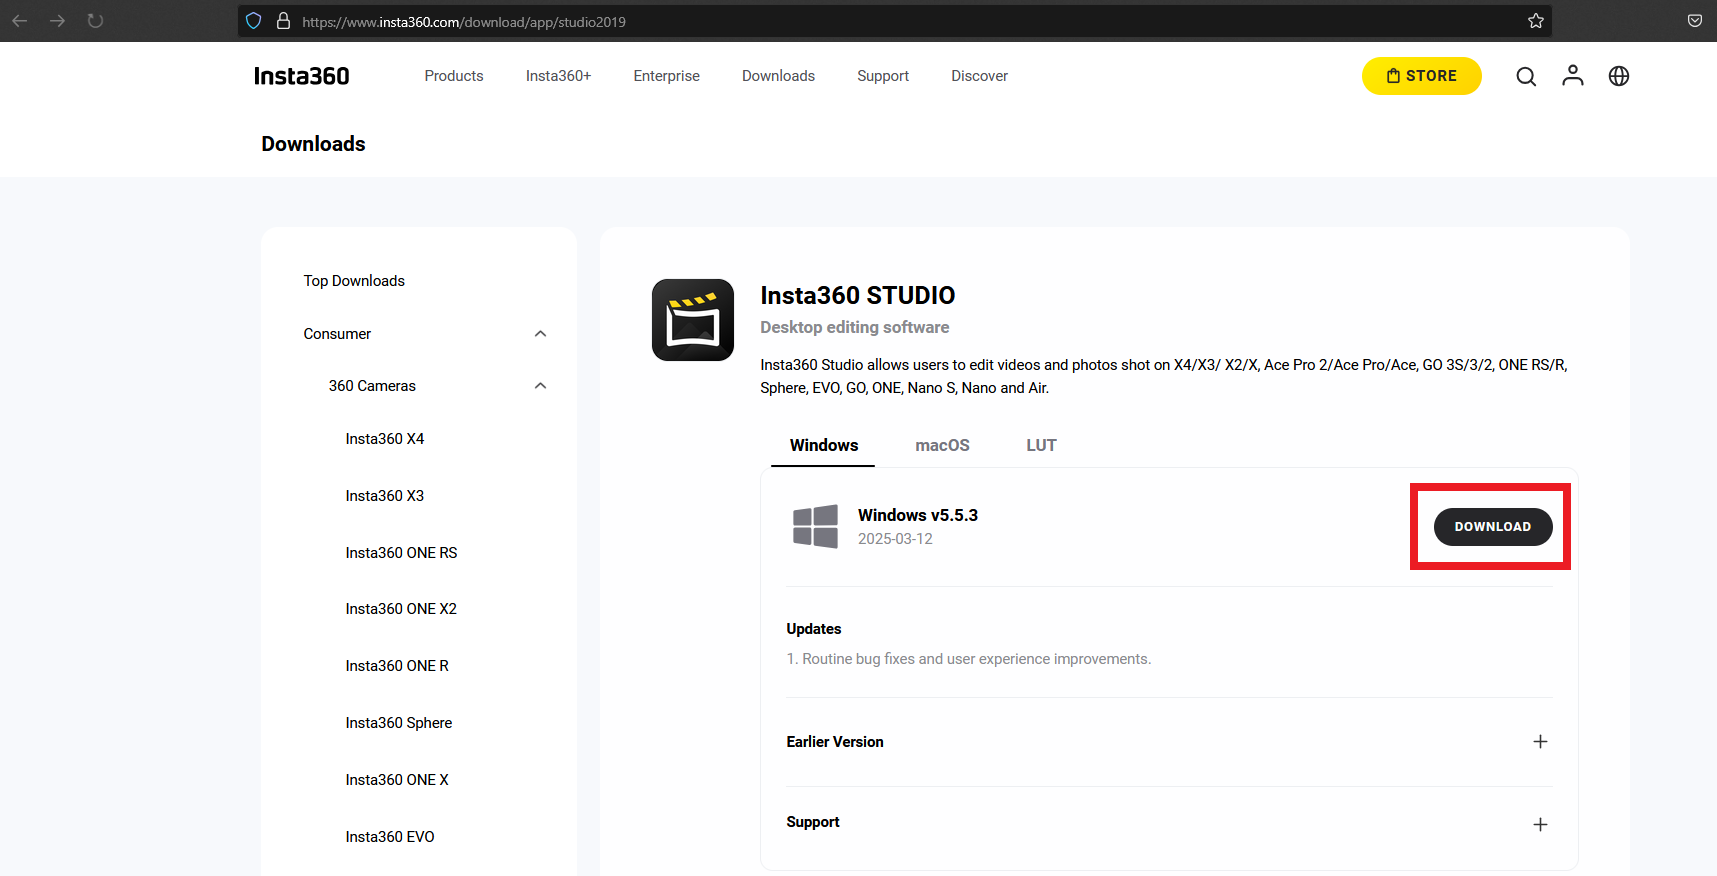
b. Install and launch the software on your windows laptop.
-
Import INSP Files
a. Click "Open File" and select the INSP (RAW) images.
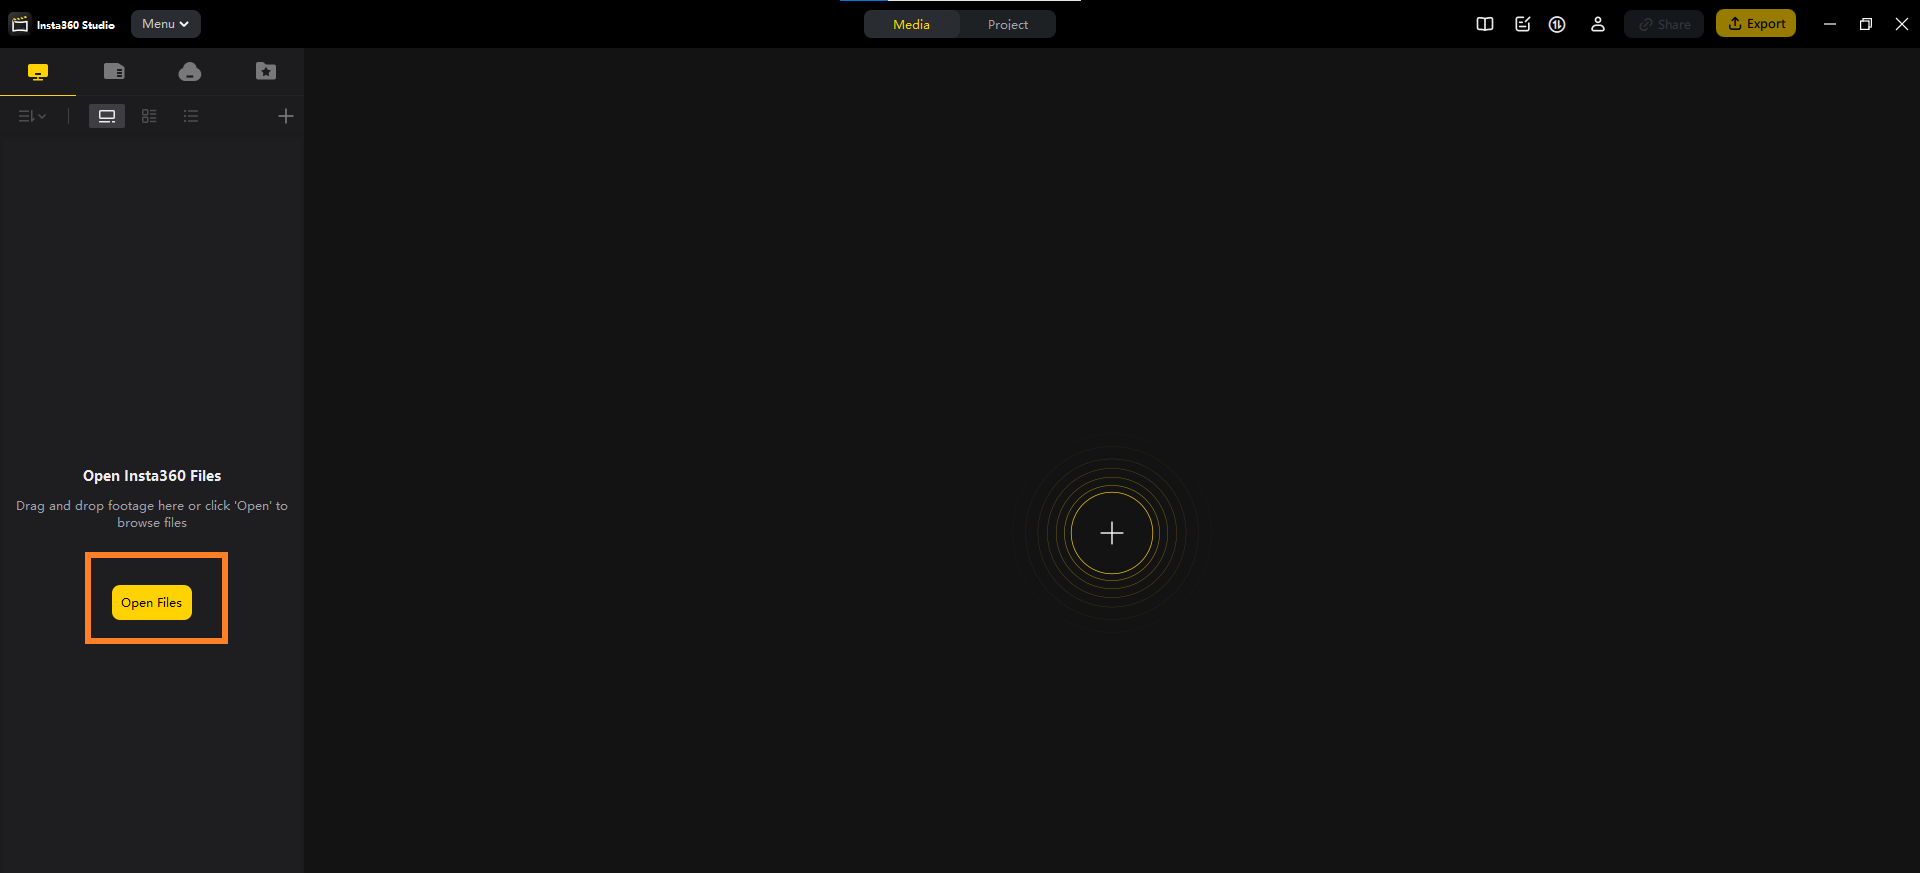
b. Drag and drop files directly into the Insta360 Studio interface.
-
Adjust & Process the Image
a. The software will automatically stitch the image into a 360° equirectangular view.
b. You can make edits like:
i. Horizon levelling
ii. Colour correction
iii. Exposure adjustments
-
Export to 360° JPG
a. Click "Export" in the top menu.
b. Choose JPEG (JPG) format as the output.
c. Adjust the resolution (e.g., 5.7K, 4K).
d. Select file destination and click "Start Export".
Leica Cameras
Convert the raw capture file through different applications.
-
Leica Software for 360° Image Extraction (LGS&E57)
a. Leica Cyclone Register 360+
b. Leica cyclone 3DR
c. Leica Truview
-
Third-Party Software for E57 Processing
a. Cloud Compare
b. Autodesk Recap Pro
Processing in Leica Cyclone 3DR
Extracting Panorama Images from. LGS and .E57 in Cyclone 3DR
LGS Format
-
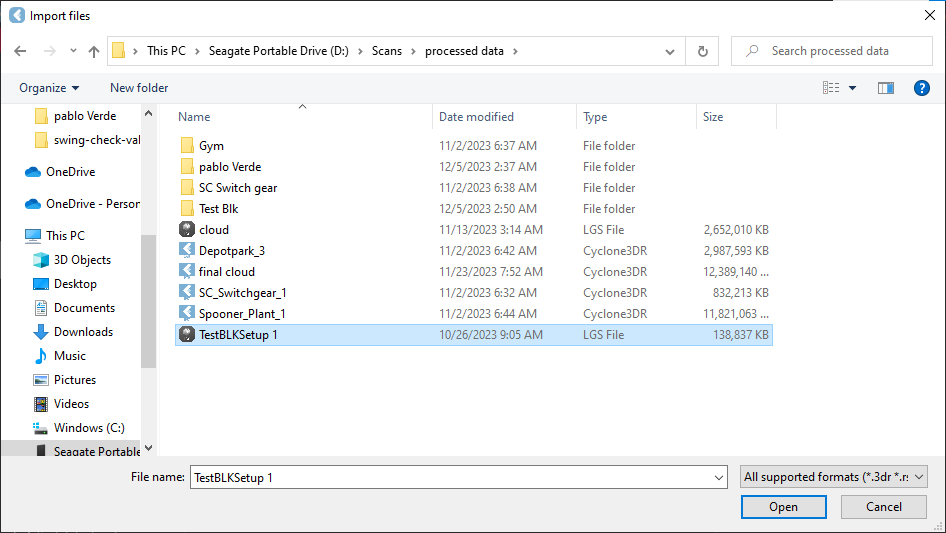
Import .Lgs file in 3dr application. .Lgs file in shown below.

-
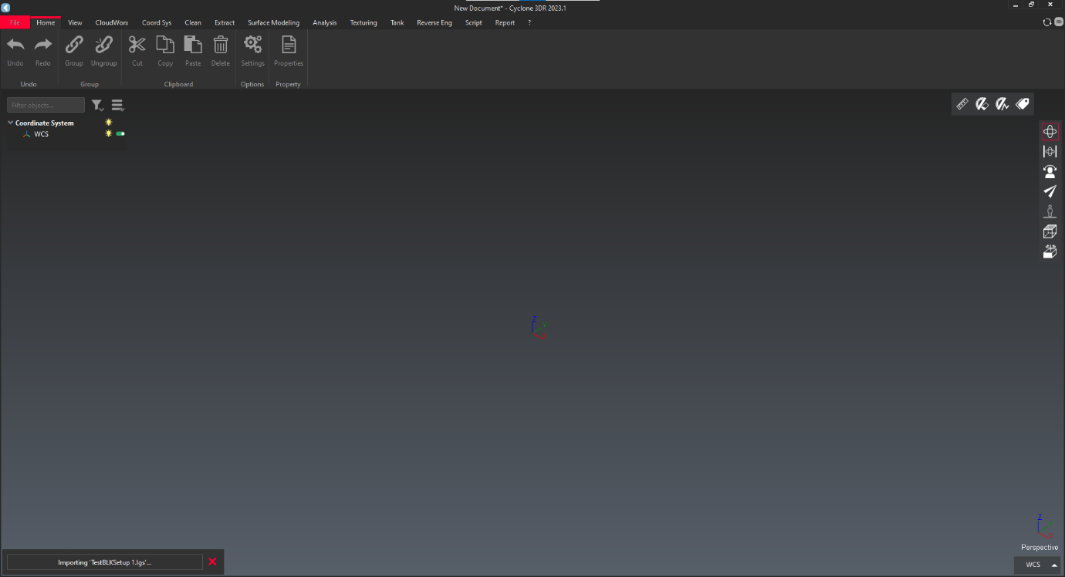
Open Cyclone 3DR applications. Home Interface shown below.
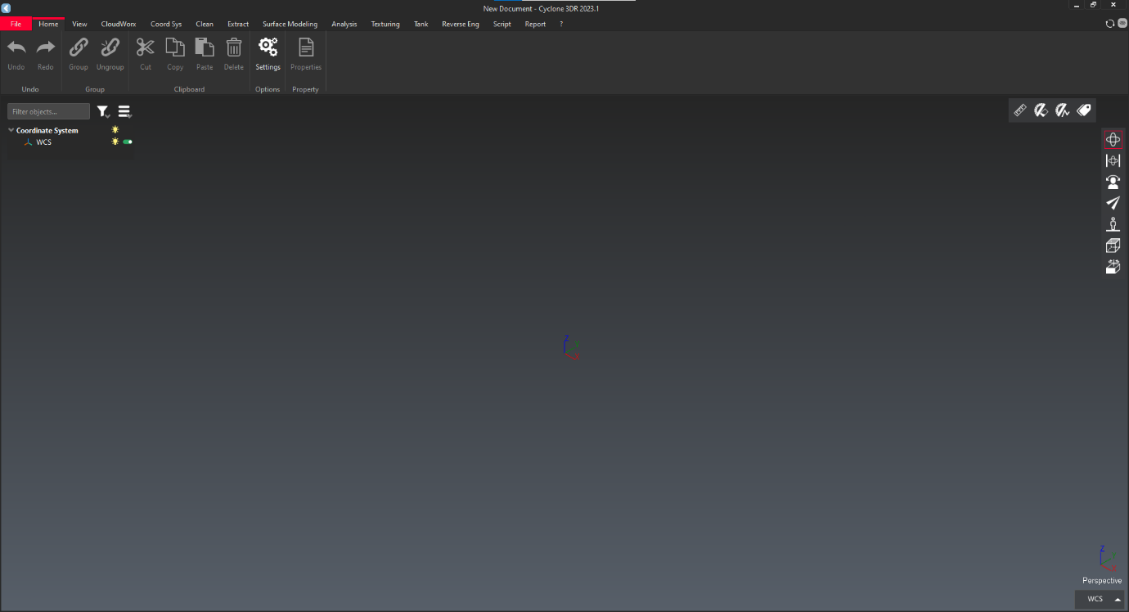
-
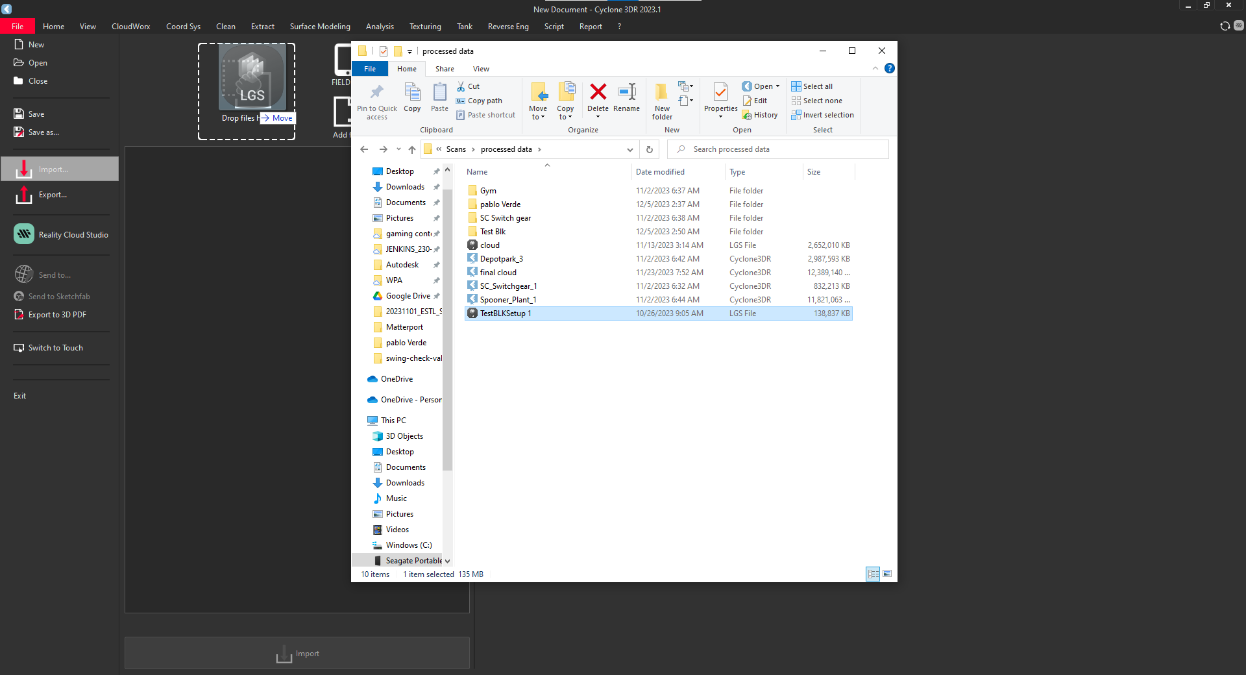
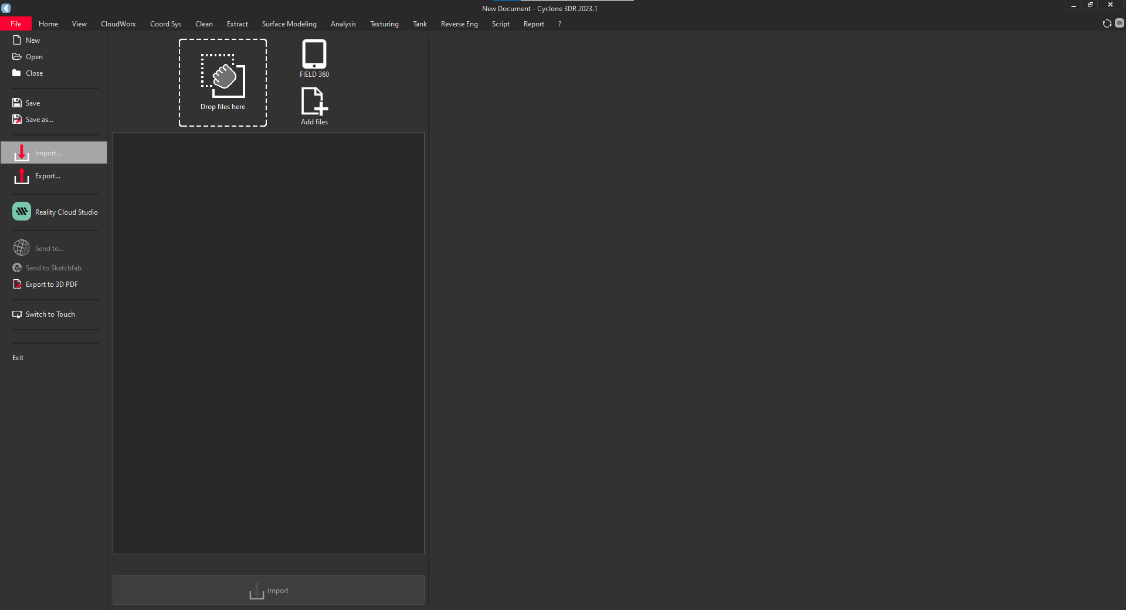
Click on "File" and click on import.
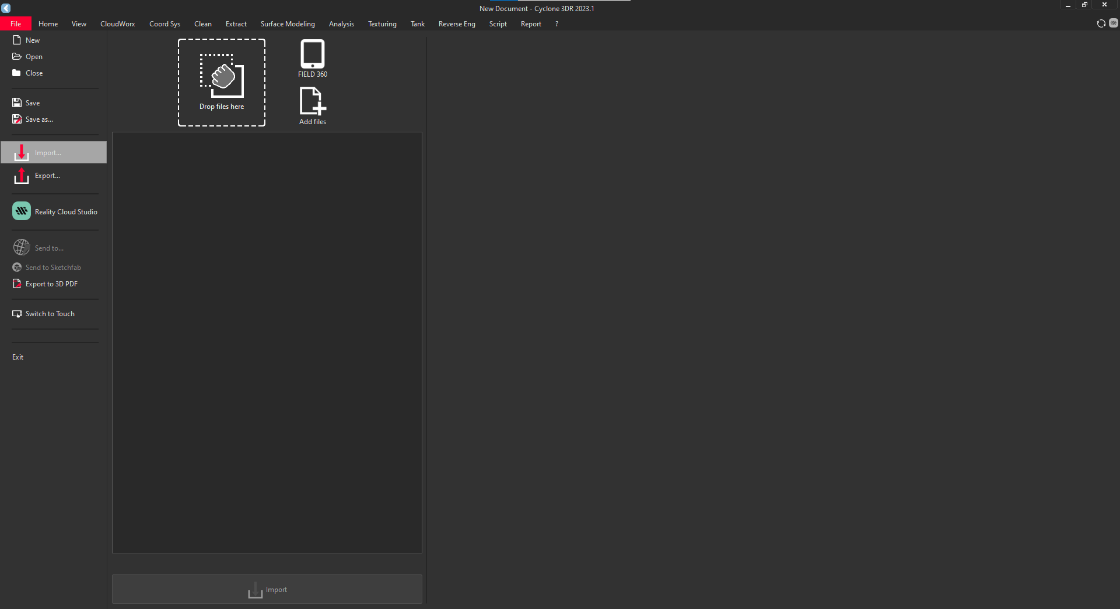
-
To import the file, they are two ways to import.
-
Drag and drop option: simply drag the file into rectangular box.

-
Browse option: click on "Add Files" and browse the file.

-
-
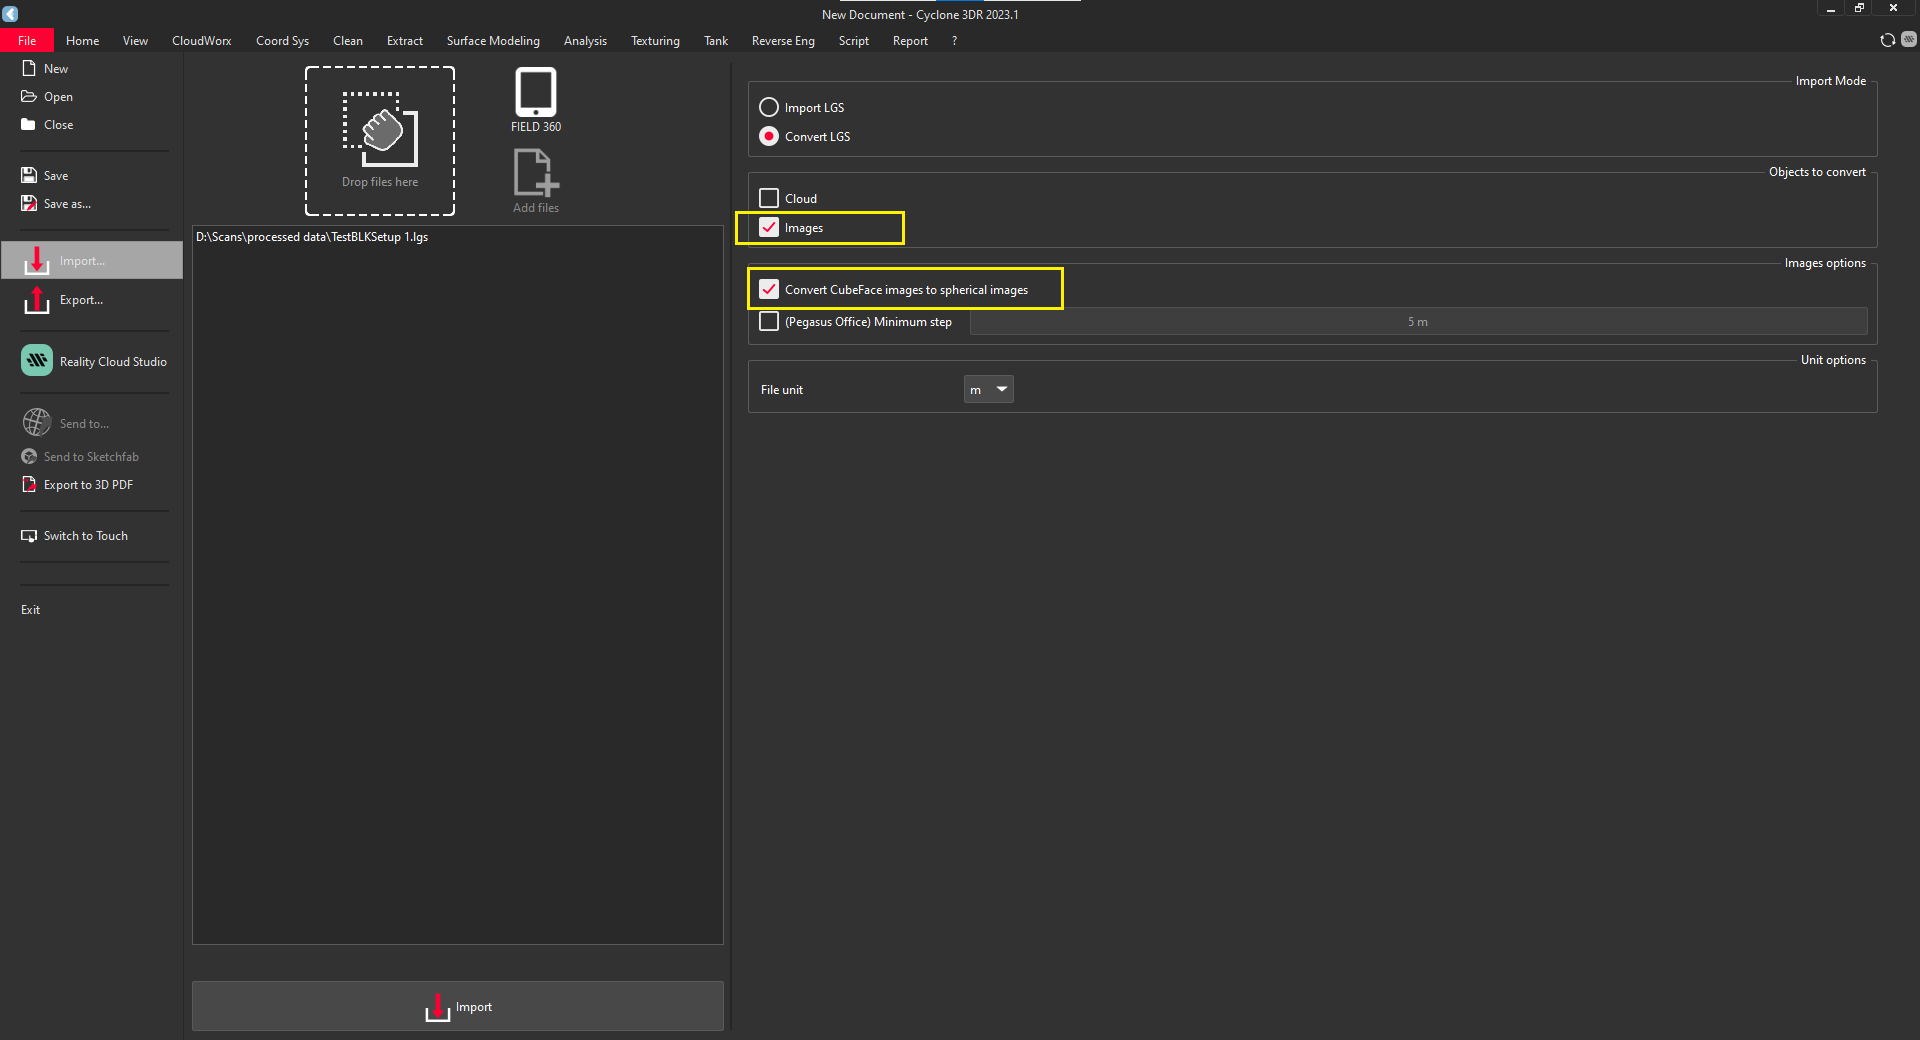
After importing the file click on "Convert LGS" and select "Convert Cube face images into spherical image" Finally click on "Import".
-
It takes some time to import .
-
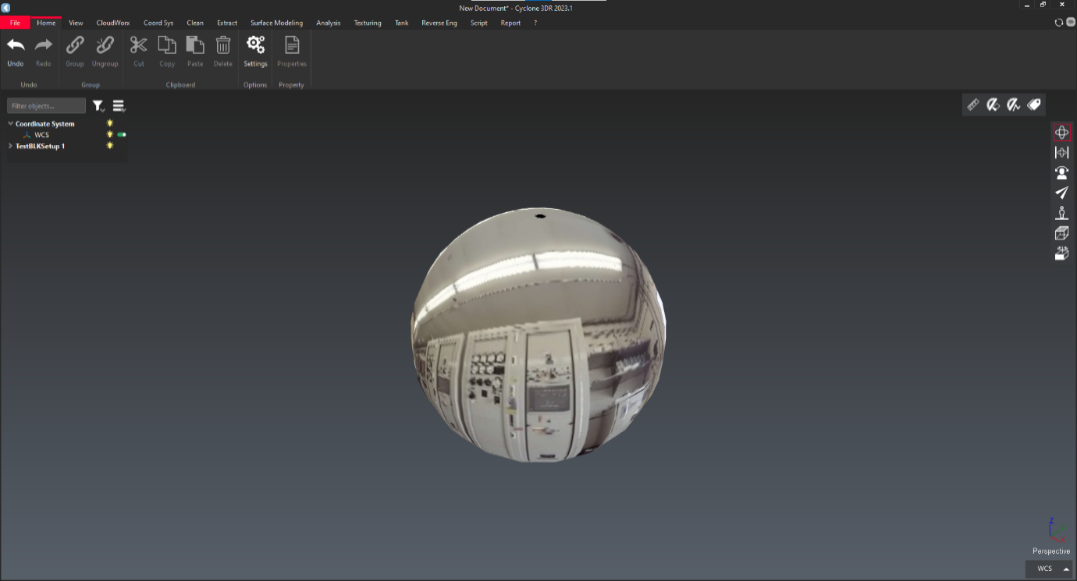
After successfully import interface shown in below.
-
Click on "File" and select "Export". Choose "Visible object".
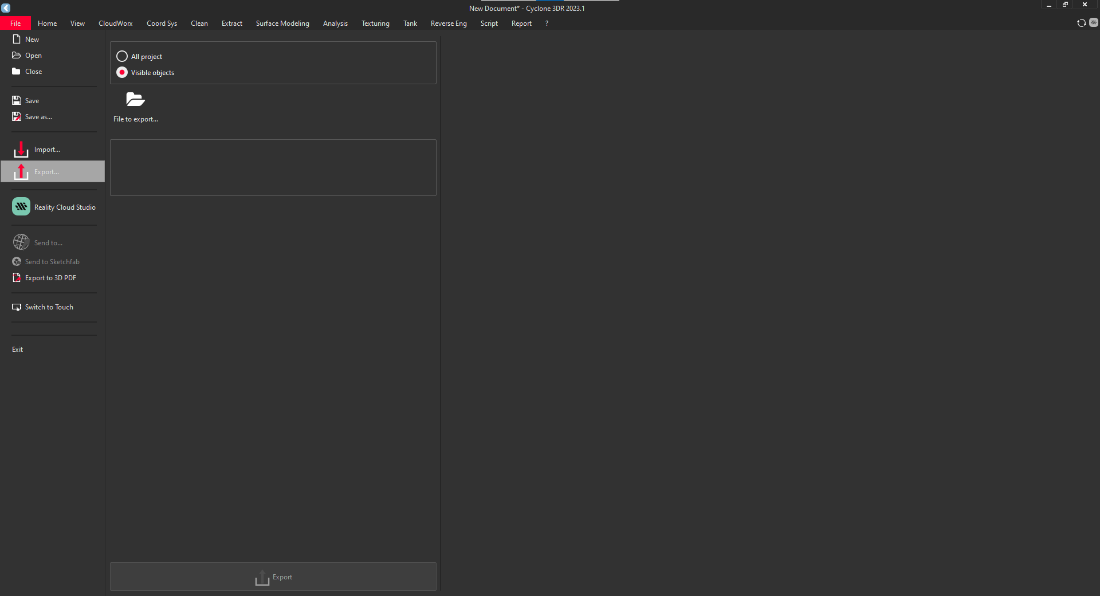
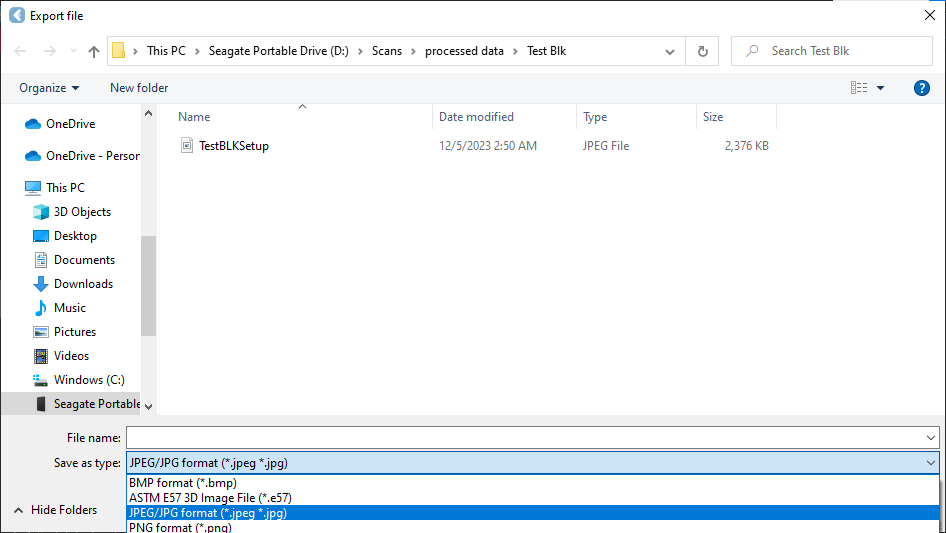
-
Choose the path and find ".jpeg format" option. Name the file and press "save" to save the file.
-
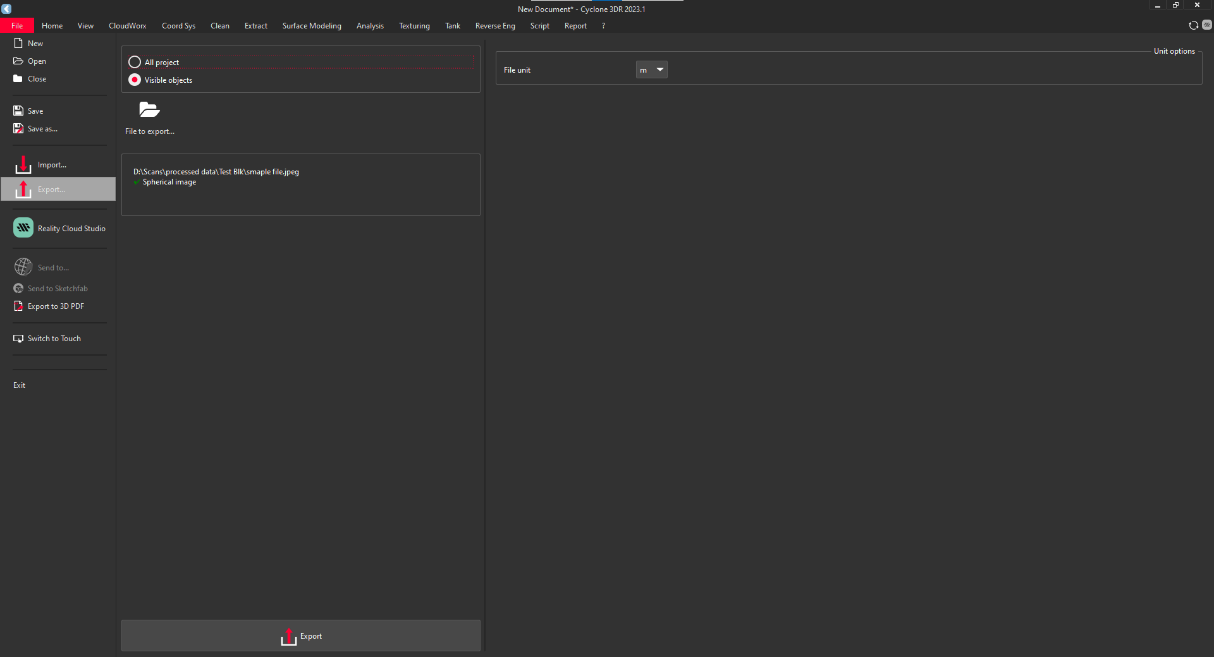
Check whether, there should be tick mark in spherical image.

-
Click on "Export" to save the file.
E57 format
-
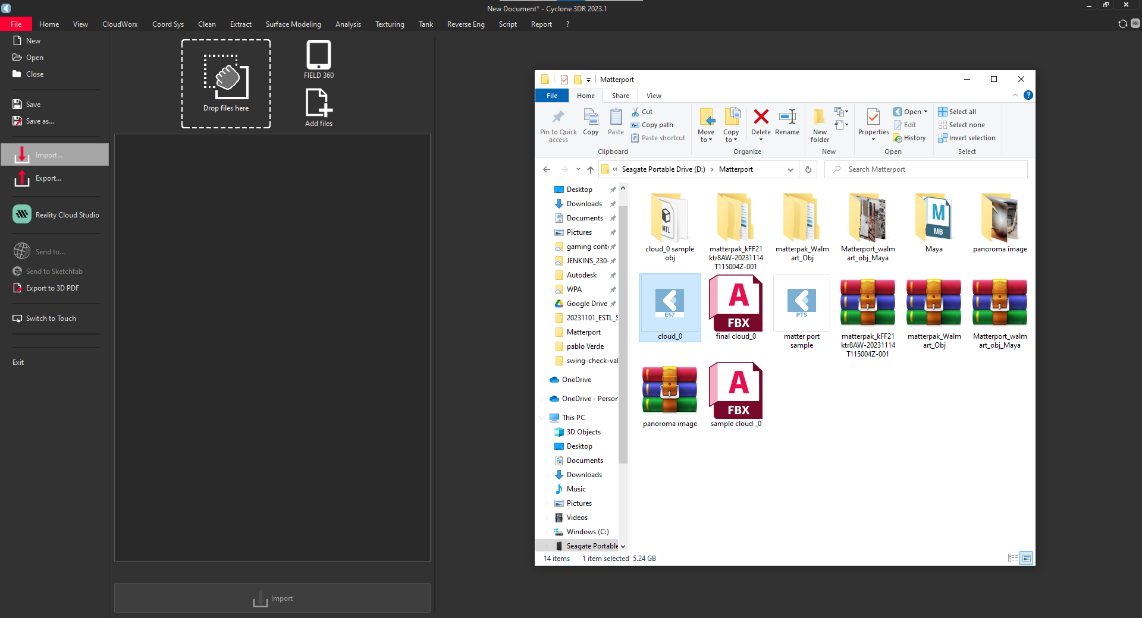
Import .E57 format file in 3dr application . .E57 file shown in below image.

-
Open Cyclone 3DR applications. Home Interface shown below.
-
Click on "File" and click on import.
-
To import the file, they are two ways to import.
-
Drag and drop option: simply drag the file into rectangular box.

-
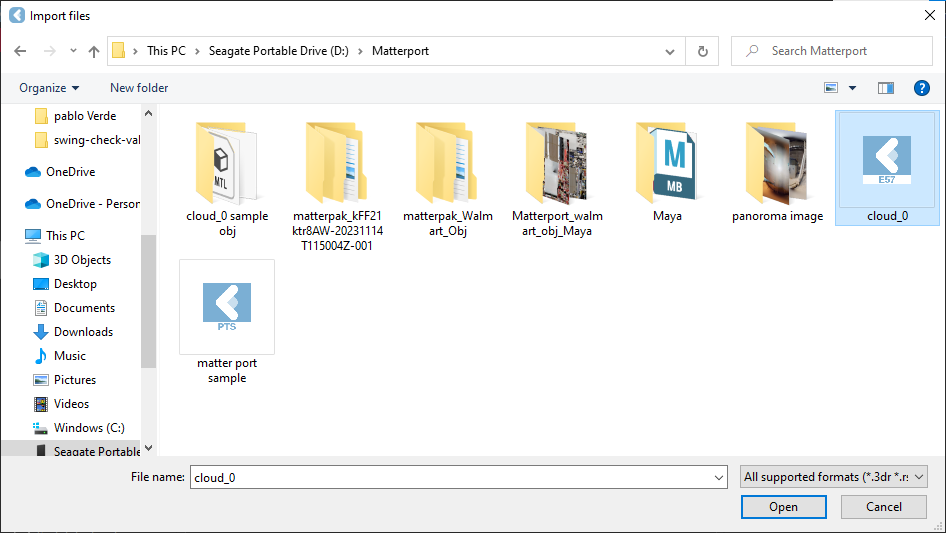
Browse option: click on "Add Files" and browse the file.
-
-
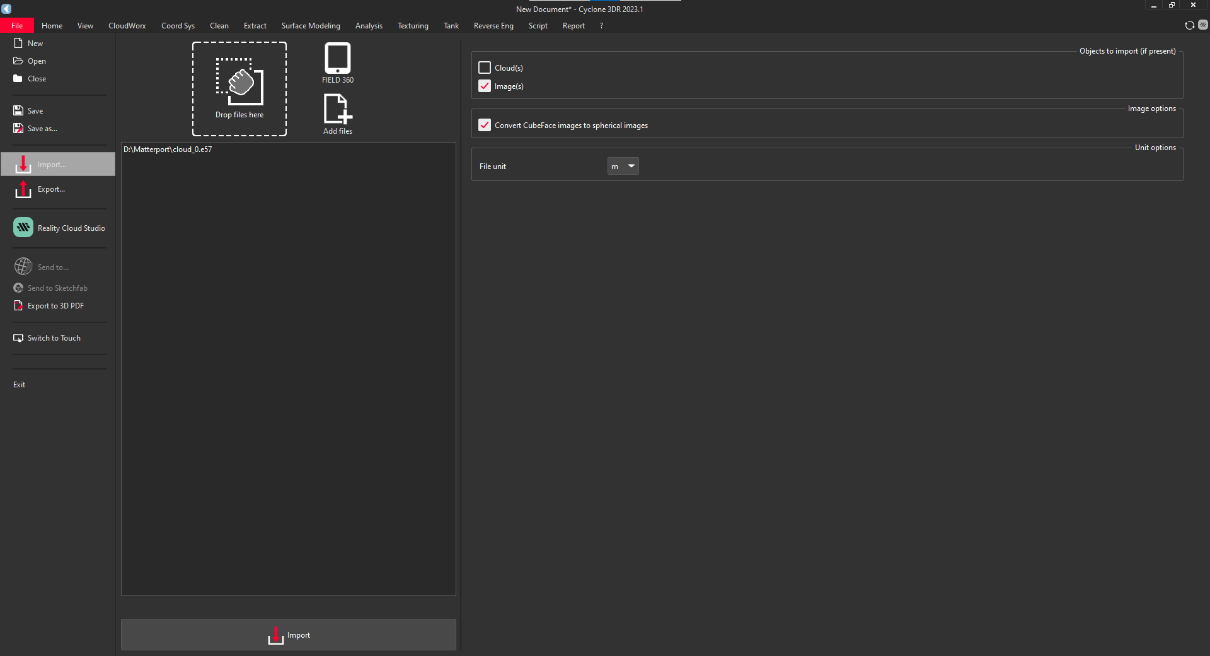
After that select "Images" and "convert Cube Face Image" into "Spherical Image".
-
It take some time to import.

-
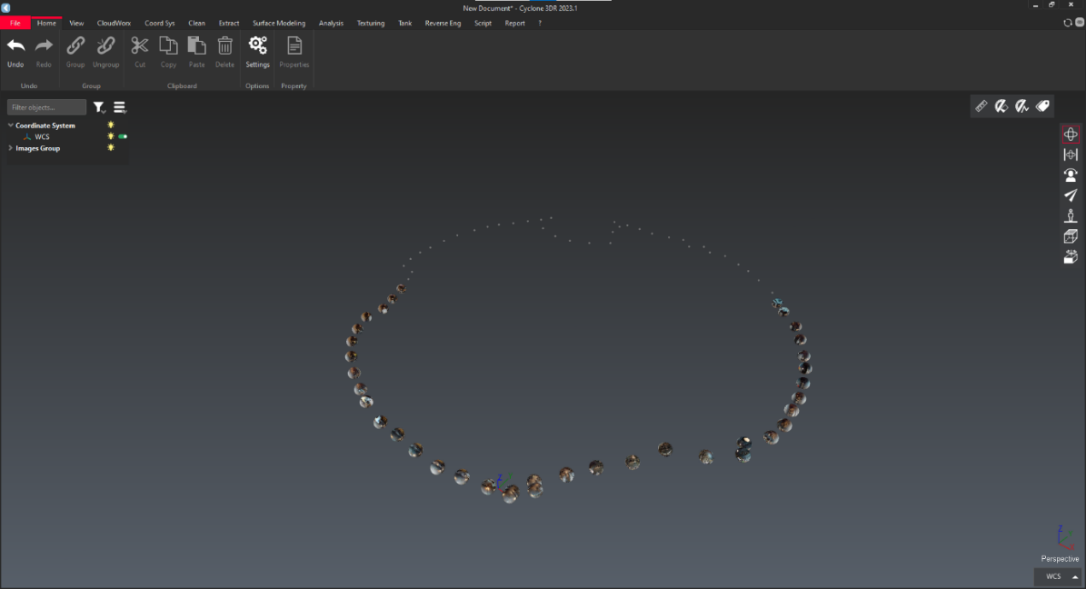
After successfully import interface shown in below.
-
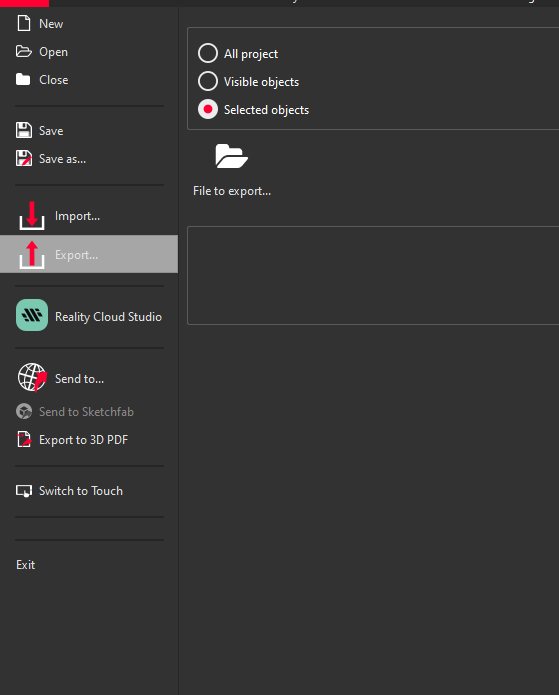
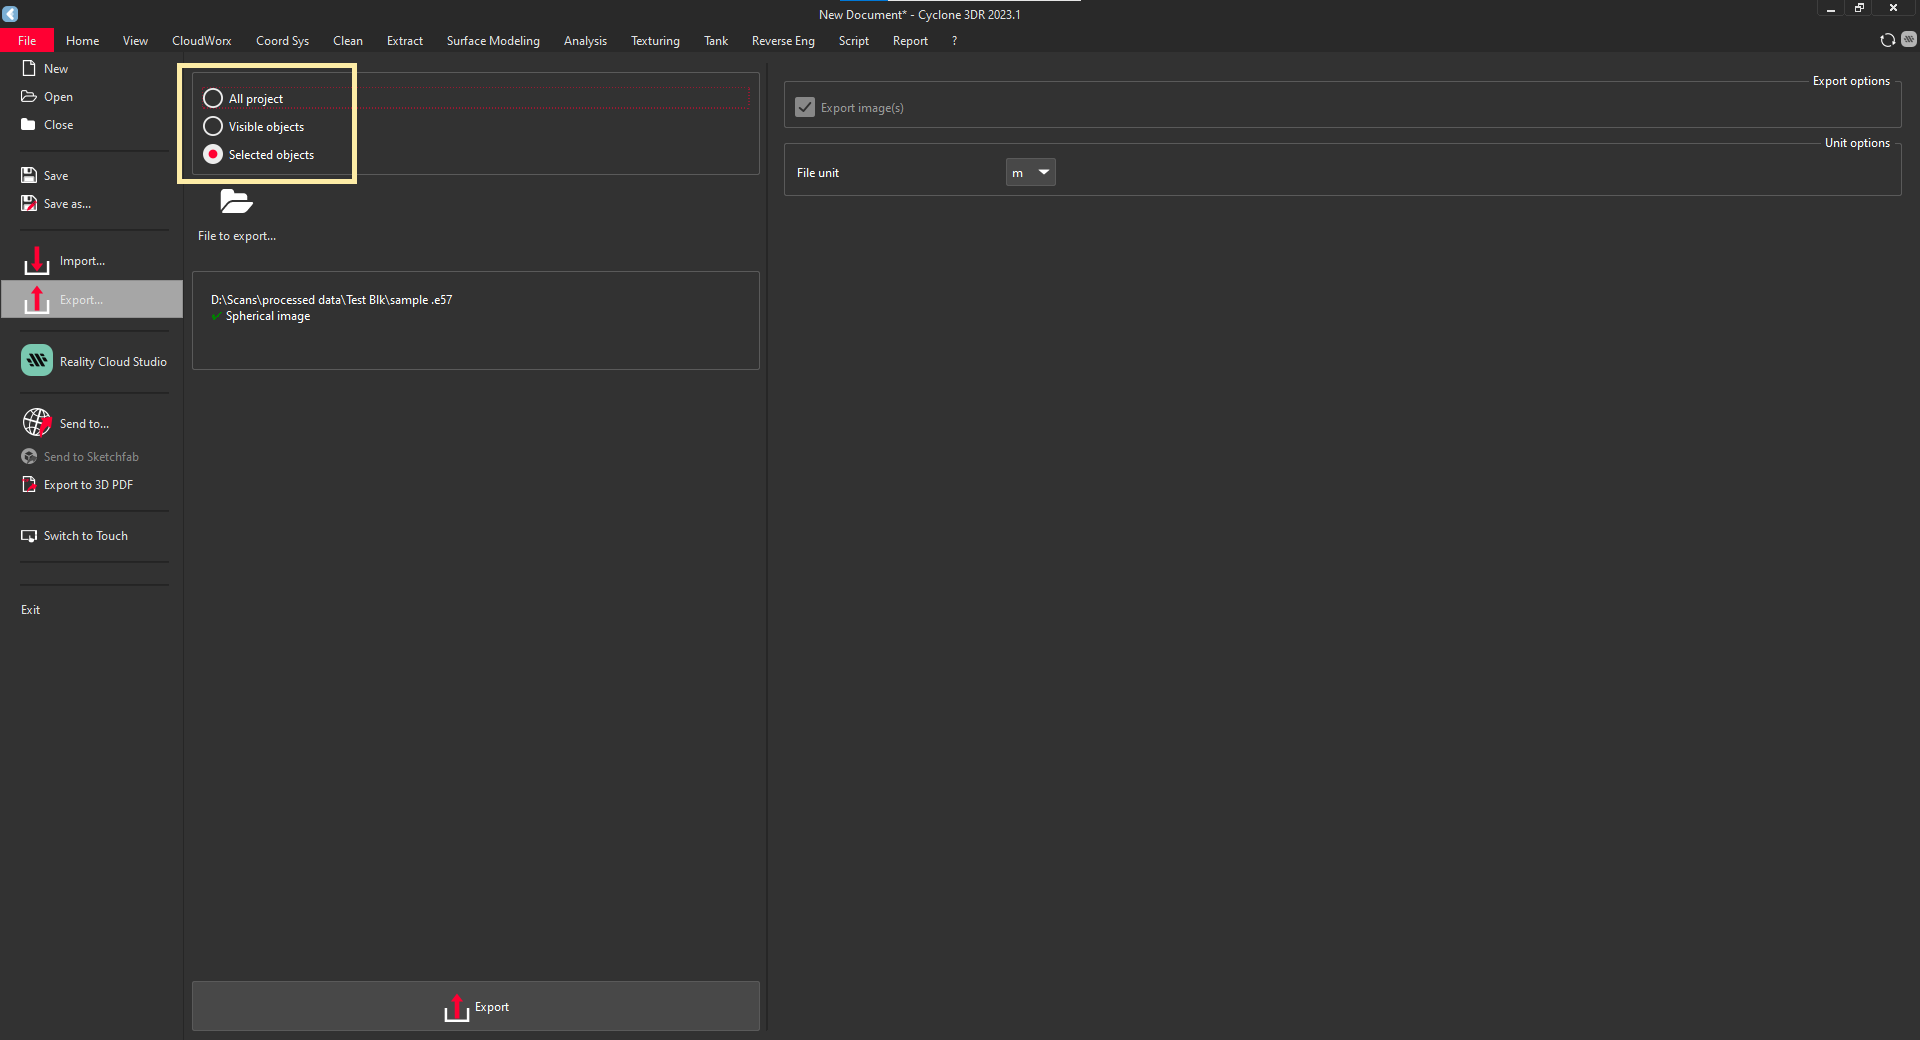
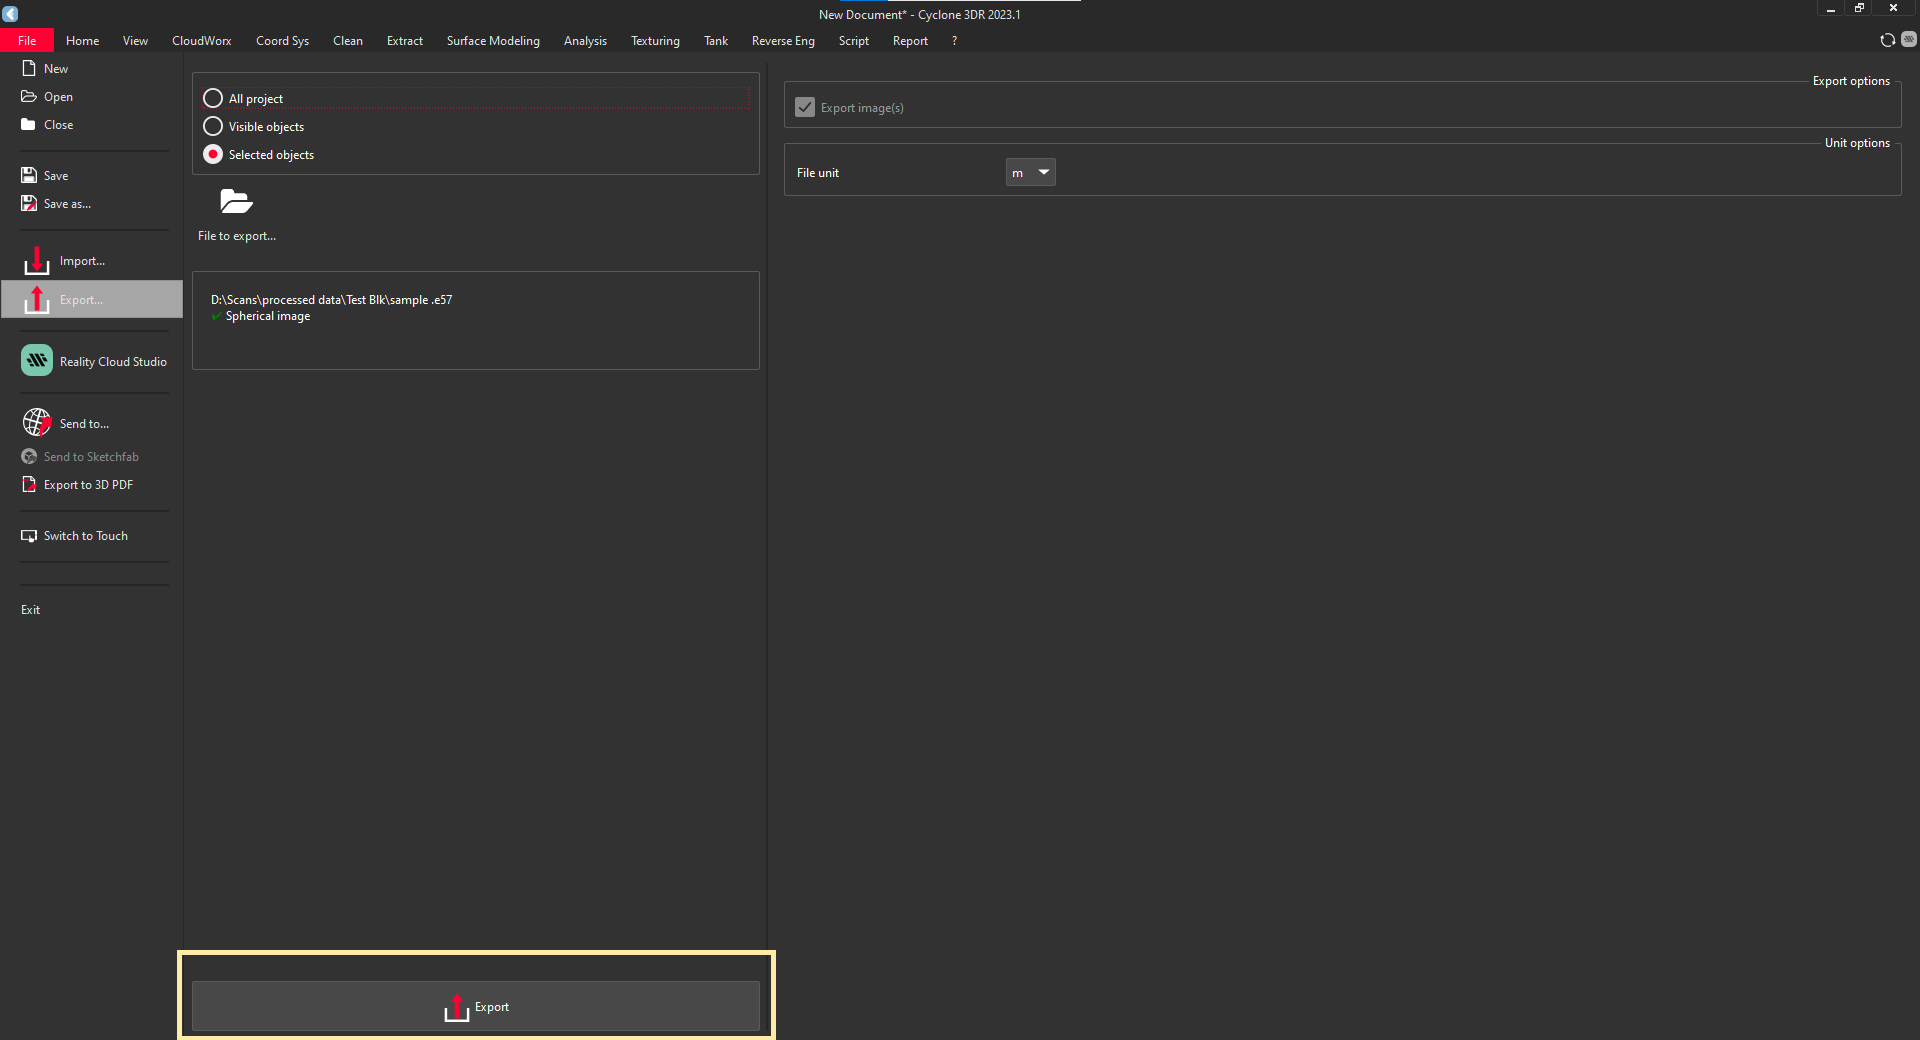
Click on "File" and select "Export". Choose "Visible object". If you need single object, then select "Selected Object"
-
Choose the path and find ".jpeg format" option. Name the file and press "save" to save the file.
-
Check whether, there should be tick mark in spherical image.
-
Click on "Export" to save the file to your Local Disk.
Processing in Leica Cyclone Register 360
Extracting Panorama Images from CloudCompare
-
Importing Point Cloud Data
a. Step 1: Open CloudCompare.
i. Launch CloudCompare on your computer.
ii. Click "File" → "Open" and select your E57 or LAS file.
iii. Wait for the software to load the point cloud.
b. Step 2: Adjusting View for Panorama Extraction
i. Navigate to the View tab and choose "Bubble View" (if available in the dataset).
ii. Adjust the camera position to a scan station to align with a panoramic viewpoint.
iii. Use the Navigation Tool to rotate and position the view as needed.
-
Processing & Enhancing the Point Cloud
a. Step 1: Filtering Unwanted Points.
i. Use "Edit → Scalar Fields" to clean noise and adjust point visibility.
ii. Apply "Segmentation" if needed to refine the visible area.
b. Step 2: Converting Point Cloud to Image Projection
i. Go to "Tools" → "Projection".
ii. Choose equirectangular projection for 360° image extraction.
iii. Set resolution and output parameters.
-
Extracting 360° Panorama Image
a. Step 1: Rendering and Exporting
i. Click "Render to Image".
ii. Select output resolution (e.g., 4096x2048 for high quality).
iii. Choose the image format (JPEG, PNG, or TIFF).
iv. Click Save to export the 360° image.
Extracting Panorama Images from Autodesk Recap
-
Importing Point Cloud Data
a. Step 1: Open Autodesk Recap
i. Launch Autodesk Recap Pro on your computer.
ii. Click "New Project" and choose "Import Point Cloud".
iii. Select your E57, RCP, or RCS file and wait for it to process.
b. Step 2: Navigating to Scan Positions
i. Once the point cloud is loaded, switch to "RealView" mode.
ii. Navigate to different scan positions where 360° data is available.
iii. Adjust the view angle to align with the desired panoramic perspective.
-
Processing & Enhancing the View
a. Step 1: Cleaning & Filtering
i. Use the Segmentation Tool to remove unwanted objects or noise.
ii. Adjust brightness, contrast, and color balance for clarity.
b. Step 2: Preparing for Export
i. Ensure you are in RealView mode with a full 360° spherical view.
ii. Set the resolution and projection type before exporting.
-
Extracting 360° Panorama Image
a. Step 1: Exporting from RealView.
b. Click "Export" → "Panoramic Image".
c. Choose equirectangular format for 360° compatibility.
d. Set output resolution (e.g., 8192x4096 f,or high-quality VR images).
e. Choose JPEG, PNG, or TIFF format and save the file.
Transforms
Intermediates
Upload and view in Panorama spaces in Snapdpl Platform.
Upload File in Snapdpl platform
-
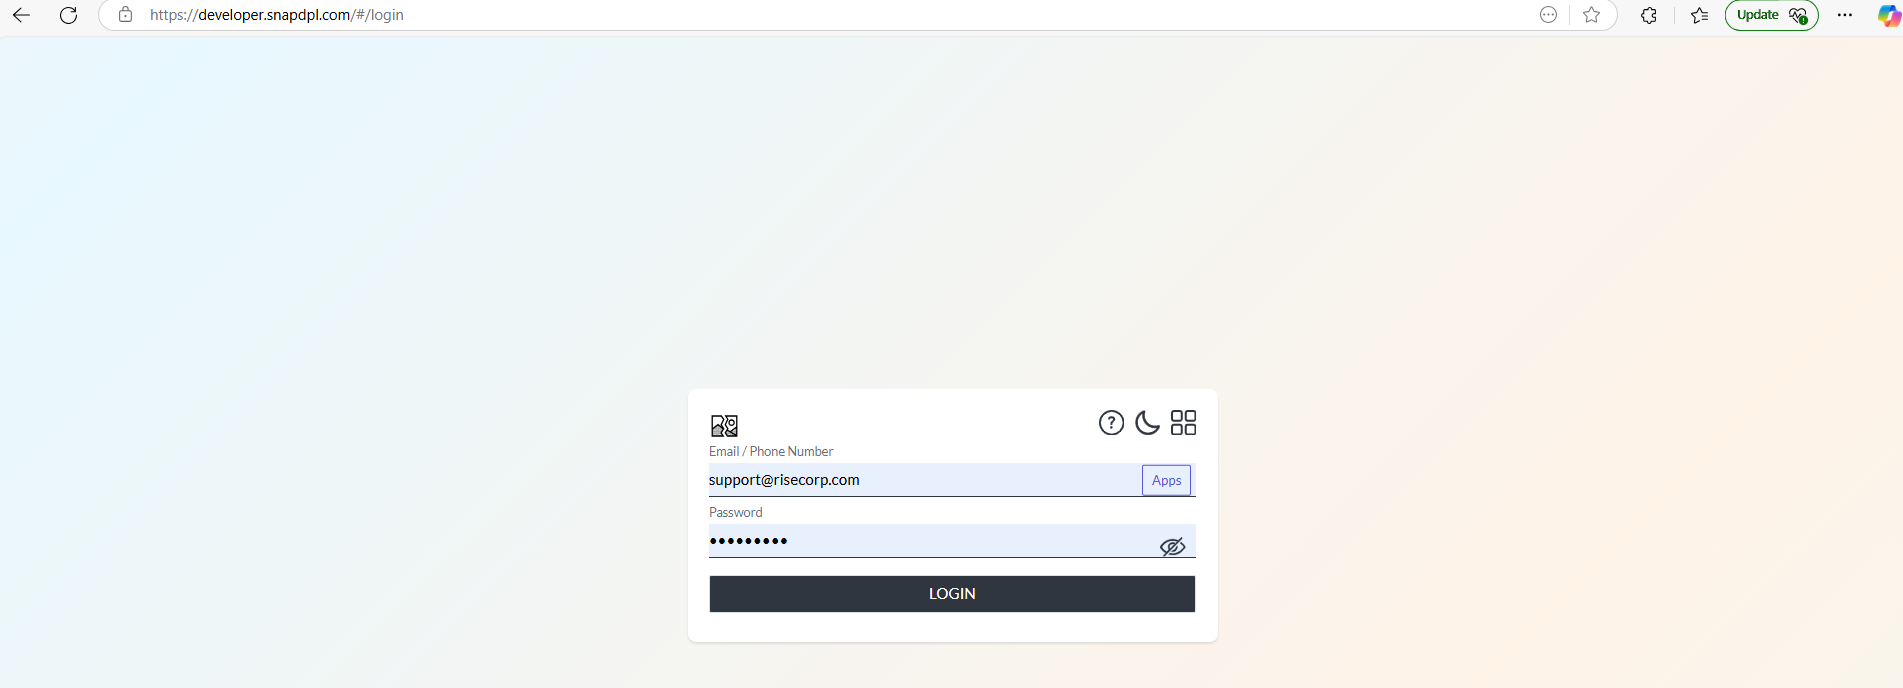
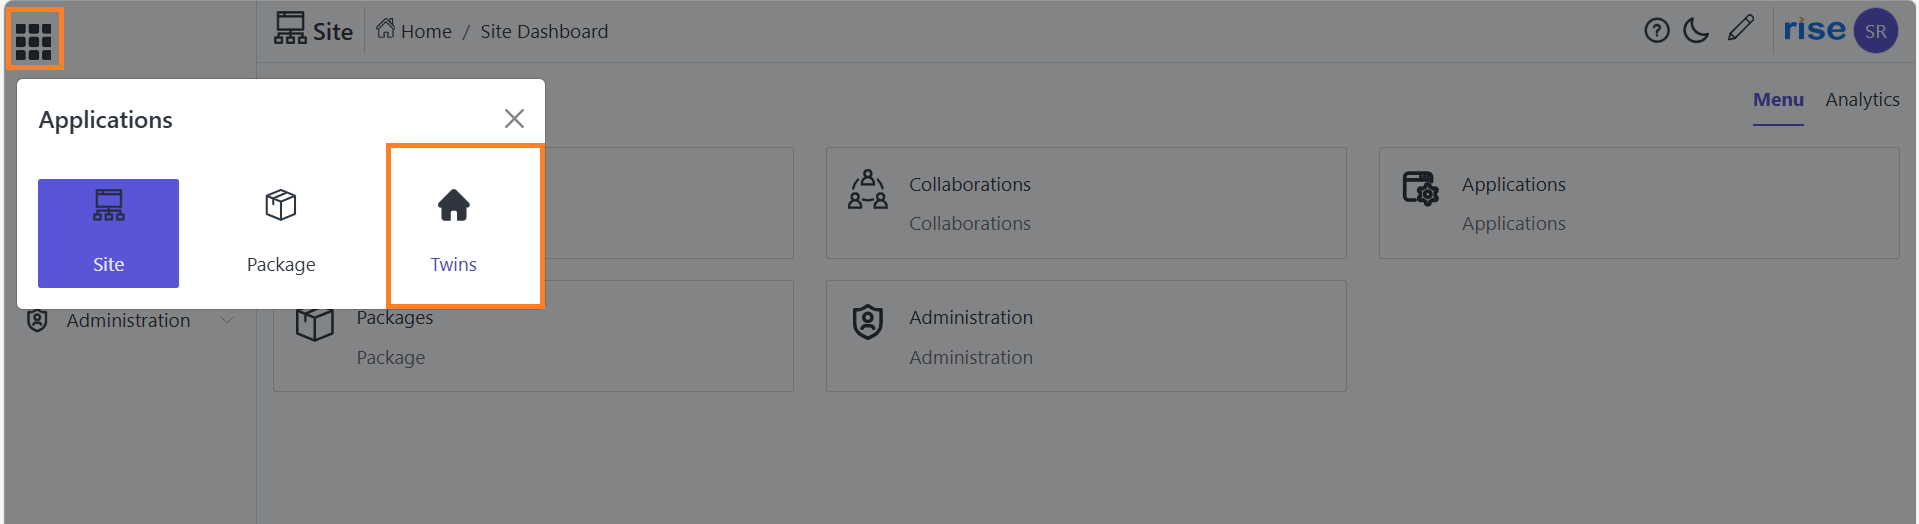
Open Snapdpl platform and login the page through valid credentials.
-
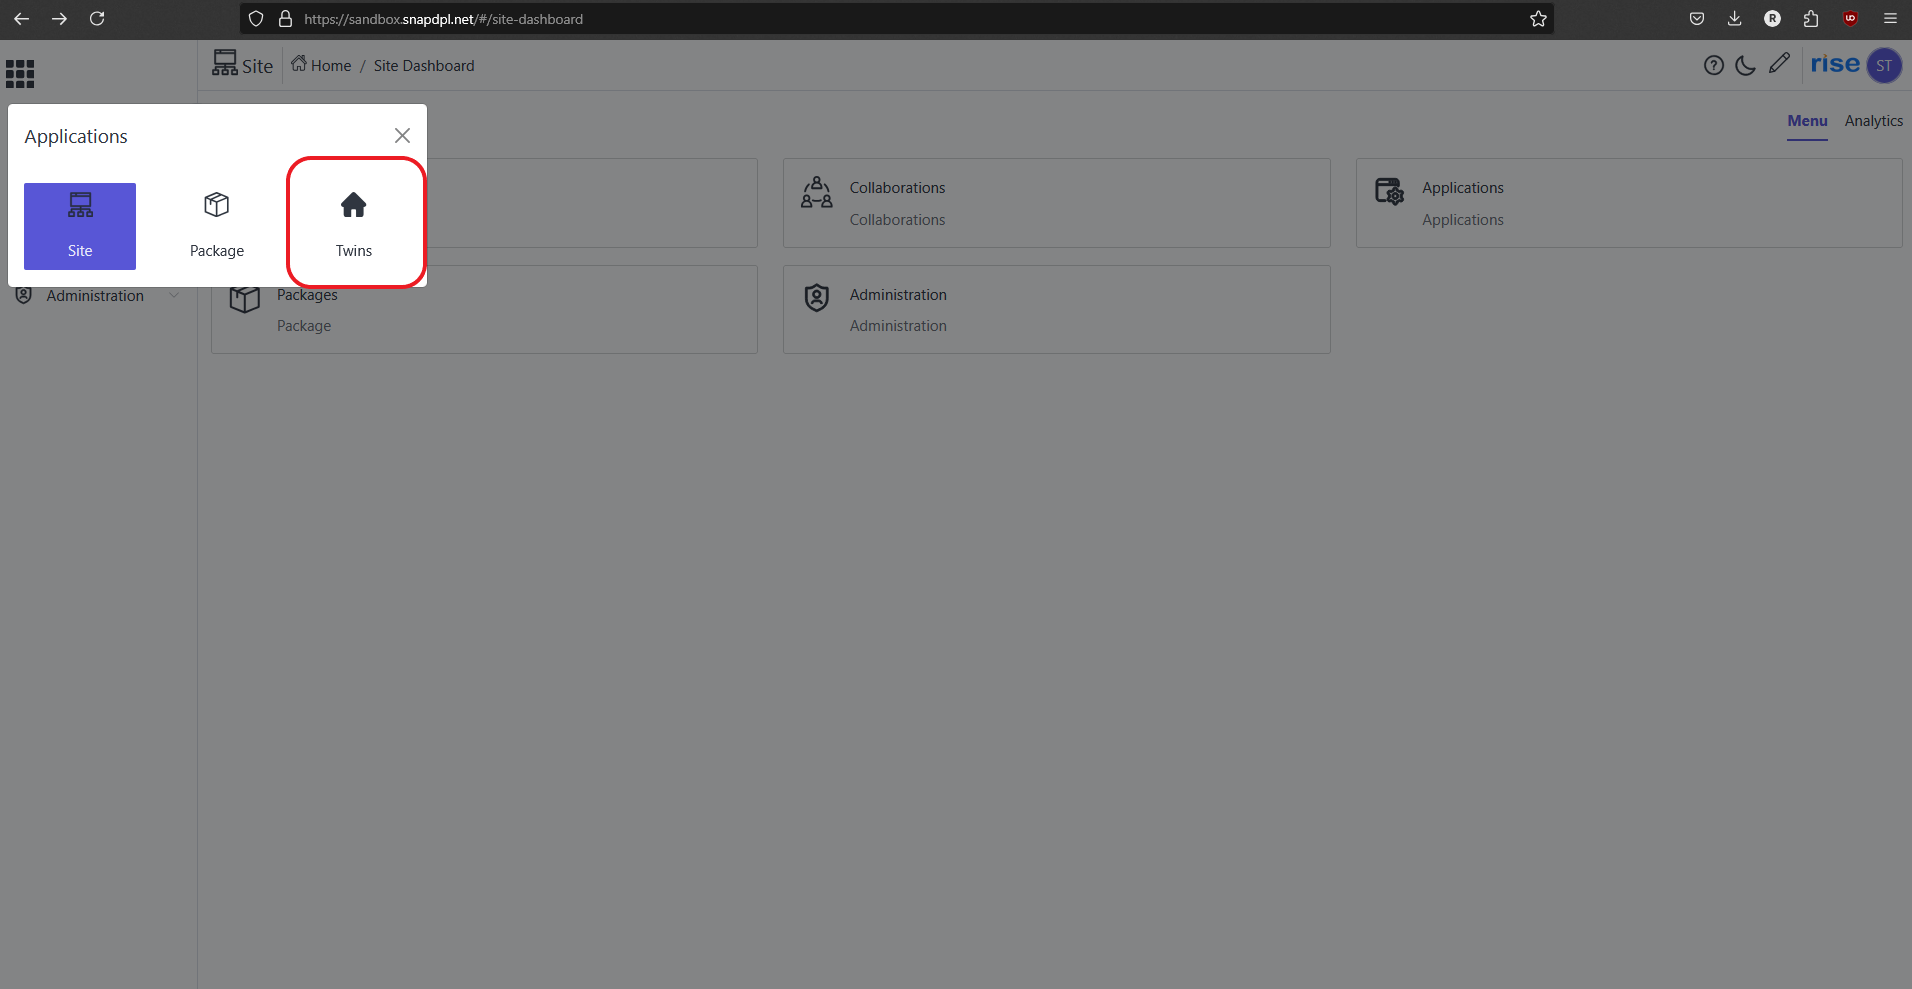
In home page click on application icon and select 'twins' option.
-
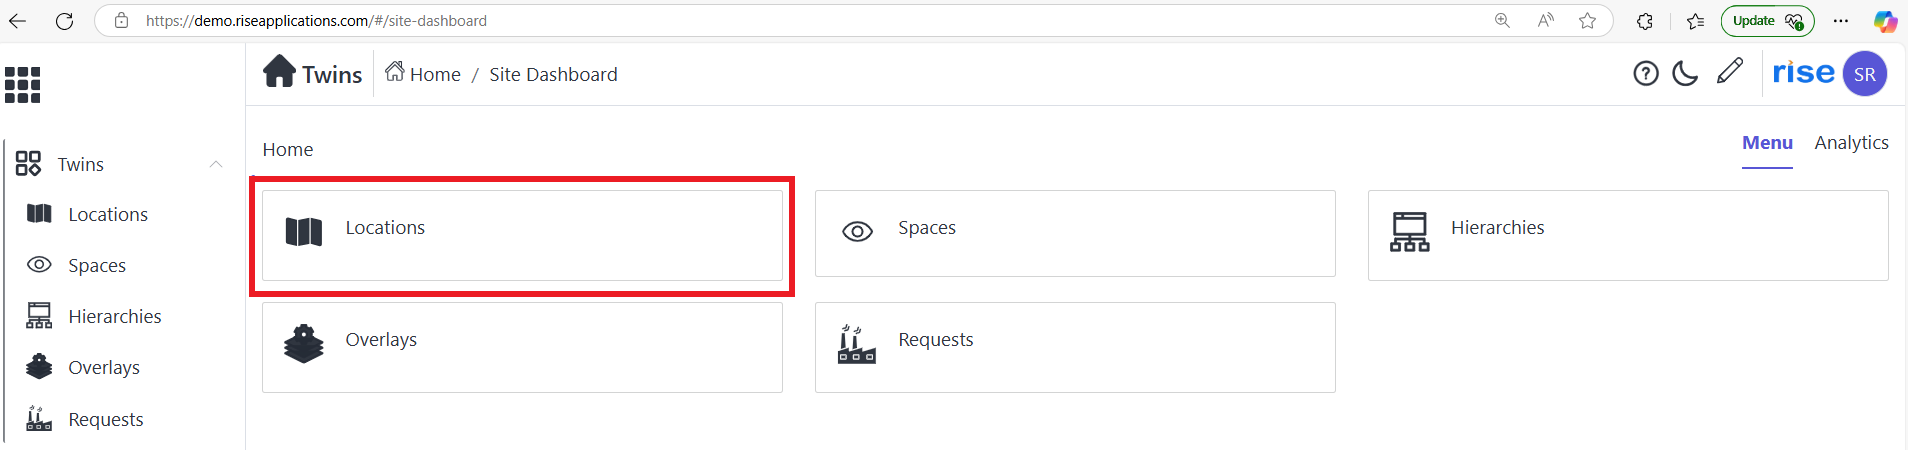
Click on 'location' option.
-
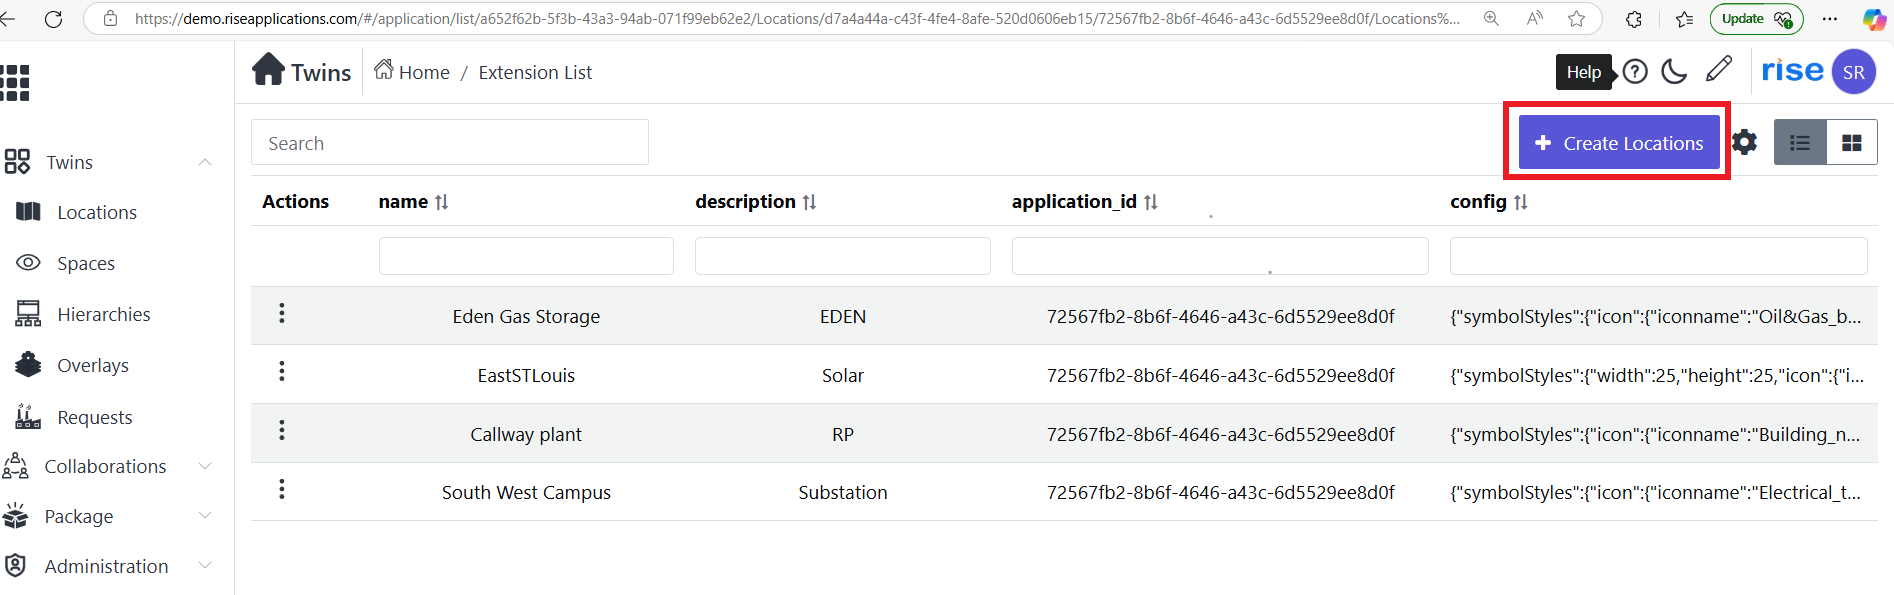
Click on 'create location' button.
-
Fill all requirements in 'create location page' .After that click on submit button.

-
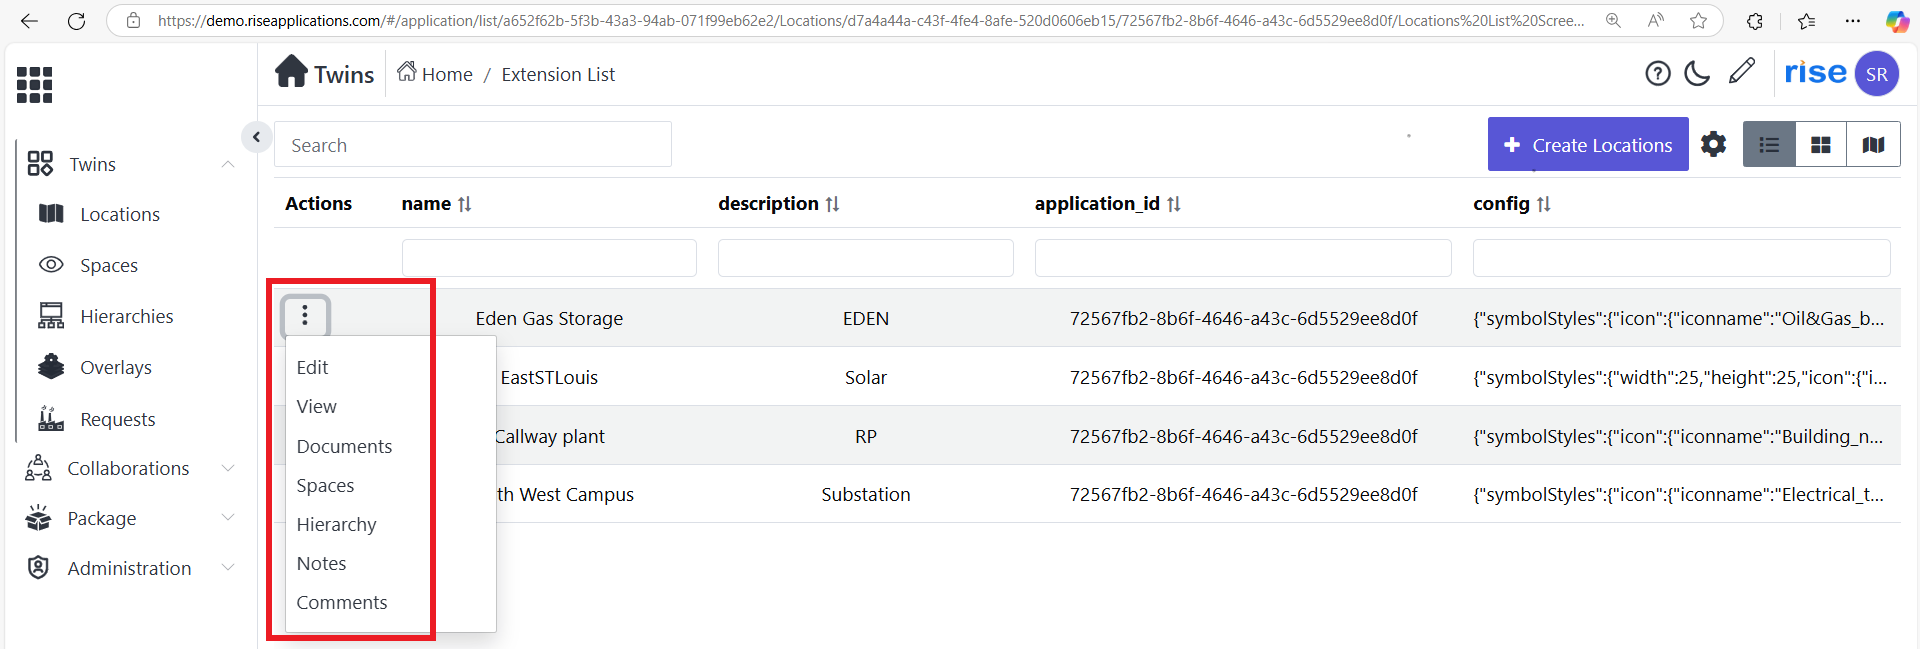
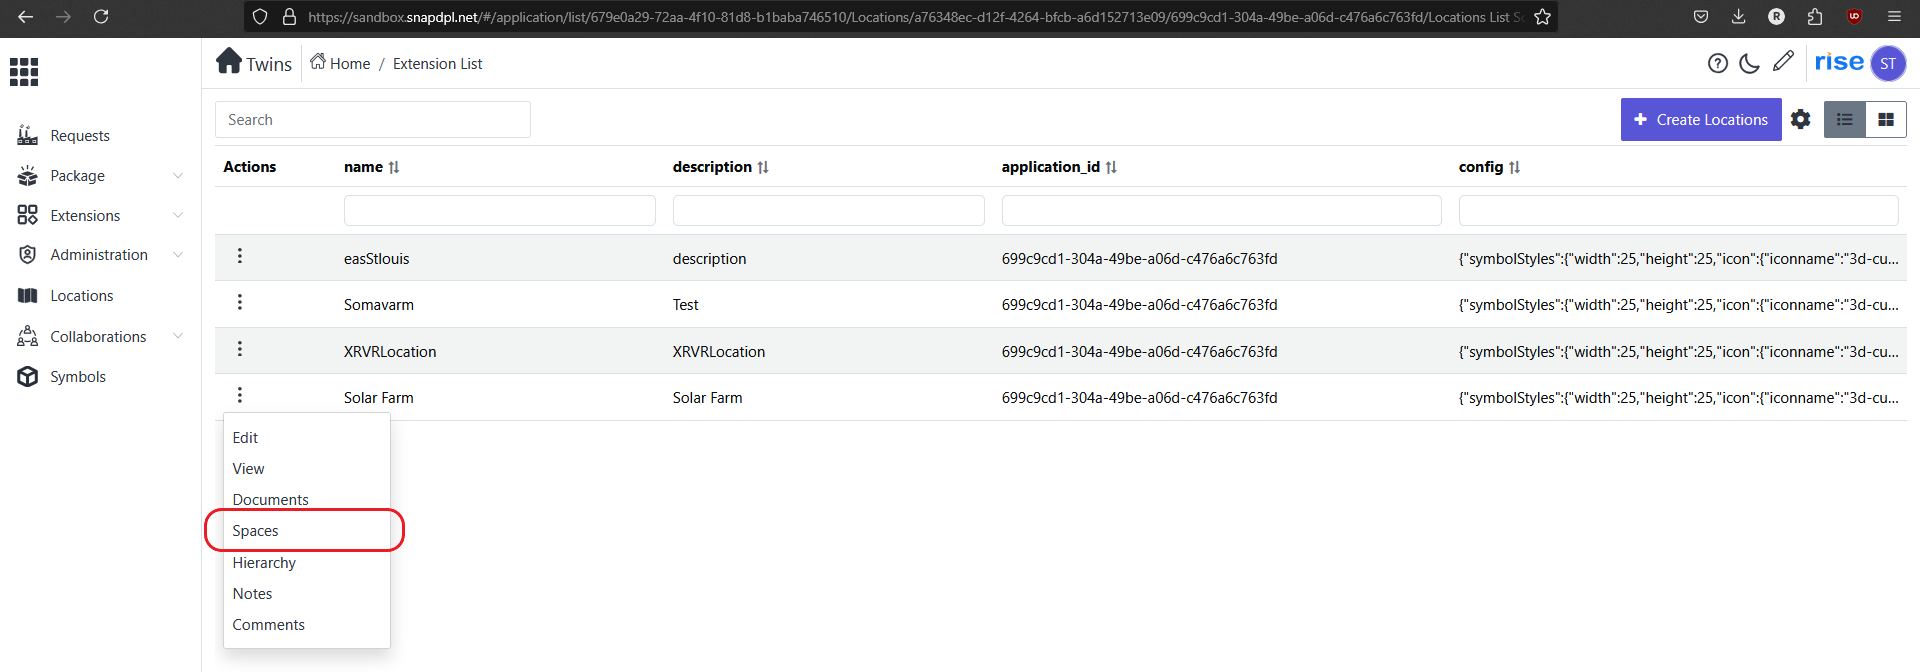
Click on 'action button' on created location option. And select 'spaces' options.
-
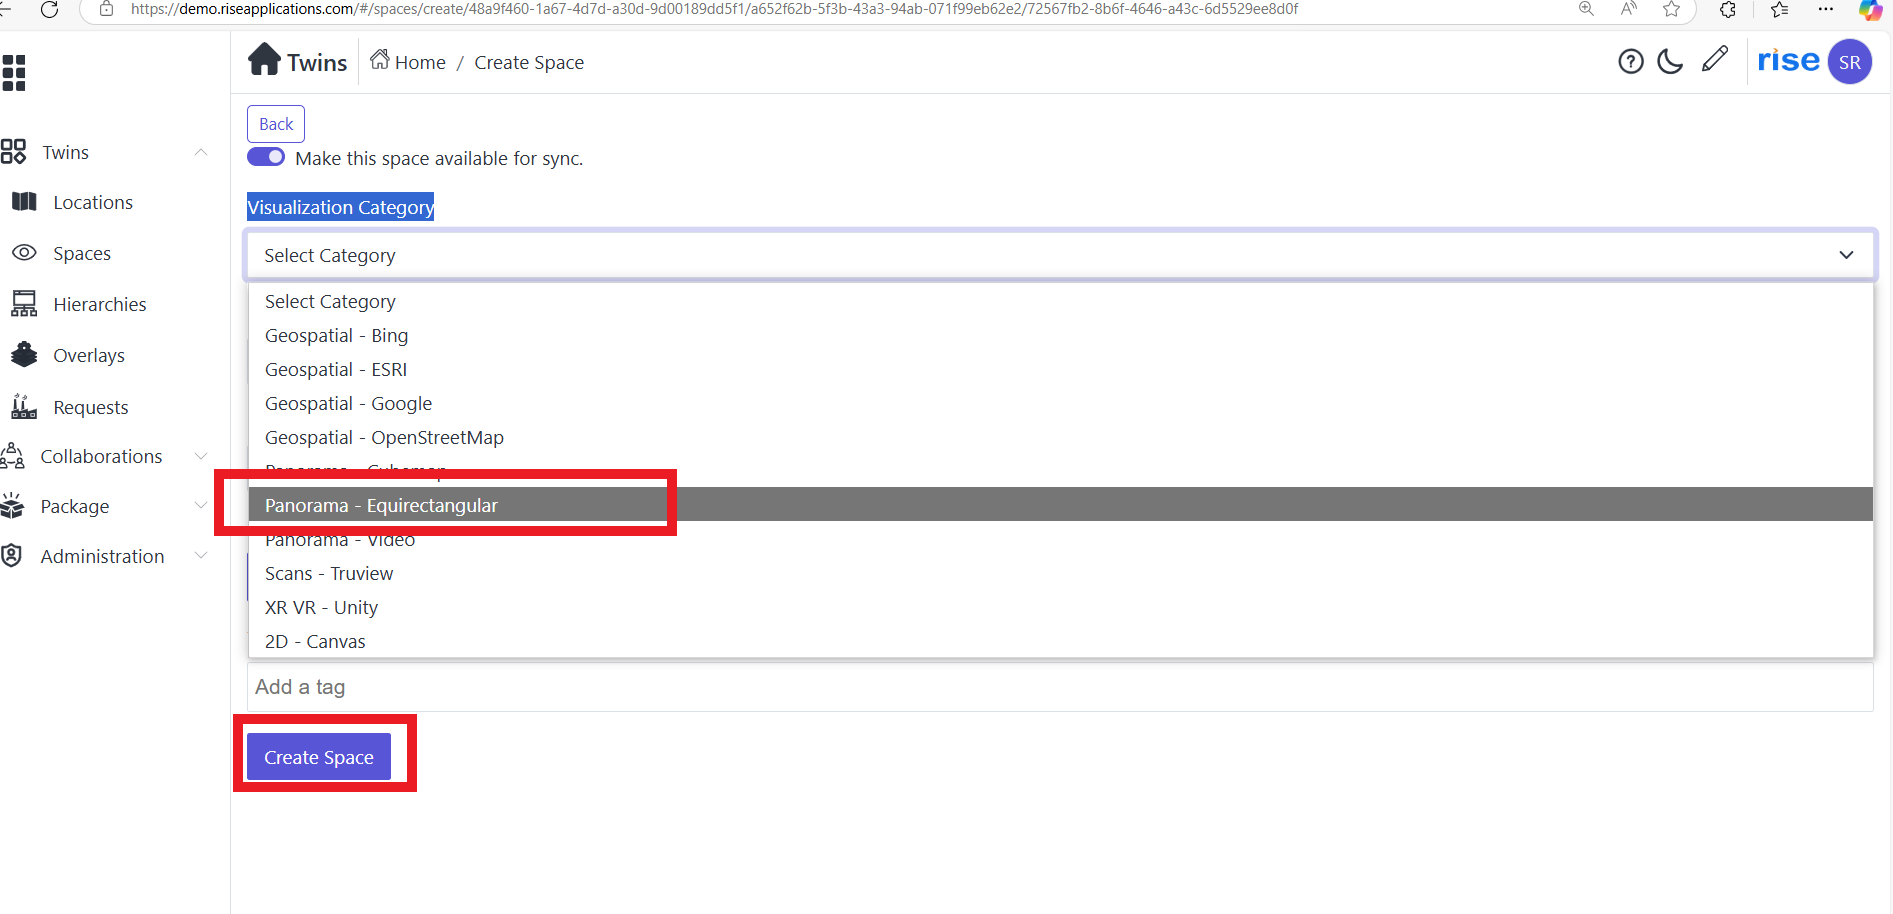
Click on 'create space' button.

-
Choose Visualization Category as 'panorama- cubmap or equirectangle' and fill the necessary data.click on create space.
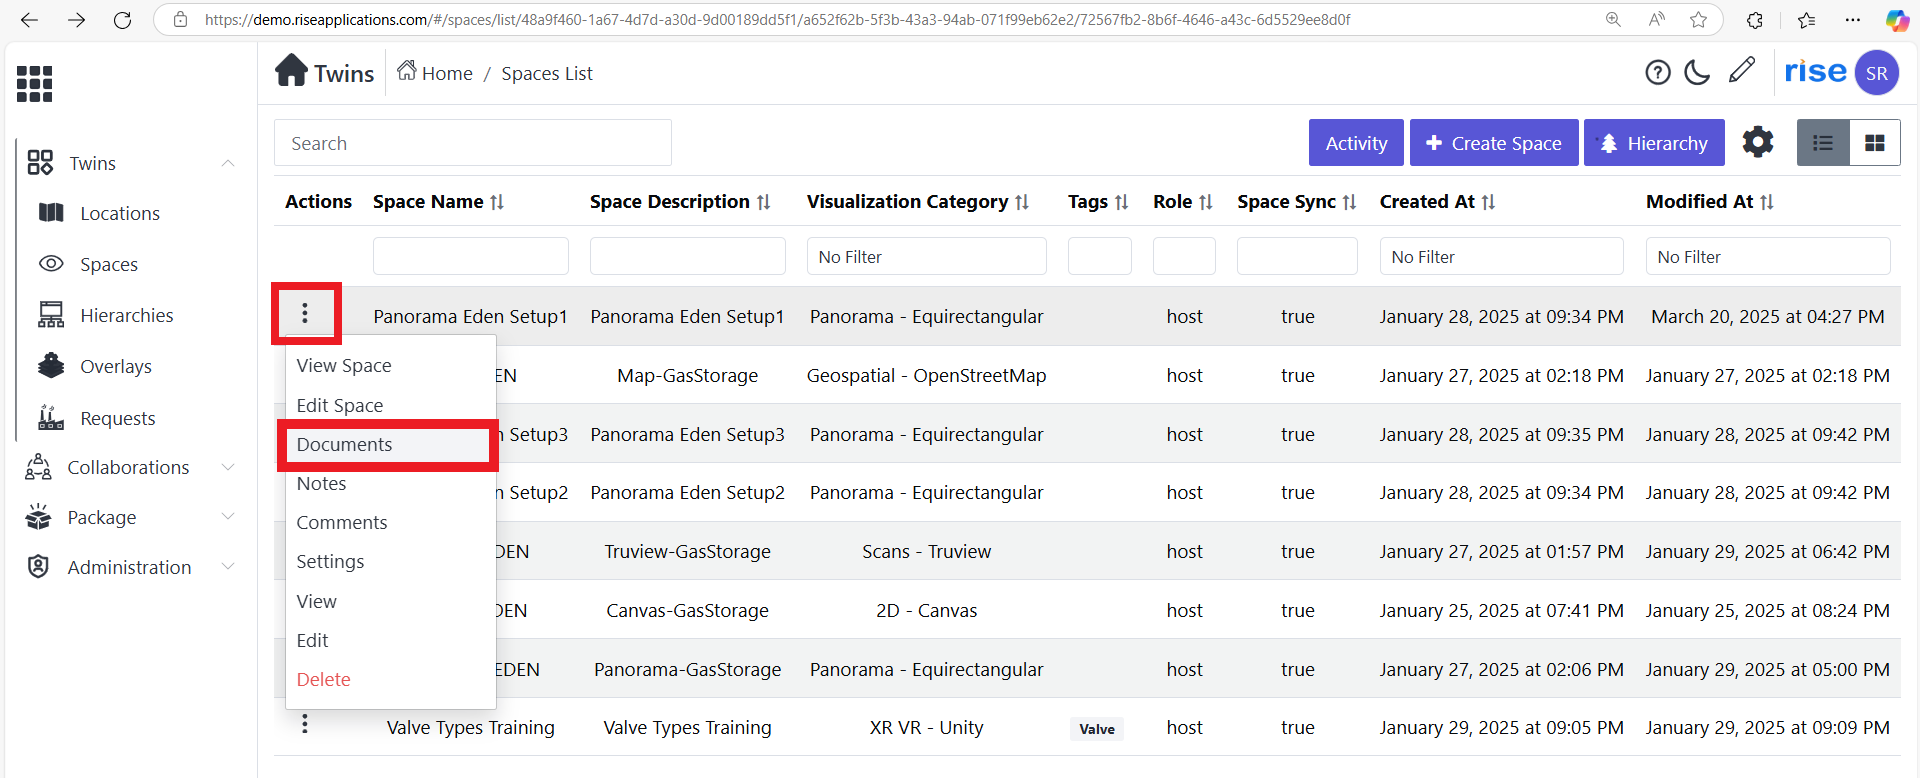
-
Click on action button created space and choose 'document' option.
-
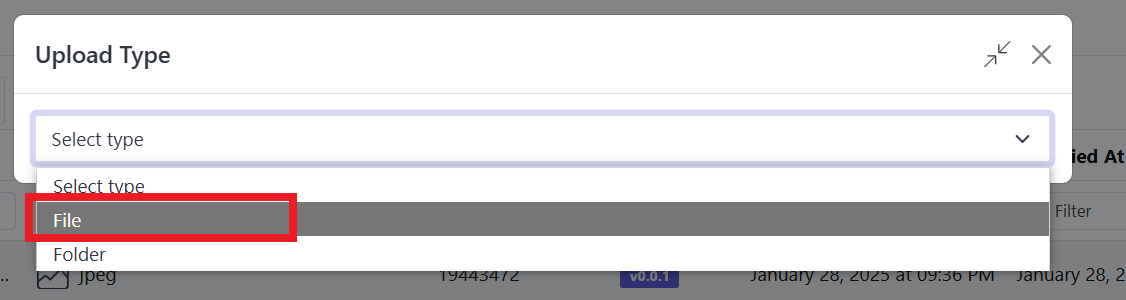
In documents page click on 'upload' option.

-
Choose upload type as 'file' .
-
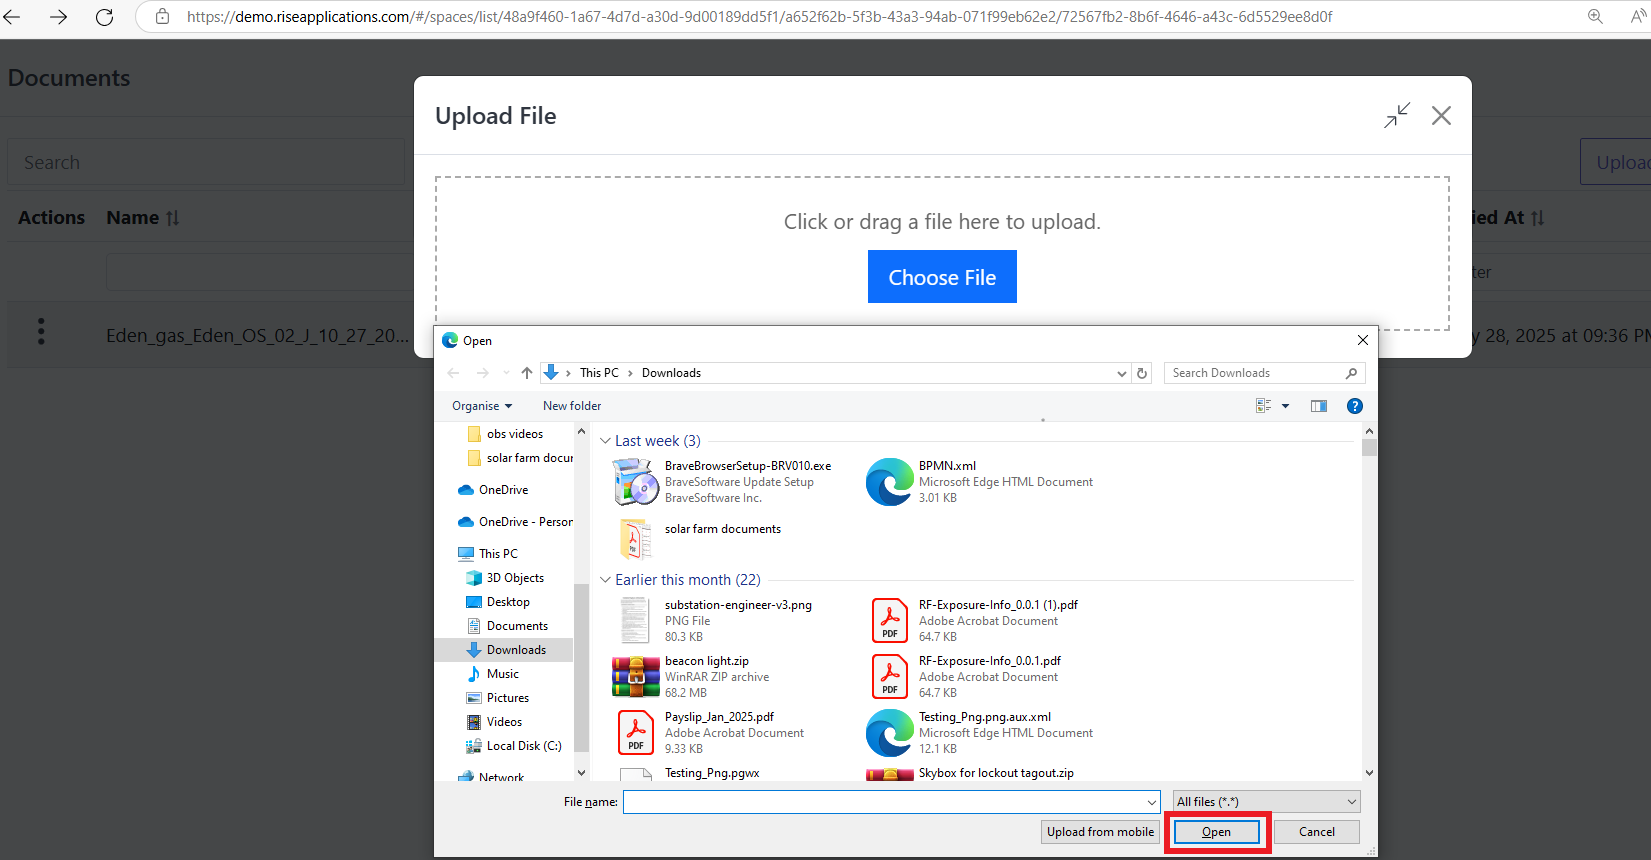
Click on 'choose file' or drag and drop the file in this below box.

-
Locate the file and click on 'open' to upload the file. Page will automatically close.
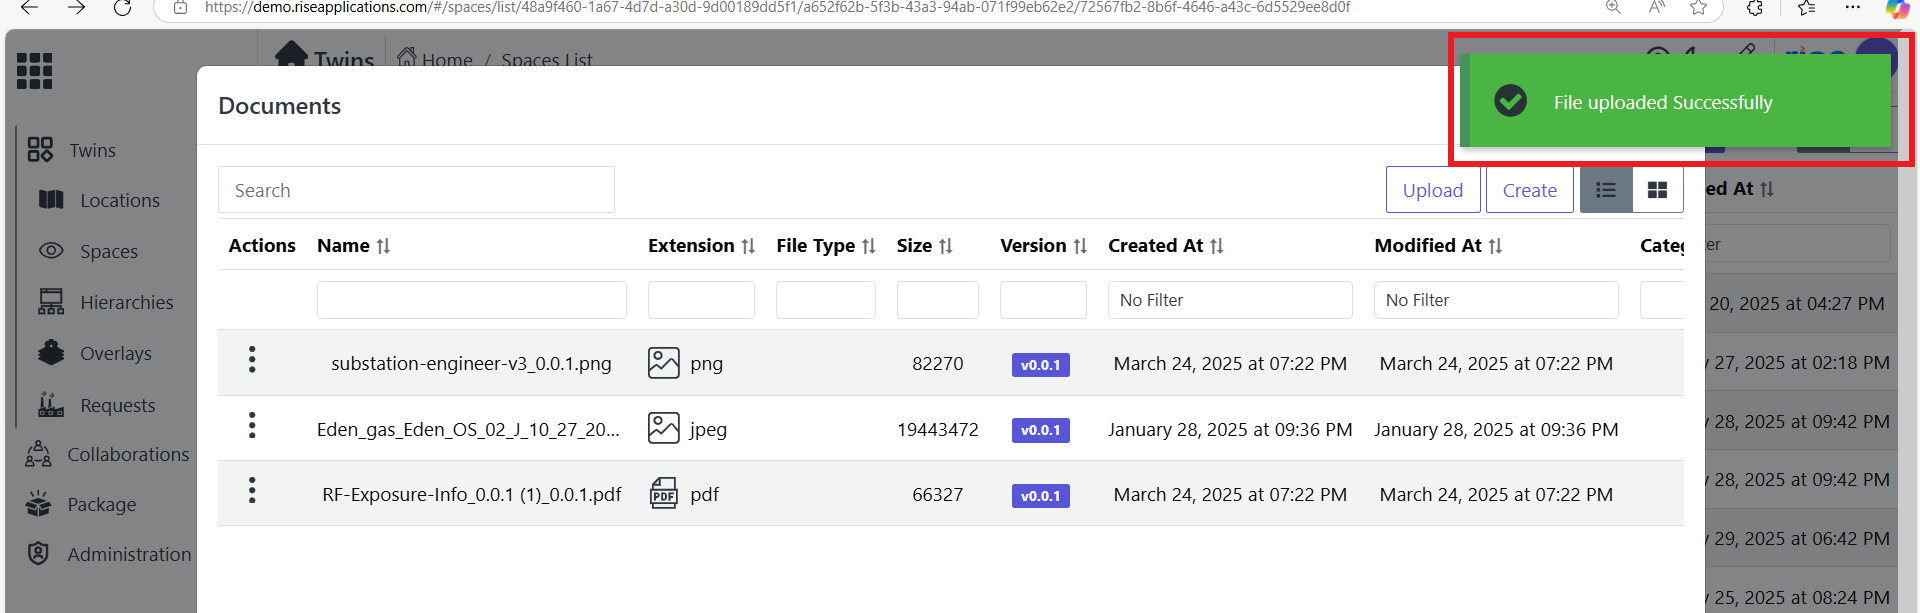
-
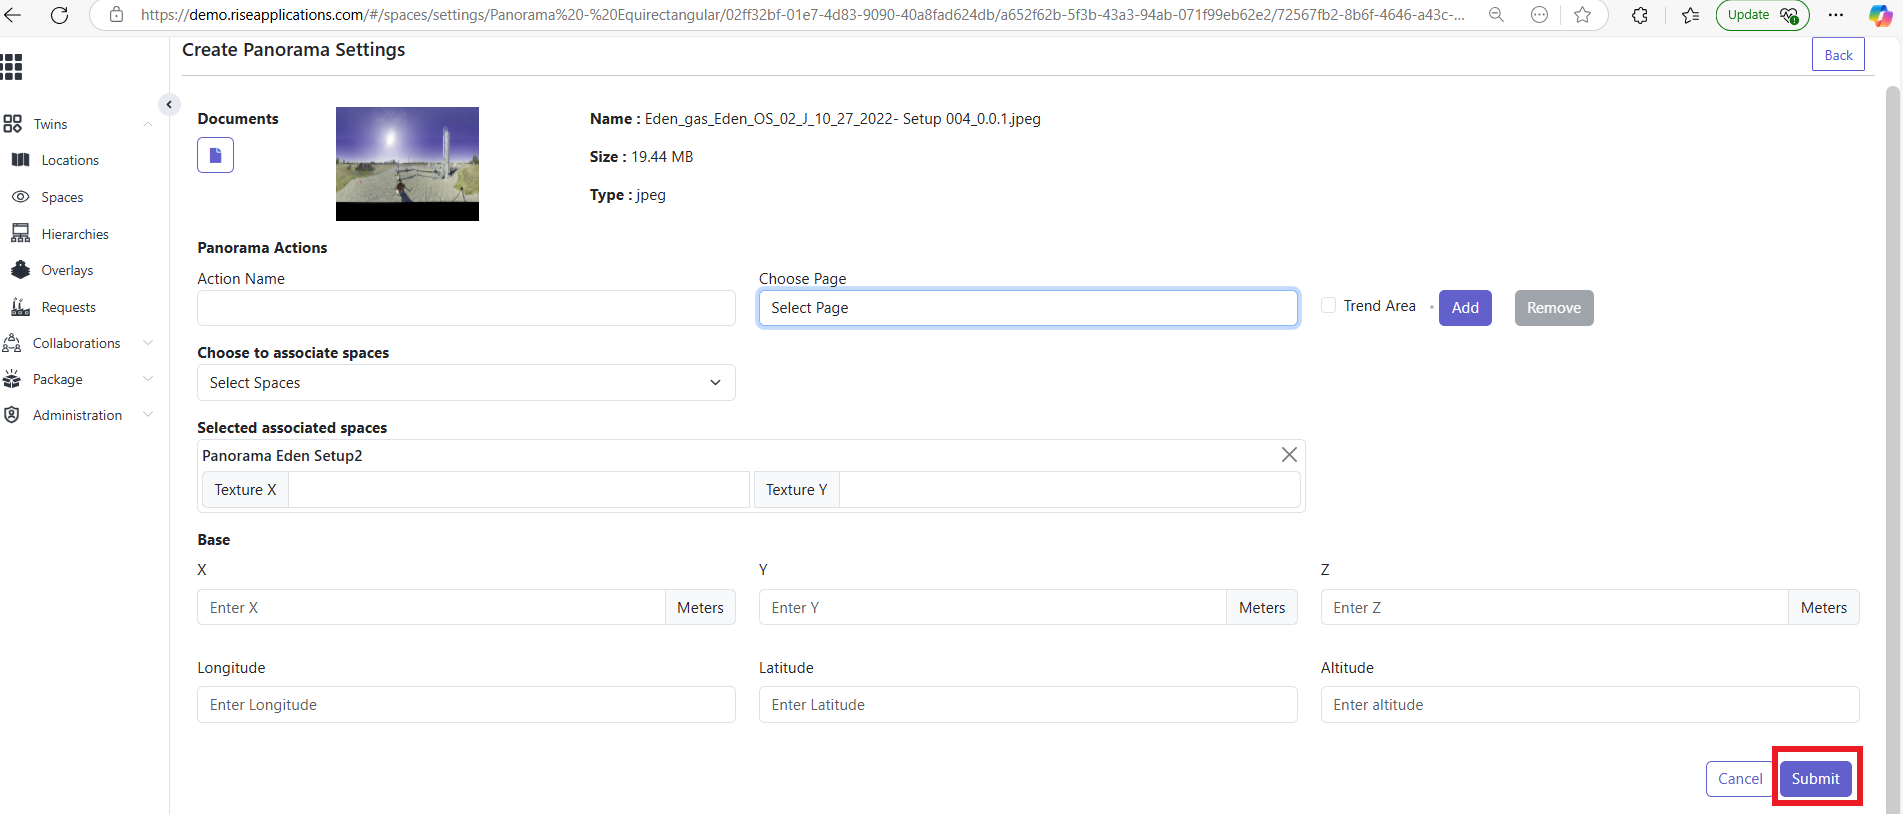
Click on action button and choose 'setting' option.
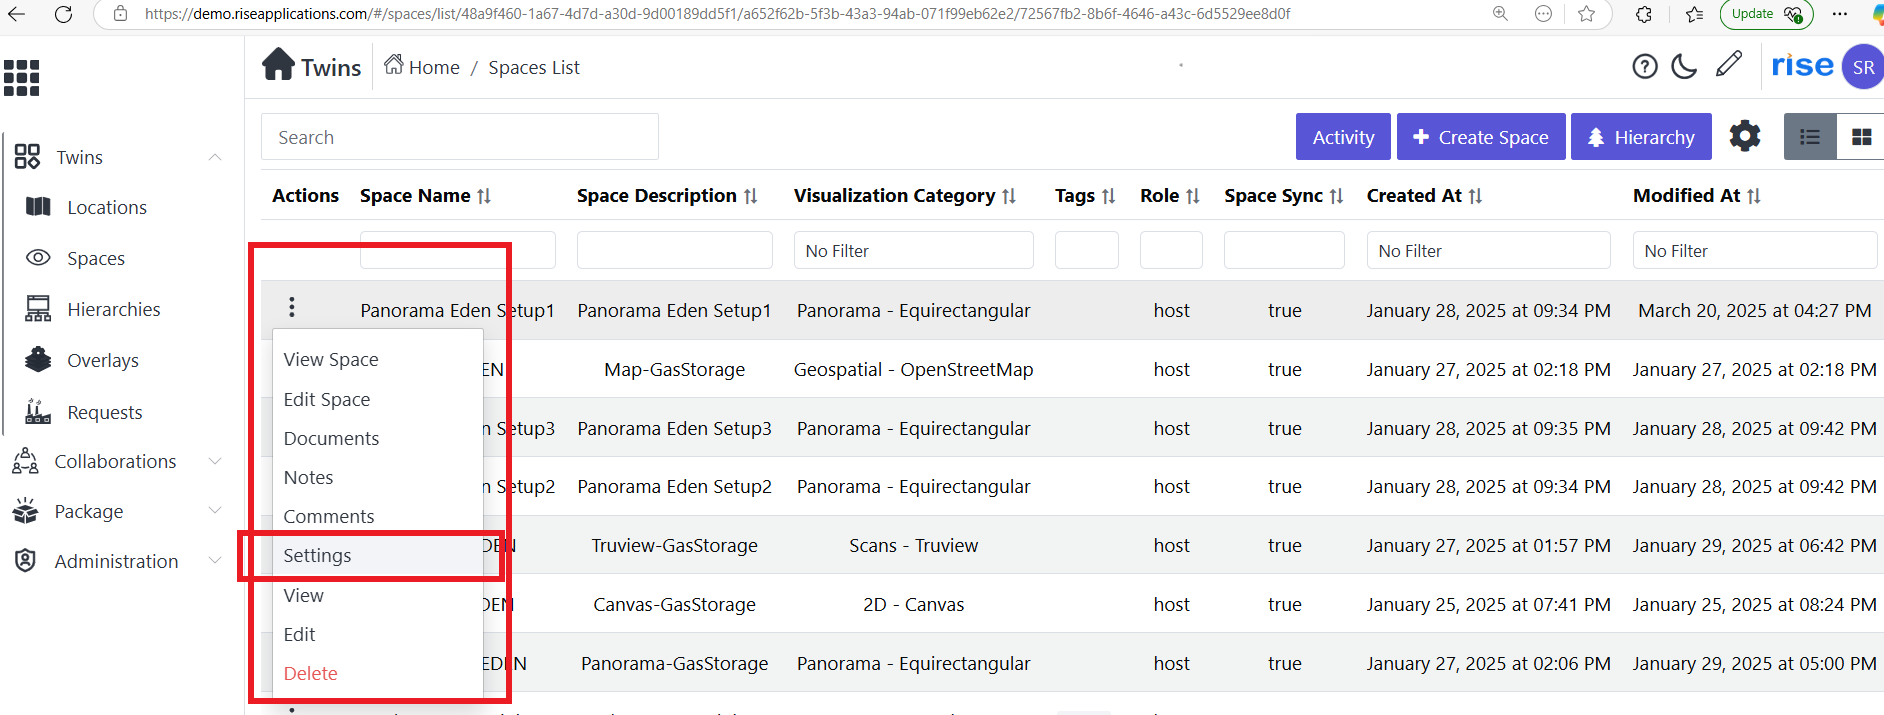
-
Setting page will open. Click on 'documents' icon.
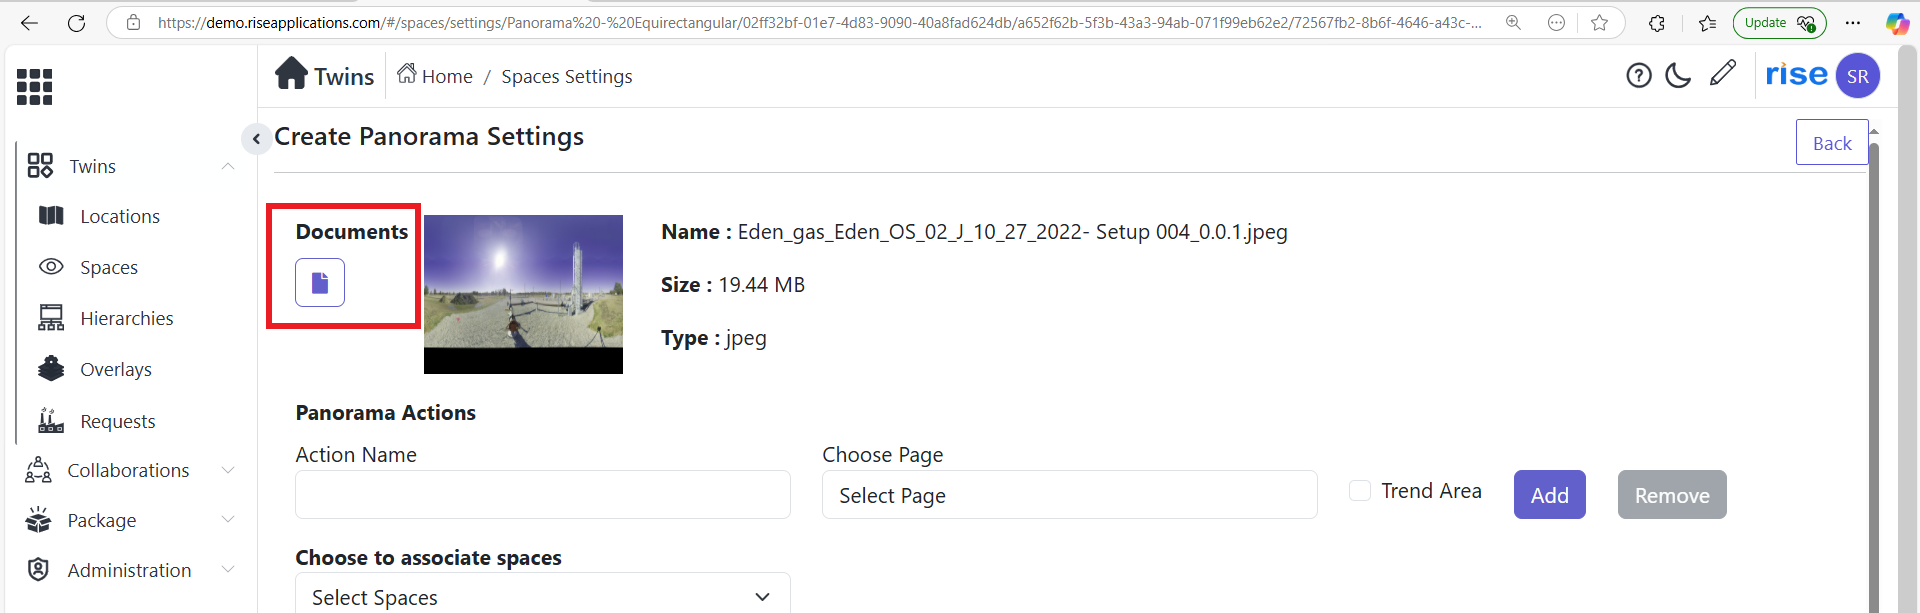
-
Choose the file and click on 'save' button.
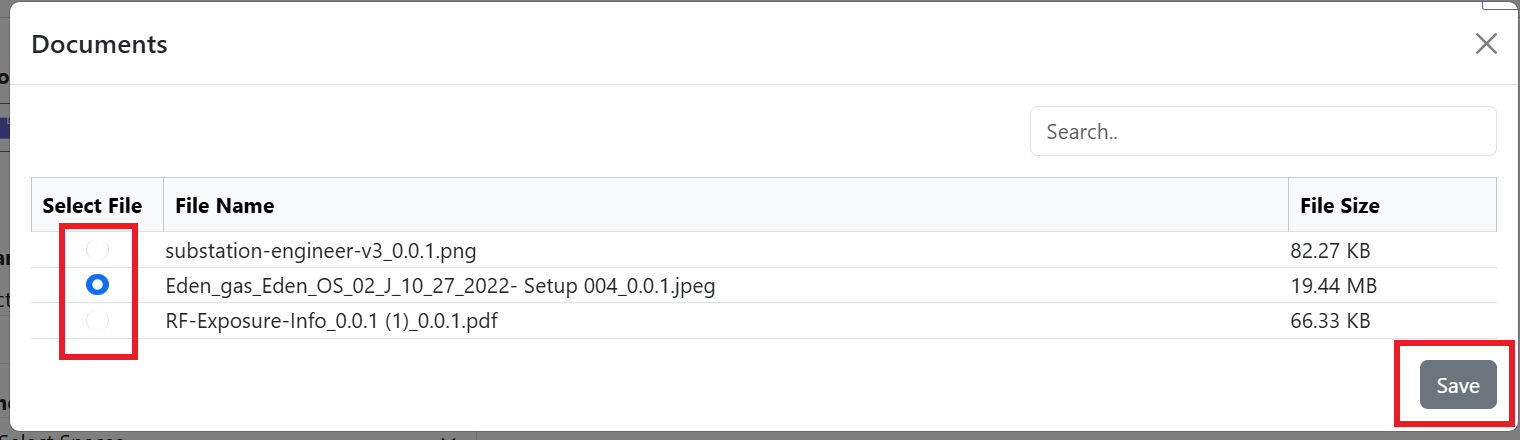
-
Thumbnail will show of overall image. Click on save button.
Hierarchy in Snapdpl Platform
Hierarchy are the features for different spaces .It act as digital twin.Features of hierarchy are
-
Chart Dashboard
-
Documents
-
Comments
Process to achieve hierarchy is
-
Click on home icon and select 'twins' application.
-
Click on location. And click on 'action button' on selected created location. Click on 'Hierarchy'.
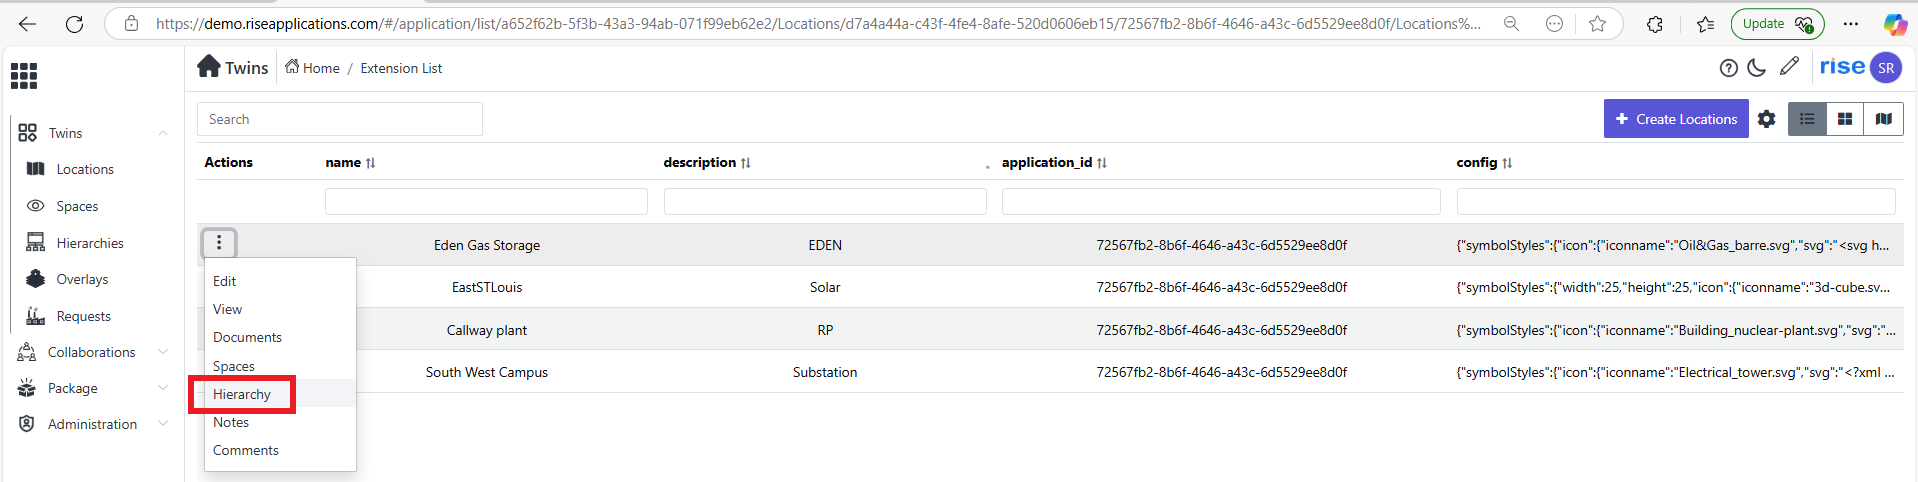
-
Default it creates hierarchy and hierarchy item. To create to new hierarchy click on 'create' and select 'hierarchy'.

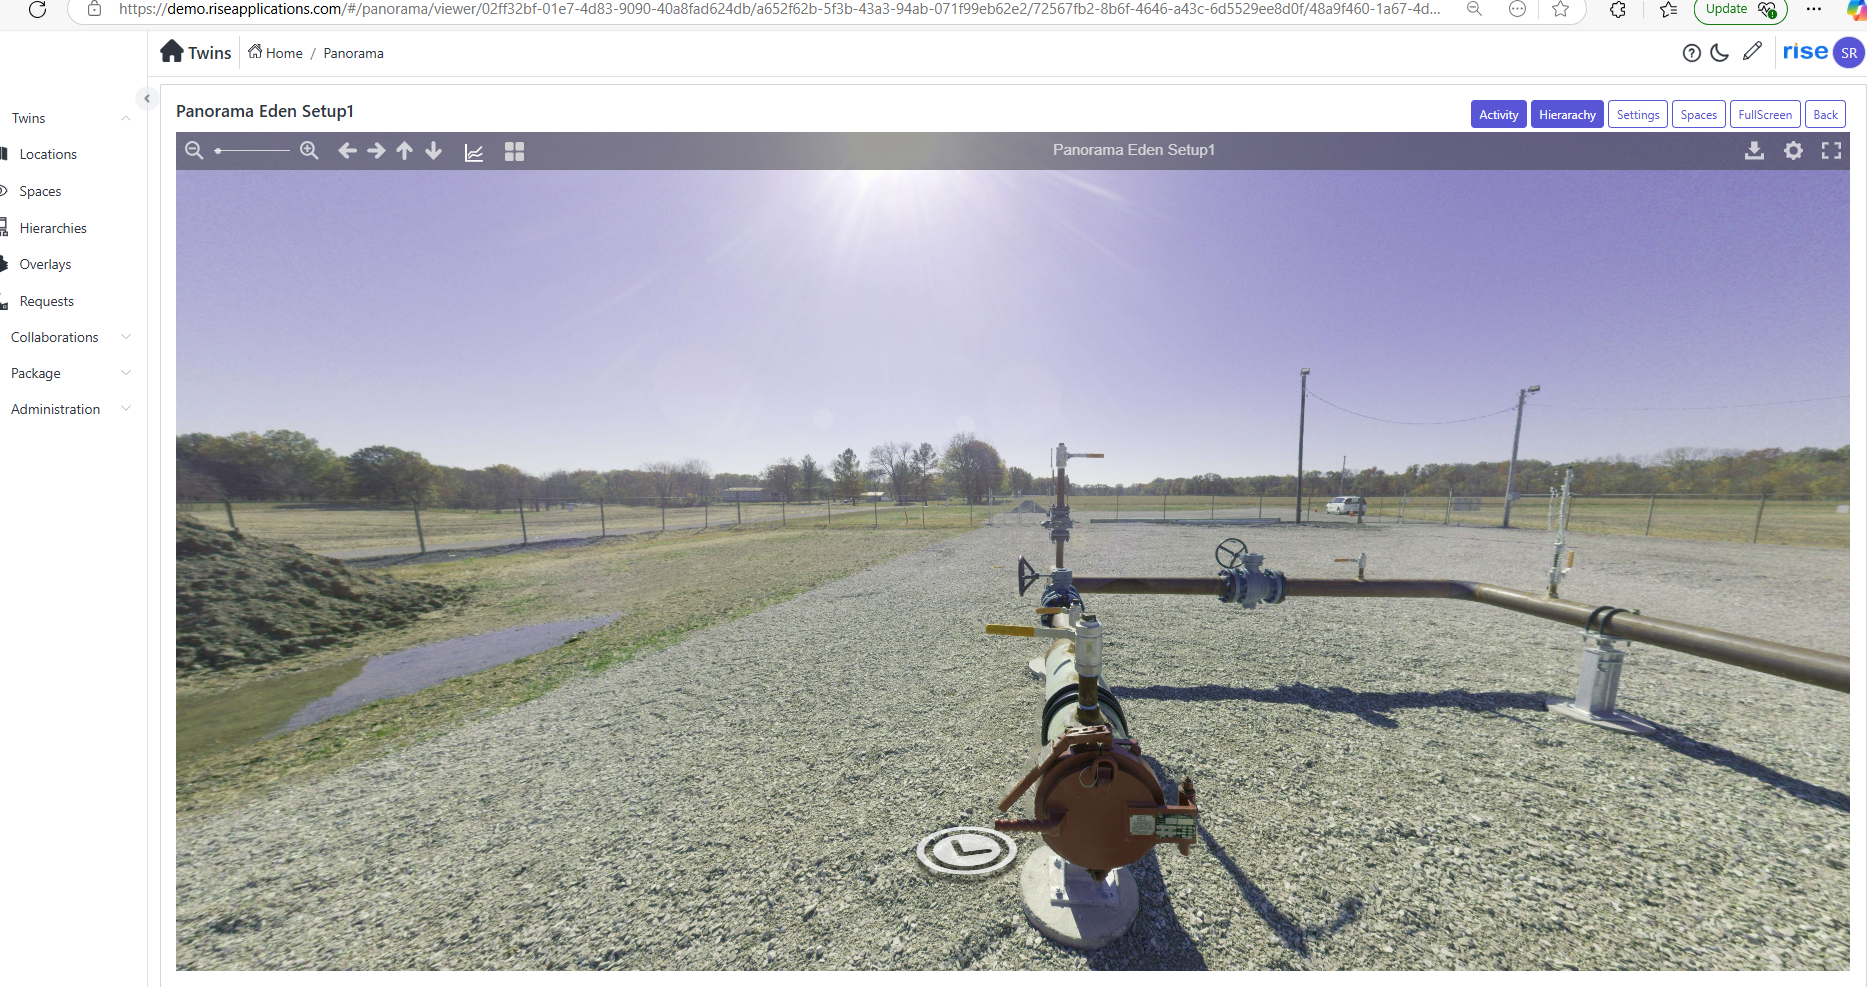
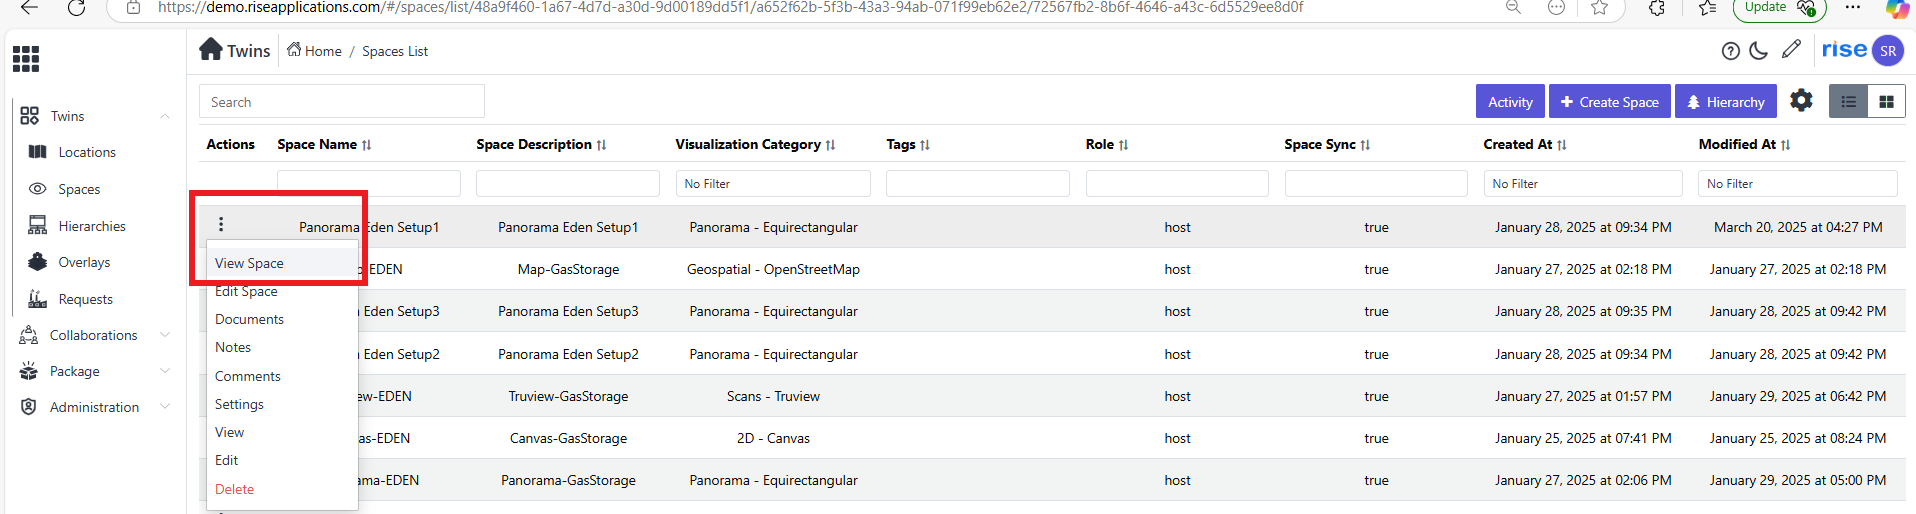
View Panorama space SNAPDPL Platform
-
Click on home icon and select 'twins' application.
-
Click on location. And click on 'action button' on selected created location. Select 'space'. Space page will open.
-
Click on 'action button' on selected space.
-
Click on 'view space' option to view the space.