Steps To Create Validation Rule
Validation Rules and Email Configuration
-
Create one or more queries for validation purposes, such as: :Standard Query, Advanced Query, Aggregate Query, Transform Query. These queries are executed in a specified order during validation.
-
Right-click on the Data Flow Screen and select Validation Rule. -OR- Add a Validation Rule from the Data Panel on the left side.
-
When the Validation Rule option is selected, the Validation Rule dialog box opens.

-
Configure the validation settings:
a. The dropdown list displays all available queries. b. Select the query designed for validation. c. Specify the Record Number, which defines the minimum number of returned records required to mark the validation as failed. By default, the value is 1.
d. Enter: Failure Message, Success Message
Each Validation Rule can contain multiple validation queries.
-
Click Run to execute the selected queries in the specified order.
a. If any validation query fails, the Validation Rule returns False. b. The bottom pane displays: Failure Messages, Failed Records, HTML Validation Output 6. Click Save to save the Validation Rule.
Applying Validation Rules During Export
-
In the left-side Data Panel, right-click Export Templates and select New Template.
-
In the Data Export Wizard, create a Destination Connection by selecting the required data connector type. Destination connections are configured in the same way as source data connections.
-
Continue through the wizard until you reach the Validate/Notify task.
-
In the Validation dropdown list: a. Select the required Validation Rule defined in the DPL Studio package. b. Validation selection is optional. c. By default, no validation rule is selected.
-
Optionally specify the Validation Output Filename. a. %FPDIR% represents the Digital Process Logic Pack directory. b. The generated HTML file contains: Validation Results, Failure Messages, Failed Records c. The HTML file can also be sent as an email attachment.
-
Optionally enter the email address to receive export notifications. a. Click Test Email to verify email delivery.
-
Click Next.
-
Click Run Export to start the export process. a. If a Validation Rule is selected, it executes before export. b. If the Validation Rule returns False, the export fails. c. Success or failure email notifications are sent if notification settings are configured.
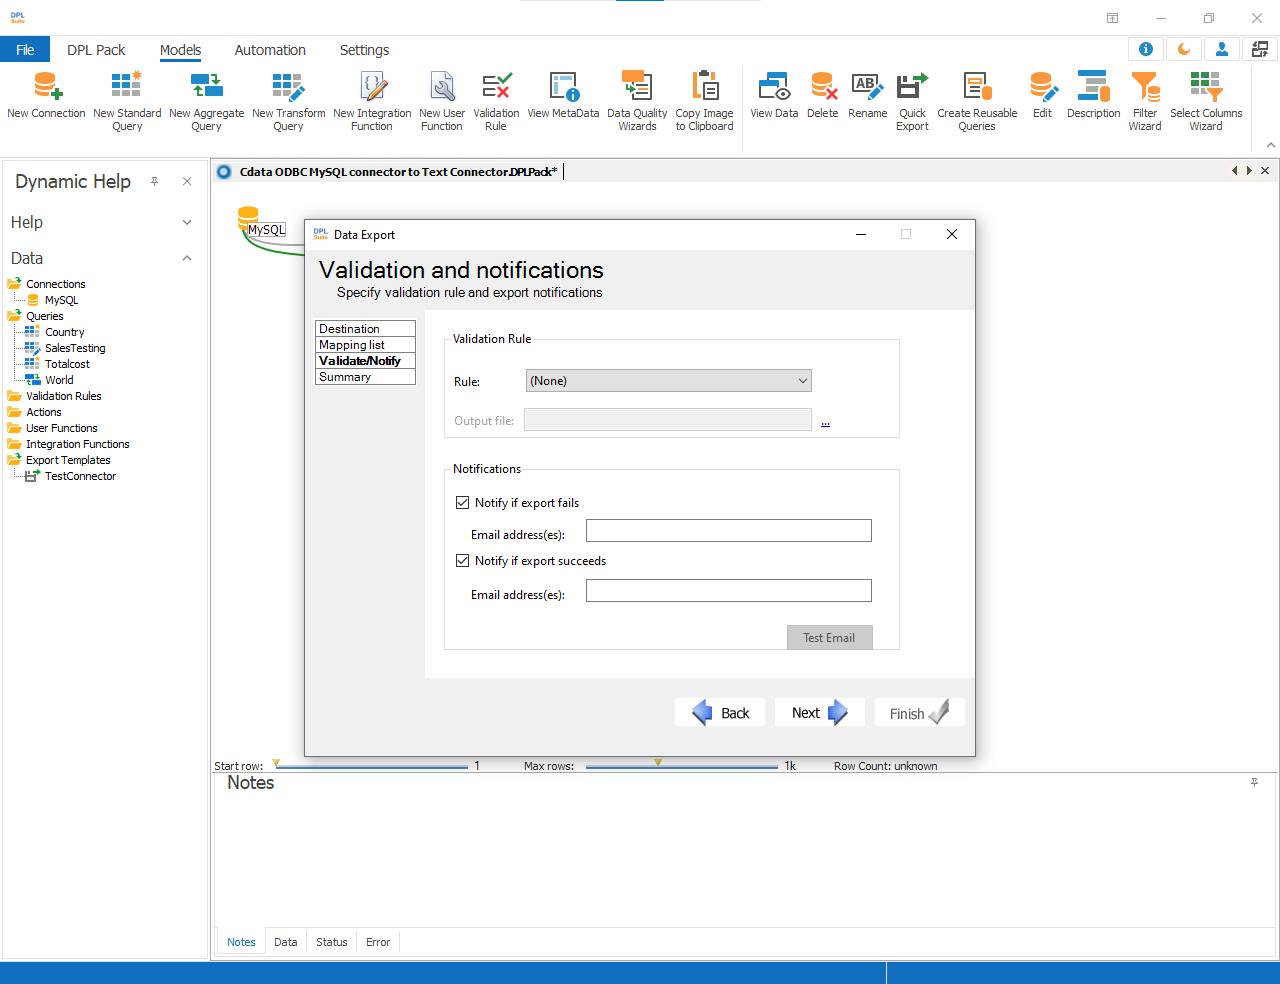
All validation and notification configurations can be managed within DPL Studio.