DPL Studio>> Data Export >>
Export Templates in DPL Studio define the source and destination for data export, along with the mappings between them. Export Templates are created using the Data Export Wizard.
Steps to Create an Export Template
-
Open an existing DPL package or create a new one.
-
In the Data pane, right-click Export Templates and select New Template from the shortcut menu.
-
In the Data Export Wizard, create a Destination Connection for the exported data. From the list of Available Connectors, select the required data connector type. Destination connections are configured similarly to source data connections.
Supported connectors include
1. Microsoft® Access Data Connector
2. Microsoft® Excel Data Connector
10. SAP Business One – Business Objects Connector
15. Sap Business one - Sap Service Layer
-
In the Define Table Mappings dialog, click Add New Mapping to display the list of existing queries in the package.
-
Select the query containing the required data.
-
If the export destination contains identifiable tables, DPL displays them along with the option to Specify a new or existing table for the exported data.
a. Select an existing table from the list, -OR- b. Choose Specify to manually enter a table name.
If the specified table does not exist, DPL attempts to create the table in the destination file.
-
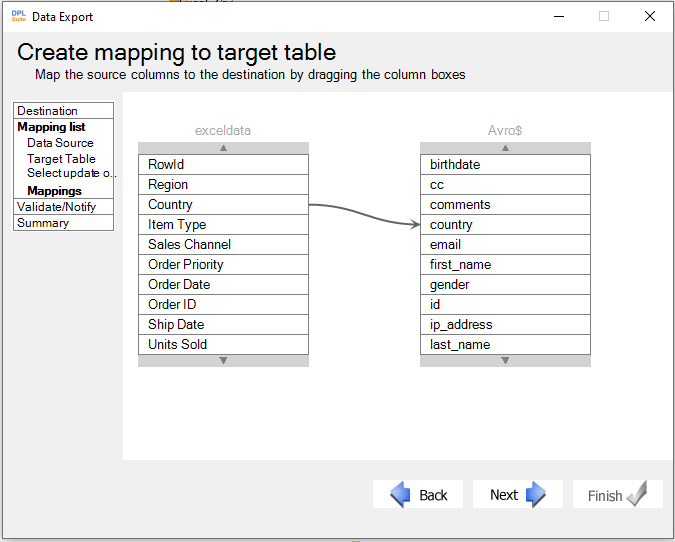
If an existing table is selected, DPL displays the source and destination fields with automatically detected mappings.
a. Drag fields from the source query (left side) to the destination table (right side) to create additional mappings. b. Click Next after completing the mappings.
-
If you specified a new table, or after mapping an existing table, DPL displays export handling options.
a. Select the required options. b. Click Next.
-
When returned to the Define Table Mappings dialog, additional mappings can be created if required.
a. After completing all mappings, click Next.
-
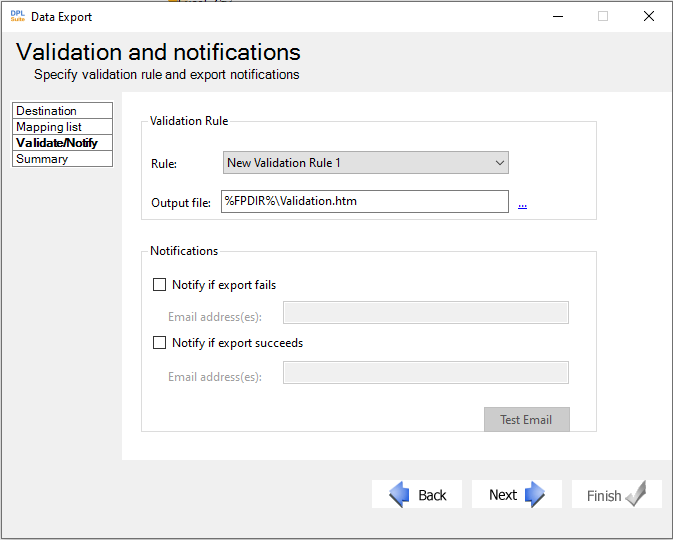
In the Validation and Notification dialog:
a. Select validation rules from the dropdown list if required (optional). b. Optionally specify a validation output filename. c. %FPDIR% represents the Fusion Pack directory. d. The validation result is generated as an HTML file and can be sent as an email attachment. e. Optionally enter an email address to receive export results. f. Click Test Email to verify the email configuration.
-
In the Summary dialog:
a. Review the export template settings. b. Click Back to make changes if needed. c. Click Run Export to export the data. d. After the export completes, click Finish.
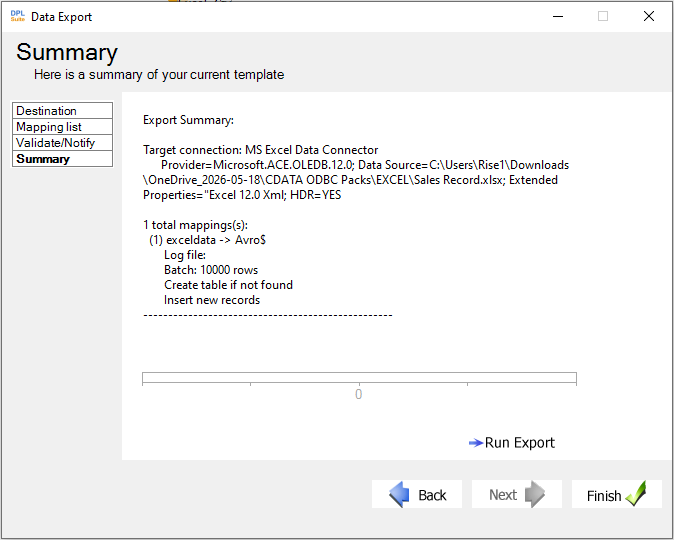
If you do not want to export the data immediately, simply click Finish.