Microsoft Excel Data Connector
Setting Up Microsoft® Excel Export Connectors
Setting up a Microsoft® Excel export connector in DPL Studio requires identifying the required .xls file.
Steps to Set Up an Microsoft® Excel Export Connector
-
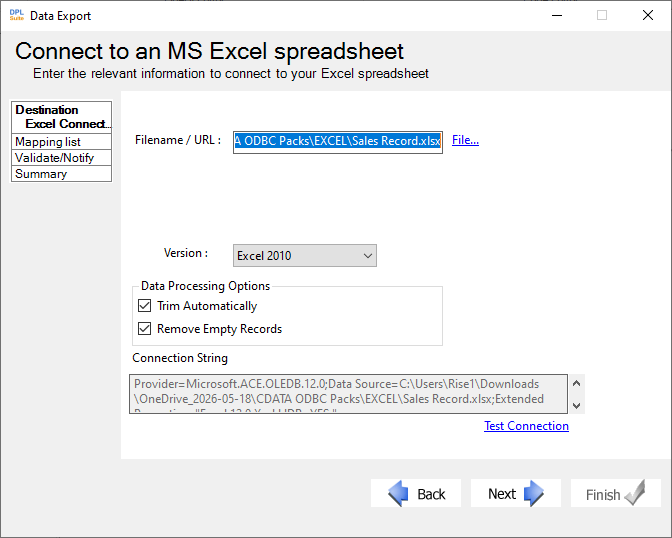
In the Set Destination Connection dialog of the Data Export Wizard, select MS Excel Connector.
-
In the Filename field:
a. Enter the full file path of the Excel file containing the required data, -OR-
b. Click File... to browse and select the required file.
-
If the file does not exist, DPL Studiio will create a new file automatically -OR-
a. Select the checkbox labeled Edit Connection String to manually enter a connection string.
-
Click Test Connection to allow DPL Studio to verify the connection and display the connection status.
-
Click Next to proceed to the next step in the wizard and configure the table mappings between the source and destination files.