Oracle Data Connector
Setting Up Oracle Export Connectors
Setting up an Oracle® export connector in DPL Studio requires identifying the database and providing the necessary connection and security information.
Steps to Set Up an Oracle Export Connector
-
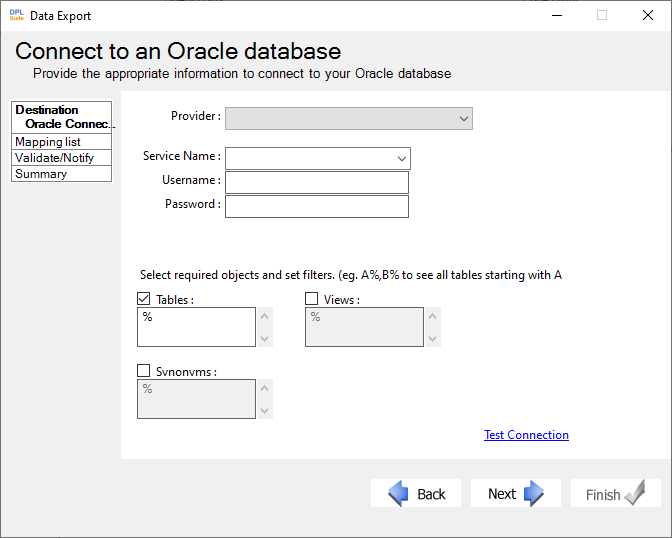
In the Set Destination Connection dialog of the Data Export Wizard, select Oracle Data Connector.
-
Select the appropriate Provider from the dropdown list.
-
Select the required Server and enter the necessary authentication details.
-
Enable Transactional if you want to use transactional export operations. (Note: Bulk Insert functionality is available only through the Oracle ODP.NET Provider.)
-
Select the required filter option for: a. Tables
- Views
- Synonyms
-
Click Test Connection to verify the connection to the selected Oracle database. (If the connection fails, verify that all connection details are correct. Incorrect credentials, spelling errors, or case sensitivity may cause connection failures.)
-
Click Next to proceed to the next step in the wizard and configure the table mappings between the source and destination files.