Setting Up OLE DB Connectors
Selecting the OLE DB export connector in DPL Studio allows users to configure connections using the Microsoft® Data Link Properties dialog. The available OLE DB providers may vary depending on the configuration of your system.
Steps to Set Up an OLE DB Export Connector
-
In the Set Destination Connection dialog of the Data Export Wizard, select OLE DB Data Connector.
-
The Data Link Properties dialog opens to the Provider tab.
a. A list of all available OLE DB providers installed on your system is displayed.
b. Select the required provider type.
c. Click Next.
-
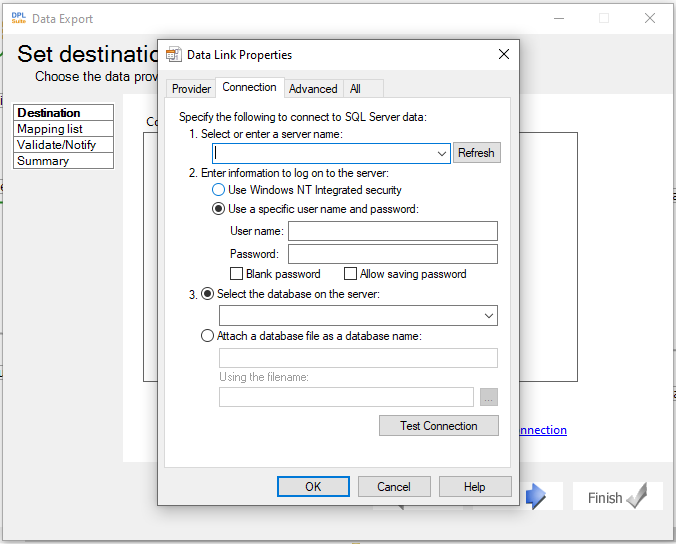
The dialog moves to the Connection tab.
a. If the data source is already configured as a DSN connection in the ODBC Data Source Administrator (Windows Control Panel), select it from the Use Data Source Name dropdown list. -OR-
b. Select Use Connection String and click Build to create a new DSN connection.
c. Enter the required security details.
d. Select the appropriate database or file.
-
Click Test Connection to verify that DPL Studio can successfully communicate with the data source.
-
If required, click the Advanced tab to configure additional security settings such as:
a. Network impersonation level
b. Connection timeout
c. Database access permissions
-
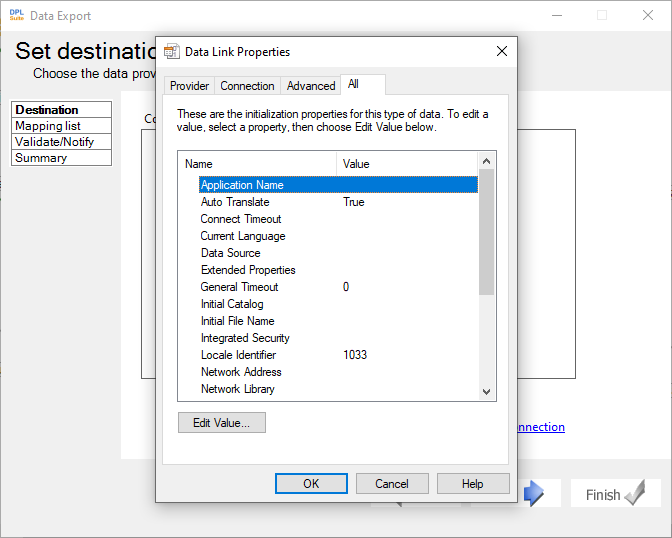
The All tab allows direct editing of connection settings.
a. Select the required property.
b. Click Edit Value.
c. Enter the required value.
-
Click OK to close the dialog and return to the DPL Studio Data Export Wizard.
-
Click Next to proceed to the next step and configure the table mappings between the source and destination files.
Copyright © 2002-2026 by Rise Inc., All Rights Reserved.